
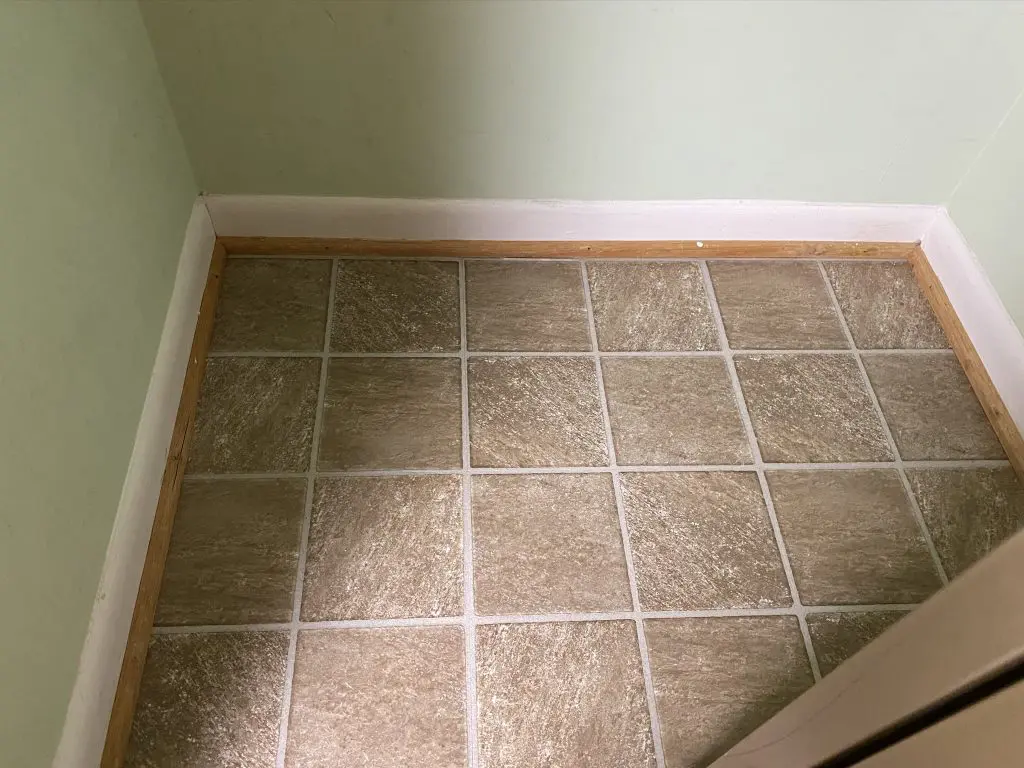
Peel and stick floor tiles are a very affordable, easy way to update your floors on your own.
Laying peel and stick floor tiles, or self-adhesive vinyl floor tiles, is a DIY that anyone can do. It only requires a bit of measuring and a bit of cutting (with scissors!) and you have a whole new floor.
This post may contain affiliate links. If you have any questions, please see my disclaimer page.
How To Prepare the Floor for Peel and Stick Tiles
One of my favorite parts of this DIY job is that it requires minimal prep work.
Just vacuum or sweep the area, wash it down with a non-sudsing cleaner, and you’re done!
Even though this step is minimal work, be sure to clean the floor well. This will help to ensure good adhesion between the new tiles and the existing floor.
This is my favorite non-sudsing cleaner because it smells so good!
As an optional step, remove the quarter round from the floor.
This will give the floor a more finished look, and will help to keep the edges of your peel and stick tiles down.
To remove the quarter round, place on edge of a mini crowbar between the edge of the quarter round and the floor or the trim behind the quarter round. Give the mini crow bar a little tap with the hammer until it begins to separate the quarter round from the other surface. Move the mini crow bar back and forth to created a wider separation.
As the quarter round separates, move it down the quarter round to where the nails are still holding it firm to the other surface, and again begin to move the mini crow bar back and forth to separate the two surfaces.
Complete these steps down the whole strip of quarter round until it can be easily separated from the floor and trim. Leave the nails in, as you can use those to reattach the quarter round when you are finished with the peel and stick floor.
How to Lay Peel and Stick Tiles
Once your existing floor is clean, measure that width of the floor. Then divide the number in two to determine the midline of the floor. Next, take your tile and determine where the midline of the tile is by measuring the width and dividing by two again. Peel off the backing and place the midline of the tile on the midline of the floor.
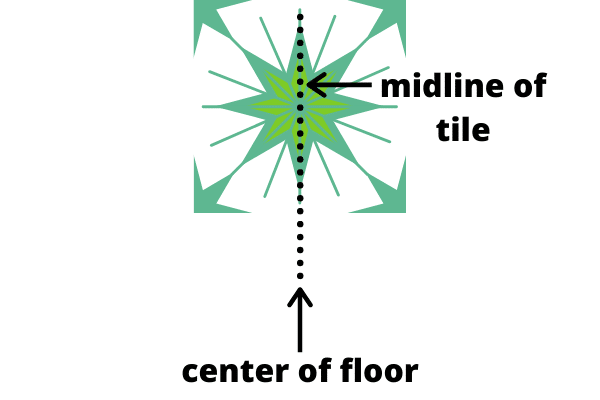
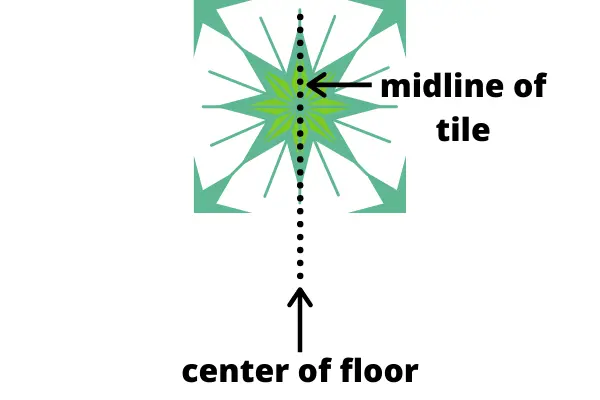
This will make it so you have an even sized tile on the two edges of the floor, instead of a whole tile on one side of the floor and just a small tile on the other side.
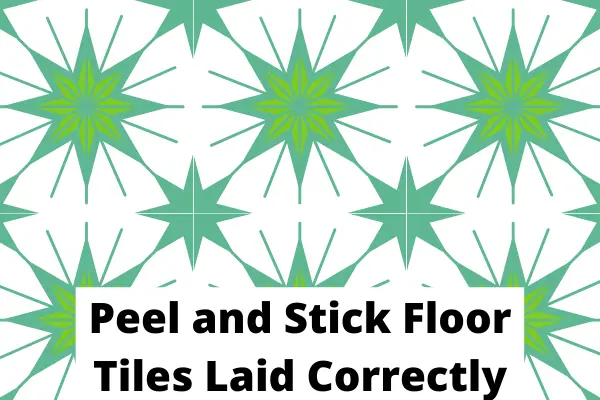
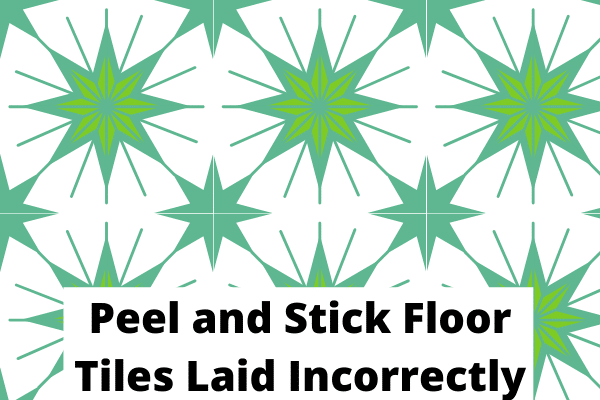
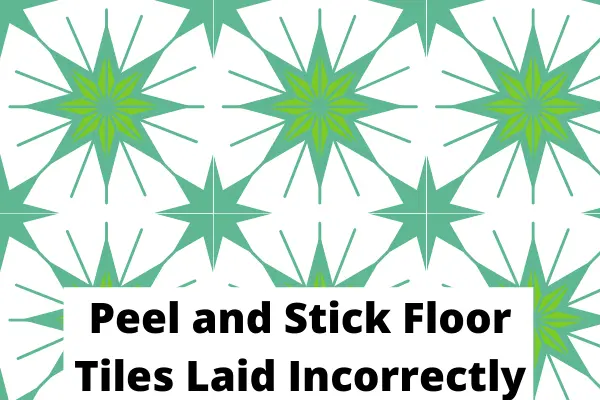
See the examples of how to lay peel and stick tile correctly and incorrectly below.
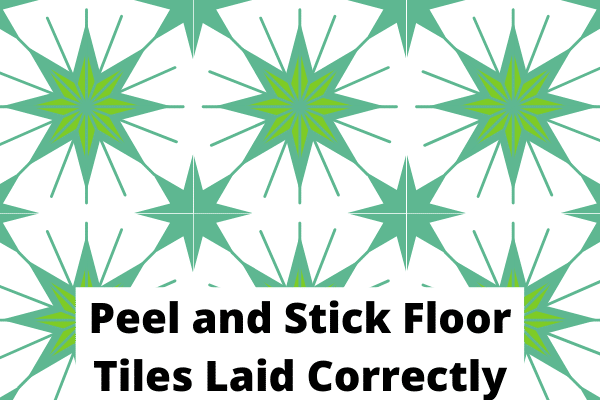
In the example above, the center of the middle tile is right in the center of the floor (from left to right). This means that an even amount is cut off the two side tiles, making the floor centered.
In the example below, the tile was laid in the top left first. This makes it so that the floor is not centered, and that only the top right tile is cut.
Once you have your first tile laid, you can peel the backing off of the next tile and begin to place them one by one around your original tile. You want the tile to be as close the adjacent tiles as possible without letting it overlap at all.
When all of the whole tiles are place, you are ready to start cutting the tiles to fit your edges.
Cutting a peel and stick tile is really easy. I used the first pair of scissors I could find in my house, though you could probably also use a utility knife.
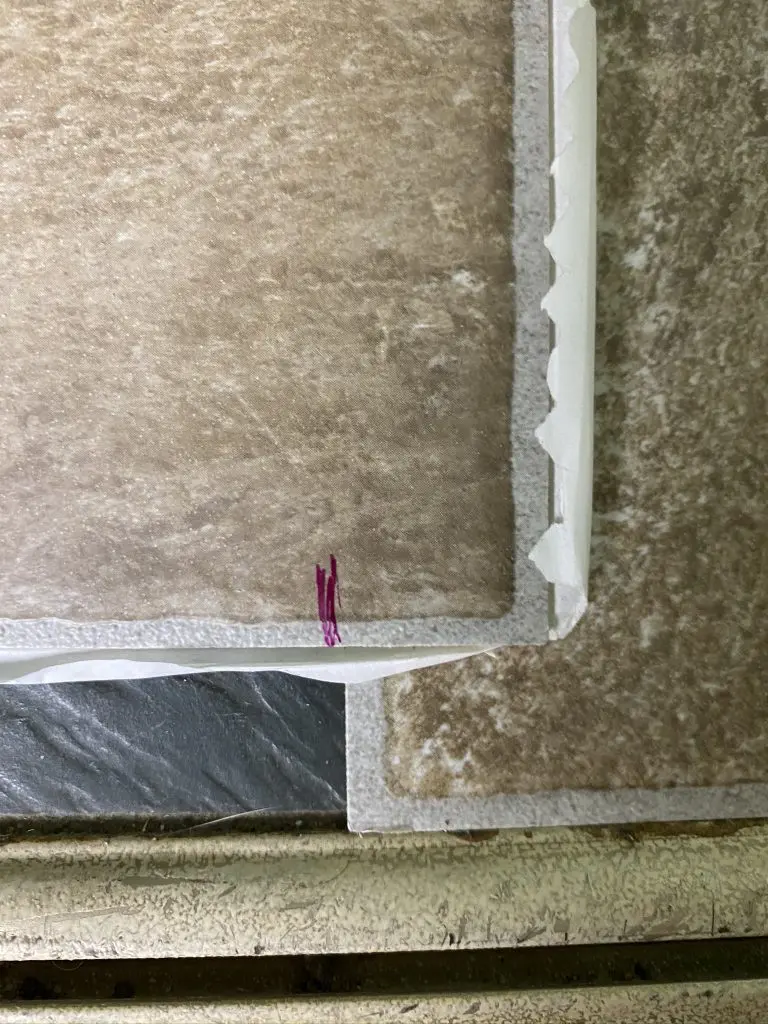
There are a few things to remember when cutting the tiles though. First, when you make a cut, you need to cut the wall side, not the side that touches the tile side. So, you will need to either measure the remaining space perfectly and then transfer the measurement to the tile, or you will need to turn the tile around to make a mark and cut it so that, when placed, the cut side is against the wall.
So for my tiles, I laid the tile (with the backing still on) on the floor against the wall. Then I made a mark where the new tile touched the already placed tile. I cut along that line, turned the tile around (so the cut side touched the wall), and removed the backing. Then I laid the tile.

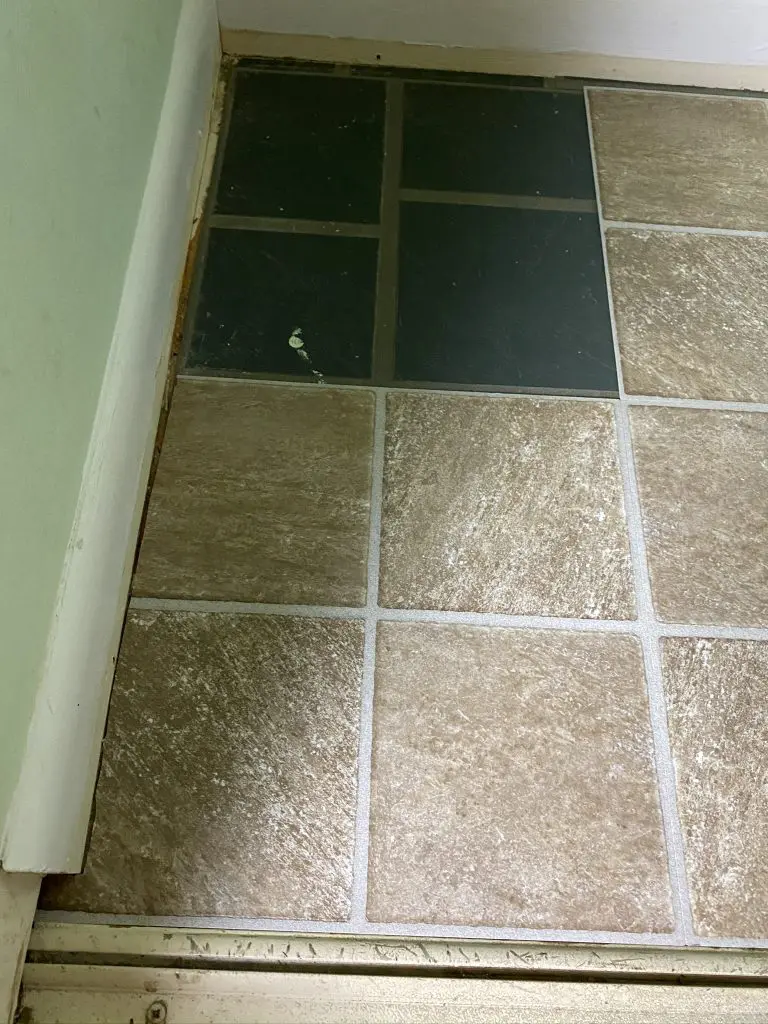
Since I removed my quarter round, the cut line didn’t have to be perfect. It is hidden under the quarter round.
You can also easily cut notches out for different things, if needed. On my front corners, I had to cut a tiny strip off most of the tile, but leave a lip so it covered the area where the trim didn’t reach. It was easy to do.

Don’t mind the bad paint job on the walls and trim (and the scratched up closet door track). In addition to putting down peel and stick tiles, stay tuned for how I am freshening up this tired space with shiplap doors and new paint.
When all your tiles are placed, roll over the tile with a rolling pin. This will help the tiles stick well.
Last, reattach the quarter round.
To do this, line the nails up with the holes in the trim behind it. Gently tap the quarter round back in place with your hammer. Hit one nail a few times, then the next, and so on, until all nails are partially sunk. Then begin at the first nail again and tap it in further, again working down the quarter round until the quarter round is in place.

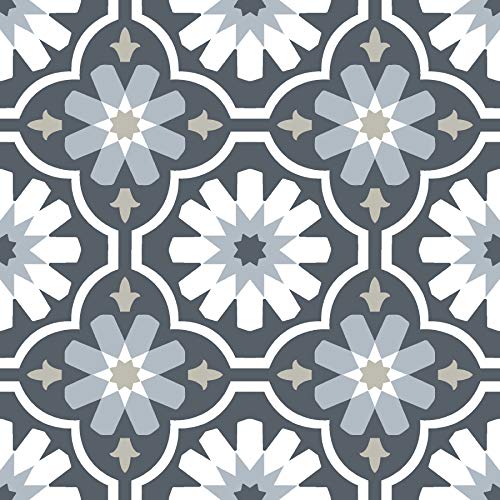
This was my first time laying peel and stick tile, and I wanted to make sure that the product was good. Someone gave me these tiles to try out, and I love the way they went down so easily. I plan to try this again in my laundry room, with a cute patterned tile.
Where to Get Peel and Stick Tiles
You can pick up peel and stick tiles are your local home improvement store, or have them delivered right to your house from Amazon.
Check out these cheap peel and stick tiles! They are a great price, and super cute! (Click on the picture for pricing info).


Are Peel and Stick Tiles Good?
Peel and stick floor tiles are a great solution to an ugly floor, but likely only a temporary solution.
The tiles I put down are on there solidly. The edges held down by the quarter round, so I don’t have any concern that the tiles will come up at all.
I think it is likely that the tile would not hold up well in a wet environment though. Because each tile is separate, and they have adhesive on the back, a lot of water on them would be problematic. I think it it likely that the water would seep in the (very tiny) cracks between the tiles and would loosen their adhesive backing.
Peel and Stick Tiles Review
Overall, I love this super easy, super inexpensive DIY. It makes a huge impact with just a few minutes of work.
Be sure to check out this post on peel and stick backsplash tile too!
How to Lay Peel and Stick Tiles
Learn how to lay peel and stick tiles.
Materials
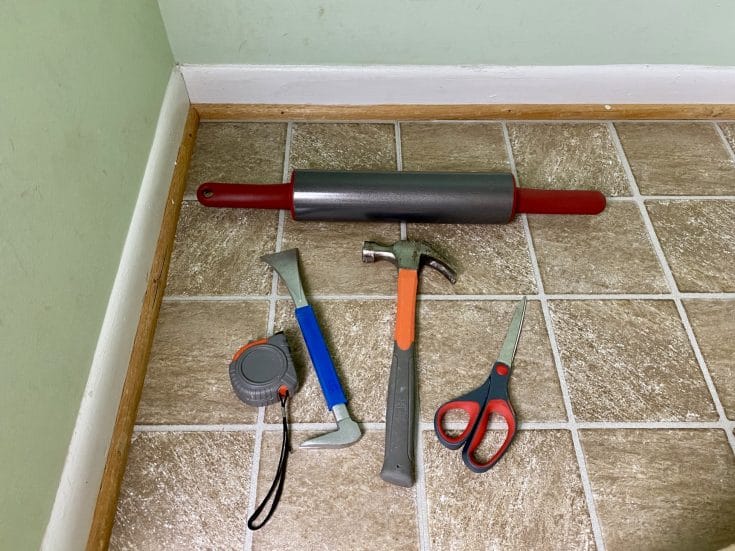
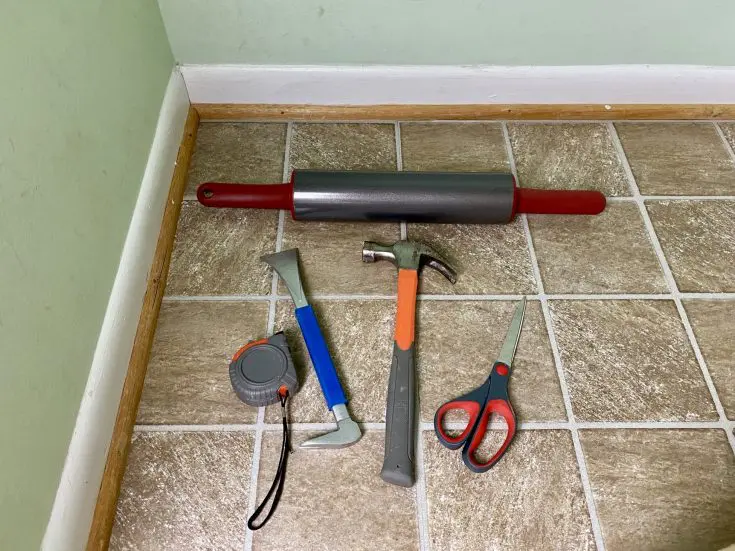
Tools
- scissors
- rolling pin
- tape measure
- mini crowbar
- hammer
Instructions
- Remove the quarter round from the floor using your mini crowbar. See notes for additional details.
- Sweep and wash the floor.
- Measure the width of the floor. Divide the number of inches in two to determine your starting place for the tiles.
- Line up the middle of your first tile with the midline point of the floor. Peel the backing off of the tile and press the first tile into place.
- Continue to lay tiles next to your first tile until you are at the edges of the floor. Remember that you want the tiles to lay as snugly as possible, without laying on top of each other at all.
- When you get to the edges, leave the backing on and put your tile down so it is against the wall. This should have it overlapping the tile next to it.
- In the spot where the new tile touches the tile next to it, place a mark with a pen or marker. This is your cut line. See notes for additional details.
- Turn the tile so that the cut edge is against the wall, peel off the backing, and lay the tile in place. Continue this until all tiles are in place.
- Roll over the floor with a rolling pin to ensure the adhesive backing is secure.
- Reattach the quarter round but lining the nail holes up and pounding them back in place. See notes for additional details.
Notes
Removing the quarter round: To do this, place on edge of the crowbar between the edge of the quarter round and the floor or the trim behind the quarter round. Give the mini crow bar a little tap with the hammer until it begins to separate the quarter round from the other surface. Move the mini crow bar back and for to created a wider separation. As the quarter round separates, move it down the quarter round to where the nails are still holding it firm to the other surface, and again begin to move the mini crow bar back and forth to separate the two surfaces. Complete these steps down the whole strip of quarter round until it can be easily separated from the floor and trim. Leave the nails in, as you can use those to reattach the quarter round when you are finished with the peel and stick floor.
Cutting tiles: When cutting tiles, remember that you are marking the tile were it will be cut. If your tiles are a pattern and it matters which way the tile is laid, lay the tile how you want it, and then turn it upside down before marking it. This will ensure that the correct side it cut and the tile lines up how you want it.
Reattaching the quarter round: When you reattach the quarter round, line the nails up with the holes in the trim behind it and gently tap the quarter round back in place with your hammer. Hit one nail a few times, then the next, and so on, until all nails are partially sunk. Then begin at the first nail again and tap it in further, again working down the quarter round until the quarter round is in place.