
Cabinet refacing is a simple, cost effective way to upgrade your home!
One of the great things about old cabinets and vanities is that the cabinets are oftentimes much sturdier than new cabinets. They were made with real wood and solid frames, instead of heavily glued plywood.
When we moved into our house, the bathroom looked like this.
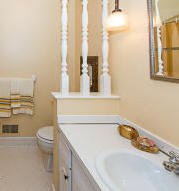

Fabulously 70’s, right? Spindles, arabesque tile (which is totally in right now!), and a funky vanity, complete with shiny metal trim around the top.
Here is how the vanity base looked.
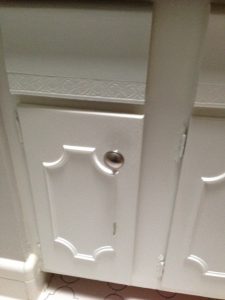
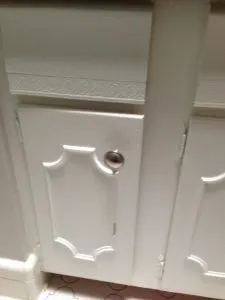
That pattern on the front of the vanity door was actually a plastic piece that was stuck on with pegs and holes, and then heavily painted. The drawers had a geometric design on them.
I could NOT let the vanity stay like this, so I started looking into other options.
This post may contain affiliate links. If you have any questions, please see my disclaimer page.
I began by measuring the vanity base and found that it was not a standard size (of course!).
This meant that I could not buy one from Home Depot and just replace it. It would have to be custom made , which meant $$$.
Plus, the tile on the floor did not go under the vanity base and unless I put one in that was the exact same dimensions, I would also have to replace the floor as well. This meant even more $$$.
So my next option was to replace just the doors of the vanity.
This sounded like a great option to me, so I started to look into it. You can actually get new doors for about $30 a piece.
Not too bad, right? They come unfinished though, and I would have to sand, prime, paint, drill holes for the hardware and hinges and then put everything on the vanity base.
I was looking at around $200 (with the drawer fronts as well), plus the cost of hinges, knobs, primer and paint, not to mention the time involved in all of this.
I had one last option: to work with what I already had by doing cabinet refacing.
I unscrewed the hinges and pried the doors off (I say pried because there was a thick layer of paint over the hinges, cementing them to the vanity base).
As mentioned above, the arabesque pattern on the front of the doors was a cheap, plastic applique.
So I pried that off too by working a metal putty knife around the edges of it.
I was left with a deep indent where the applique had been due to the many layers of yellowed, white paint that had been painted on the door over the years, and some holes where the plastic pegs were inserted.
Time to sand!
I sanded all the door fronts with my mouse sander and 120 grit sandpaper until they were as flat as possible.
Then I followed up with a quick sanding with 220 grit sandpaper.
I decided that a shaker style door front would be easy to make and would go with my overall theme in the bathroom.
A short trip to my local big box home improvement store later and I had all my supplies for the job.
Here’s the list of what I used to complete the transformation:
- metal putty knife
- mouse sander
- sand paper in different grits (120 grit and 220 grit)
- several 2 inch X 1/2 inch x 3 foot strips of poplar
- saw (we used our DeWalt miter saw, but you could use a hand saw if needed)
- wood glue
- clamps
- wood putty
- paint
- new hinges
- door hardware
- 1 inch by 6 inch common board
- drawer hardware
- drill
I cut the strips of poplar into the lengths I needed with my husband’s handy DeWalt miter saw.
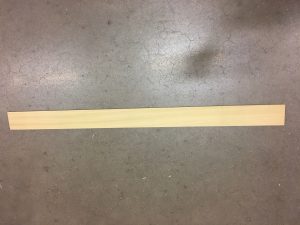
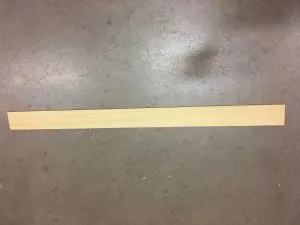
It was scary to use at first, but it soon became my new favorite tool (who knew that cuts of wood could look so pretty!).
I tried nailing the strips of poplar onto the door, but it was not working for me.
So I switched to the wood glue and clamp method.
I worked on a door at a time so that way all of the pieces fit perfectly and were clamped together.
After all the doors were glued, I started filling in where the strips came together and where they met the door on the top and sides with the wood putty.
In retrospect, a better product would have been to use Durham’s Water Putty , but you know what they say about hindsight.
Once the wood putty was dry, I sanded with my mouse sander and 120 grit sandpaper to smooth the puttied areas and rough up the grain of the wood.
While I was at it, I sanded the front of the vanity (sans doors and drawers) to make sure a new coat of paint would adhere.
Then, I followed over all of the surfaces with a quick sanding with 220 grit sandpaper.
Finally time to paint!
I painted the vanity base and the fronts and backs of the doors with a coat of two coats of paint, with dry time in between, and then set to work drilling the holes for the door handles.
The internet told me that they should be 2 1/2 inches down from the top of the door – so this is what I did.
It was hard to get them perfectly centered, and I found out the hard way that it was super important to keep the drill entirely straight when drilling through.
This is super important, because if you don’t, the handle does not sit flush on the door.
Last, I attached the new hinges I purchased in the same place as where the old hinges had been. I reattached the hinges to the vanity base and was done!
With the doors at least…
Now for cabinet refacing the drawer fronts.
I wanted a flat front, which made this step pretty easy.
I cut my 1 inch (thickness) x 5.5 inch (width) board into the lengths I needed for the drawers and the fake drawer under the sink with my DeWalt saw (this time with confidence instead of trepidation).
I sanded and painted three coats of paint onto the wood (with light sanding and proper dry time in between).
To attach the handles, I drilled holes right in the center of the drawers. Then, I unscrewed the door fronts from the old drawers, and screwed the new drawers into place.
The middle fake drawer was a little harder to do, because I had to get up under the sink to drill it into place.
After LOTS of frustrating attempts, I impatiently waited for my husband to get home to hold it for me while I climbed under the sink and put the screws in the correct place.
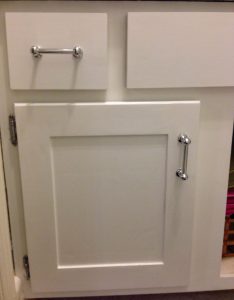
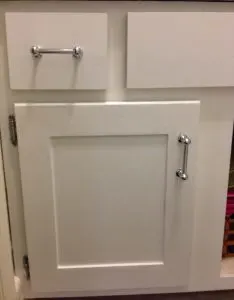
That’s it!
It took a little time and work, but I’m really pleased with the result. And the best part it, it only cost me about $30!
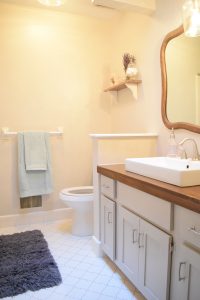
After I made the new vanity top, I repainted the doors to be a different color (Benjamin Moore La Paloma Gray).
Here is how it looked after the final paint job.

AJ
Saturday 6th of February 2021
Oh my!
I have the same bathroom! With the 70's spindles!
I will start my bathroom remodel in March. It is nice seeing the before and after.
Lauren
Saturday 6th of February 2021
How funny! Hope the remodel goes well!
Sarah
Tuesday 12th of May 2020
Thanks for sharing this! I just moved into a small new home and the kitchen cabinets needed major work. In our previous home, we got the cabinets refaced and refinished by a local wood refinishing company and they did great work. But for this smaller home, I thought I could try to tackle the kitchen cabinets myself. I followed similar steps to the one you used, and it worked very well. I am going to do this again for the cabinets in my bathroom. Thank you so much, your bathroom is so cute!
Lauren
Thursday 14th of May 2020
Thank you Sarah! I'm glad to hear that your kitchen turned out well!
Janin Gough-Iler
Saturday 4th of January 2020
You did a beautiful job! I am having the same delema with my vanity top. I am going to attempt your project. Wish me luck!!
Lauren
Saturday 4th of January 2020
Thank you Janin! I hope your vanity project goes well! Good luck!!