
Whitewashing your brick fireplace is a really easy how-to that updates your home beautifully.
A brick fireplace is a gorgeous focal point for any home, but the dark, natural brick look can be really outdated.
Many people choose to paint the brick a solid color.
A more natural looking, timeless option is to whitewash the brick.
Whitewashing the brick allows for the color of the brick to come through the painted finish, giving variety and texture to the fireplace.
Here is how the fireplace looked before I whitewashed it.
When I moved into my home, the fireplace looked like this.
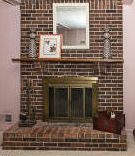

So dark, right?
It made the whole room look dark.
After looking into my options, I decided that whitewashing would be the easiest and cheapest way to change the look of it.
This post may contain affiliate links. If you have any questions, please see my disclaimer page.
It was also the scariest!
What if I messed it up? What if I hated it? After putting paint on brick, there is no easy way to turn back.
But, as they say, no risk no reward. So I got down to business.
I thought that whitewashing the brick may turn out to be a pretty messy job, and I was right.
Luckily, we were replacing the carpet in the home anyways and had already torn it out.
I think it would have been really hard to cover enough of the floor surface to make sure that no paint got on it.
With the floor being down to just subfloor, my prep work was pretty minimal. I removed the fireplace screen and the mantle.
Then, I found a can of white paint in my basement and started to thin it out.
Because I wanted a really soft white wash with some of the brick color showing through, I ended up with about a 1 part paint:4 parts water ratio.
This stuff was liquidy.
I enlisted my husband’s help with this project because I wanted to make sure that he was part of the ruining process if that was how this thing ended up (then he couldn’t blame me!).
Also, I knew that I did not want the paint to sit on the brick for very long before wiping it. So I truly did need his help.
So here is how we whitewashed the fireplace.
I painted the paint/water mixture on, and as soon as I picked the paint brush up off of the brick, my husband wiped the brick with a towel.
He wiped it so fast after I painted it that half of the time he was knocking my hand out of the way.
This was critical to get the look that we wanted.
I made sure to run the paint brush along all of the mortar because I wanted that to come out nice and white.
In all honesty, paint got everywhere!
I had an old couch sitting about four feet behind us and it was splattered with little tiny flecks of paint water that never came off.
The paint got all over the subfloor just from running down the brick.
So take note, if you are planning to white wash your fireplace and have a floor that you want to keep nice, cover it REALLY well with something waterproof like plastic and tape it down.
Cover everything nearby that you do not want paint on.
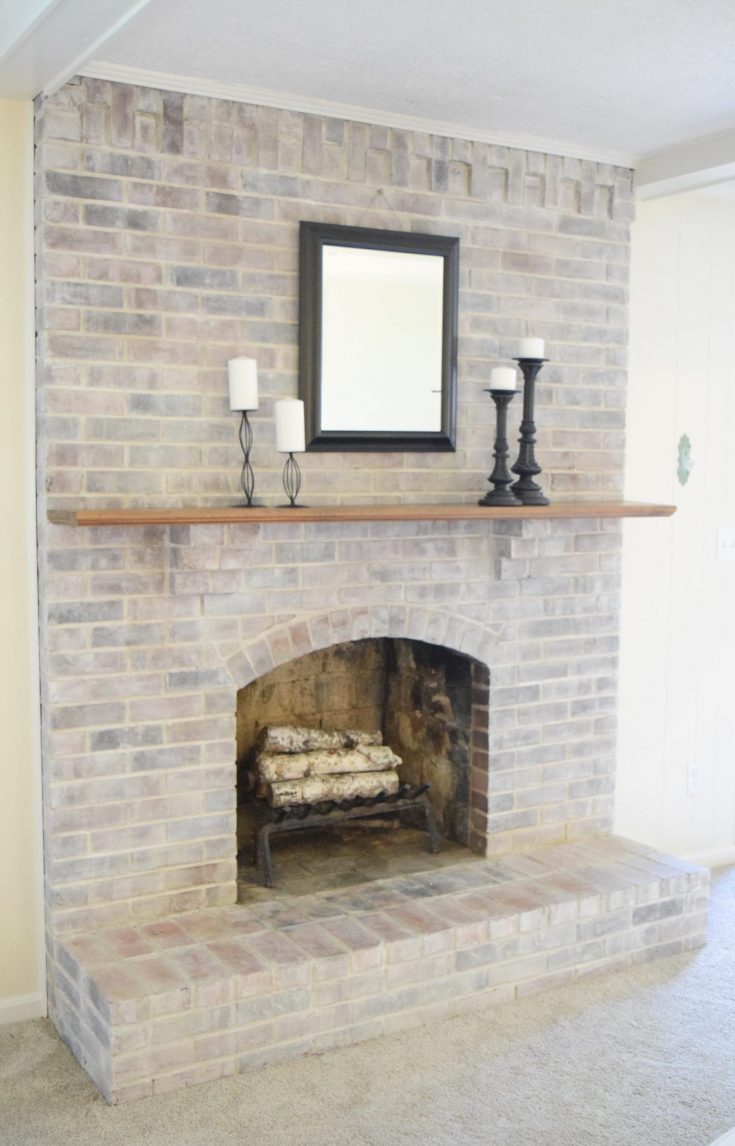
I LOVE how it turned out.

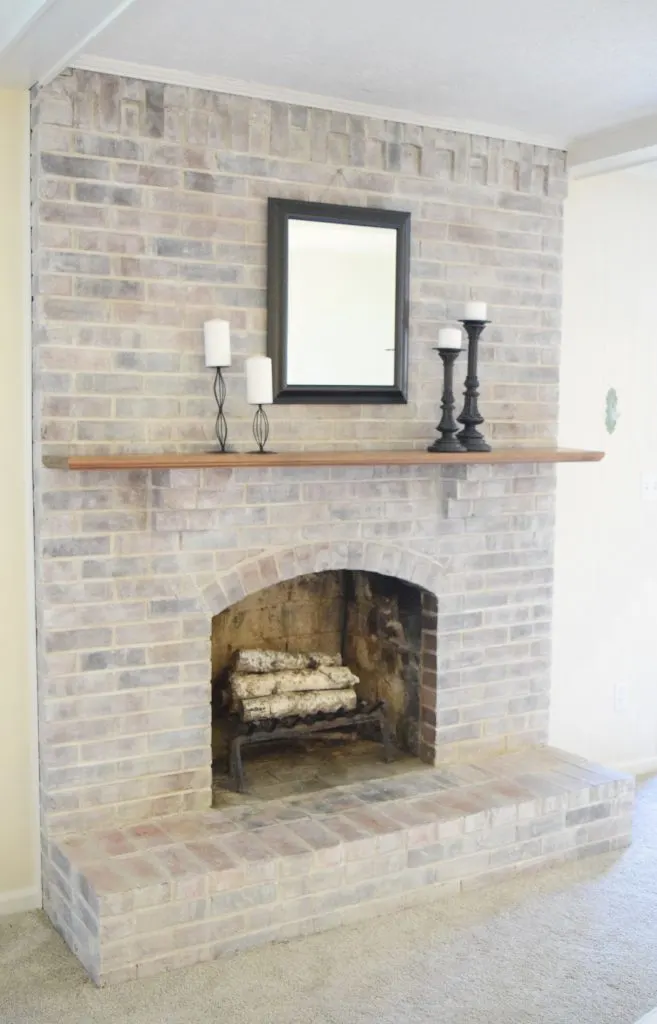
It brightened up the room, and really became such a gorgeous focal point.
I chose to leave the dated brass fireplace screen off, and instead opted for some birch logs.
Since the mantle was already a beautiful wood finish, I put it back in place.
After I whitewashed the brick, I painted all the trim white. I also chose a creamy white color from this whole house color scheme to finish the look.
Follow the instructions below to whitewash your own fireplace!

How To Whitewash A Fireplace
Learn how to whitewash your fireplace to give your home an updated look.
Materials
- White Paint
- Water
- Bucket
- Paint Brush
- Lots of Rags/Towels
- Painters' Tape
- Plastic Dropcloths
Instructions
- Cover everything around the fireplace. Cover the floor with plastic and adhere it to the area around the fireplace with painters' tape. Cover the walls and floors that are within 2-4 feet of the fireplace.
- Move furniture that is near the fireplace. If you cannot move it, cover it.
- Pour 1 part white paint in the bucket.
- Pour 4 parts water in the bucket.
- Mix with a paint stirrer. Your mixture will be very watery. This is how you want it.
- Starting at the top, use a large paintbrush to wipe the water mixture on the brick.
- Working quickly, paint the entire surface of the brick with the paint/water mixture.
- Let the fireplace dry for a few hours.
Notes
This water/paint mixture splashes a lot. If you do not want paint on it, cover it!
The more watery you make the paint/water mixture, the more color of the brick will show through.
If you desire a more see through finish, wipe the brick off with a rag or towel immediately after painting it. You will not pull all the color off of the brick, but it will lessen the amount of paint that sits on the brick.
If paint drips down the brick, wipe it quickly, as the drips may show through when you are finished (similiar to if you had done two coats in the areas where the drips are).
When you are sure the paint/water mixture is no longer dripping, remove the covering from the floor. If any drips escaped underneath the plastic, they should still be wet enough to wipe up at this point. Wipe them quickly, with a rag.
Tiffany
Thursday 30th of September 2021
I showed your fireplace to my contractor, but I wanted mine to look like this, but he’s having trouble believing that the fireplace was all dark red brick, and your final product has multi colored brick. The bricks don’t all look the same in the end, even though they all started out the same. Can you please explain to me how this look was achieved? Thank you!
Lauren
Thursday 30th of September 2021
Hi Tiffany! The bricks were different colors to start. They weren't all the same shade - some were lighter and some darker. Look at the bottom right corner. You can see a dark brick, same as there is a darker brick on the finished photo in the bottom right corner. Some bricks were maybe wiped off more than others, but overall, I didn't do anything to achieve the varied look on the brick. If your brick is all the same exact shade, you'll probably end up with all the bricks being the same shade after they are whitewashed. But if you have variations in your brick, those will show through if you water the paint down enough. Good luck!
Kelly
Sunday 8th of August 2021
I have been wanting to do this for YEARS and I think I am finally there! Do you wash your brick first?
Lauren
Monday 9th of August 2021
Hi Kelly! If your brick is dirty or has soot on it, I would. Otherwise, the soot will probably mix in with the paint, leaving black marks. Once you wash your fireplace, you'll need to let it dry for a few days. Good luck on your fireplace!
Jolene
Monday 21st of June 2021
Hi, it really looks good! Did you white wash the mortar also or just the brick?
Lauren
Monday 21st of June 2021
Thanks Jolene! I made sure to go over the mortar lines specifically to makes sure they were well covered. I liked how that looked best for my fireplace. Good luck if you decide to do it!
Harel Marziano
Tuesday 20th of April 2021
Hi , i dont understand waht kind of colour you used? A regular white colour or a primer colour?
Lauren
Thursday 29th of April 2021
Hi Harel! I used a regular white paint. Not a primer. For example, Snowbound, Pure White, or Alabaster would all work well.
Karen
Friday 5th of March 2021
It looks so great. So any white paint will do? I am nervous about what color white to buy.
Lauren
Saturday 6th of March 2021
Yes, any white paint! I just used some random white paint I had in my garage. But, I wanted a really subtle whitewash with a lot of the brick color showing through. If you're going to be buying a color, pick one that is neutral or leans slightly warm instead of cool. For example, White Dove, Pure White, Alabaster or Simply White. Hope that helps! I was SUPER nervous before I did mine, but I love how it turned out. Good luck!