
Adding moulding to a kitchen island is an easy, inexpensive way to upgrade a builder grade island.
Recently we refinished our kitchen cabinets in 2 days (for less than $20!) by staining them with Minwax Polyshades. I love how it turned out, but I wanted to do something different with my kitchen island.
The kitchen island originally looked like this:
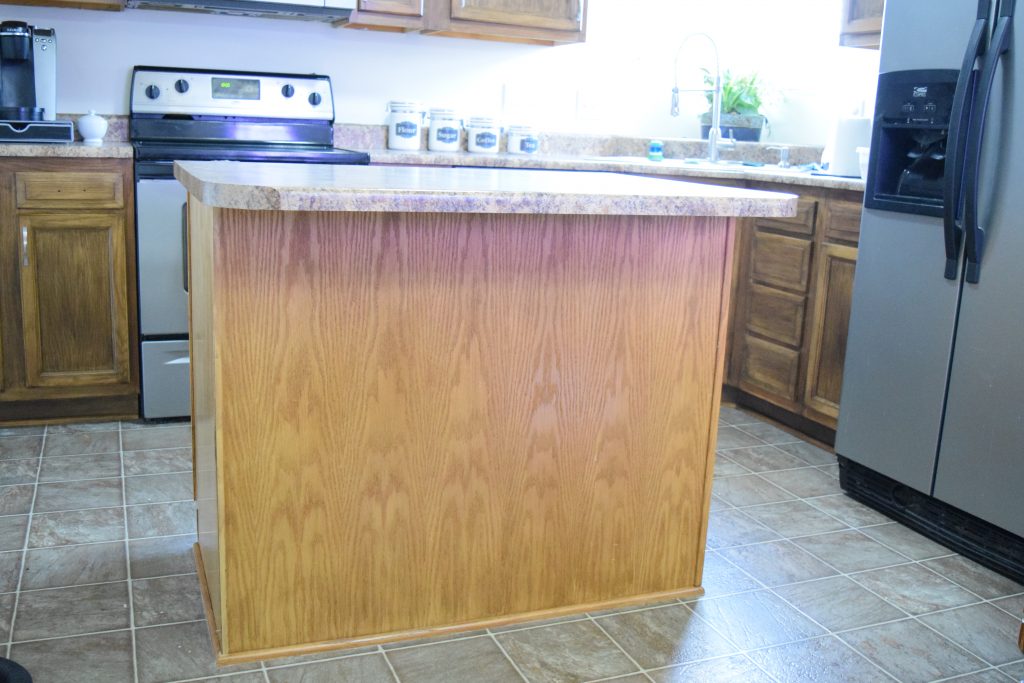
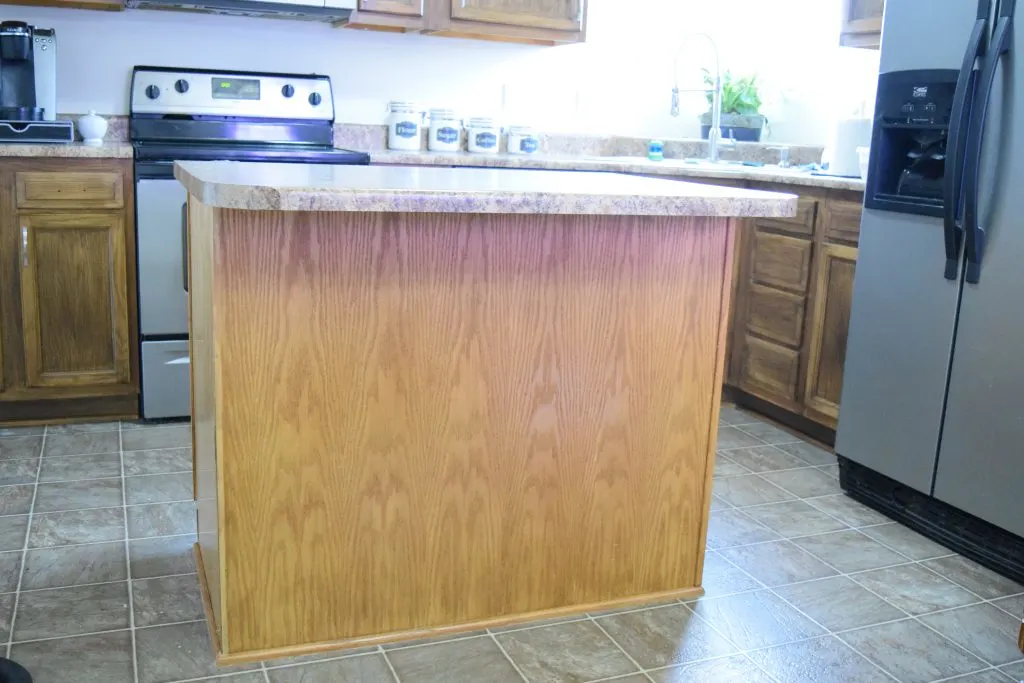
Suffice to say, it was not my favorite style.
So I decided to add moulding to it.
To my surprise, it was an easy, inexpensive DIY that required only a few simple tools.
When I did my Pinterest search, I didn’t find a lot of information on how to add trim to a kitchen island. But, after viewing some examples, I set out to my local home improvement store to pick up some moulding pieces.
This post may contain affiliate links. If you have any questions, please see my disclaimer page.
Here is what I used to add moulding to our builder grade kitchen island.
Materials:
- mini crowbar
- nail remover tool
- (3) 1 x 4 x 8s in oak
- (6) 1/4 x 4 x 3s in poplar
- (8 ft) baseboard trim
- 1.5 inch finishing nails
- 1/2 inch wire nails
- Stanley Nail Setter
- 180 grit sand paper
- 220 grit sand paper
- Mouse Sander
- Durham’s Water Putty
- Paintable caulk
- DeWalt Miter Saw
- Stanley Miter Box
Once I gathered all my materials (who am I kidding… this project took 4 trips to Home Depot due to mis-measurements or me changing my mind), I got to work.
Directions:
1. Remove the existing trim
I started by removing the existing trim on my kitchen island. This included the corner trim pieces and the quarter round on the bottom of the island. This was actually much harder than it sounds, and took both the use of a mini crowbar and a nail remover.

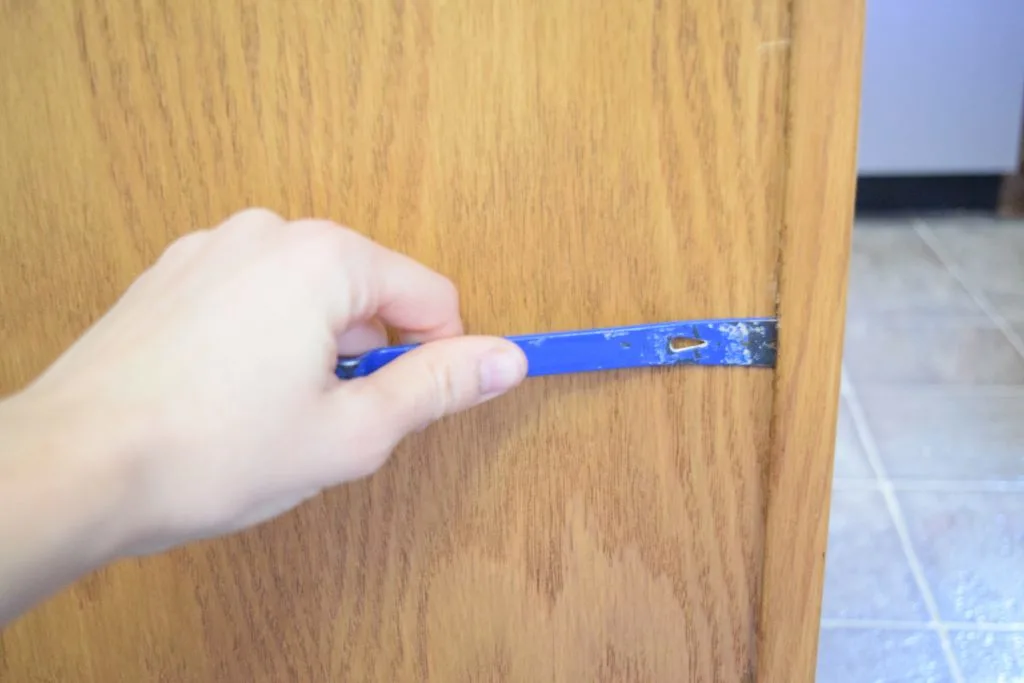
Basically, just find a place where you can get the mini crowbar into a small gap, and work from there.
After I removed all of the trim pieces, I used the nail removing tool to remove any remaining nails. Since they are finishing nails, they don’t have a head on them. This means that sometimes they pull right through the trim piece and remain stuck in the floor or the base of the cabinet.
2. Sand the kitchen island.
Then, I started to sand the cabinet. Since its mostly all flat, I used my mouse sander. If you don’t have one, get one, because it will make this project go so much quicker for you (and they’re less than $25).
I sanded first with 150 grit, and then sanded again with 220 grit to make sure the surface was smooth. I didn’t worry about sanding the edges because I knew that the moulding that I was adding would cover them.
After, I also sanded the doors on the opposite side of the kitchen island with a combination of my mouse sander and just regular old sand paper and elbow grease for the crevices where the mouse sander can’t get.
Finally, I wiped it down with a wet rag three times. I wanted to make sure I got all of the sanding dust off.
3. Cut and Adhere the New Moulding to the Kitchen Island
Finally, time for moulding! I measured each piece that I was adding separately, to ensure I got a tight fit.
As you can see from the materials list, I chose two different sizes of trim for my island. This was for two reasons. First, my island had a little lip on the side pieces that extended out 1/4 of an inch. Because I wanted the moulding that I was attaching to match this, I used the 1/4 inch thick poplar for the side pieces. The back of the island was much deeper, and did not have any lips that I had to accommodate. So, I chose the 1 inch thick board for the back because it made more of a visual impact than the thinner board did.
It is important to note…
To make sure your edges are perfect, you’ll need to have both the side vertical pieces (that are 1/4 inch thick) and the back vertical pieces (which are 1 inch thick) measured and cut prior to attaching them. Because you will want the edges to fit together nicely, either the side pieces will have to extend beyond the island edge by 1 inch, or the back pieces will have to extend beyond the island edge by 1/4 inch. If that sounds confusing now, it’ll make total sense when you start adding the moulding to your kitchen island, don’t worry.
For the back of the kitchen island (the part you see in the picture) I used my 1 x 4 pieces of oak board. Using my DeWalt saw, I cut the top and bottom pieces to size, and nailed them in using my finishing nails. Then I measured my vertical pieces, cut them with the power saw, and nailed them as well.
When that was finished, I started on my sides with the 1/4 x 4 poplar pieces. Again, I measured and cut all the necessary lengths, and then nailed them in with wire nails that were meant for a smaller depth. I didn’t want to end up with nails poking through the other side and jabbing me when I was getting a pot!
When the basic box around the edge of the island was complete, I measured one more width on the bottoms of the back and side pieces. I nailed those pieces in right above the bottom board.
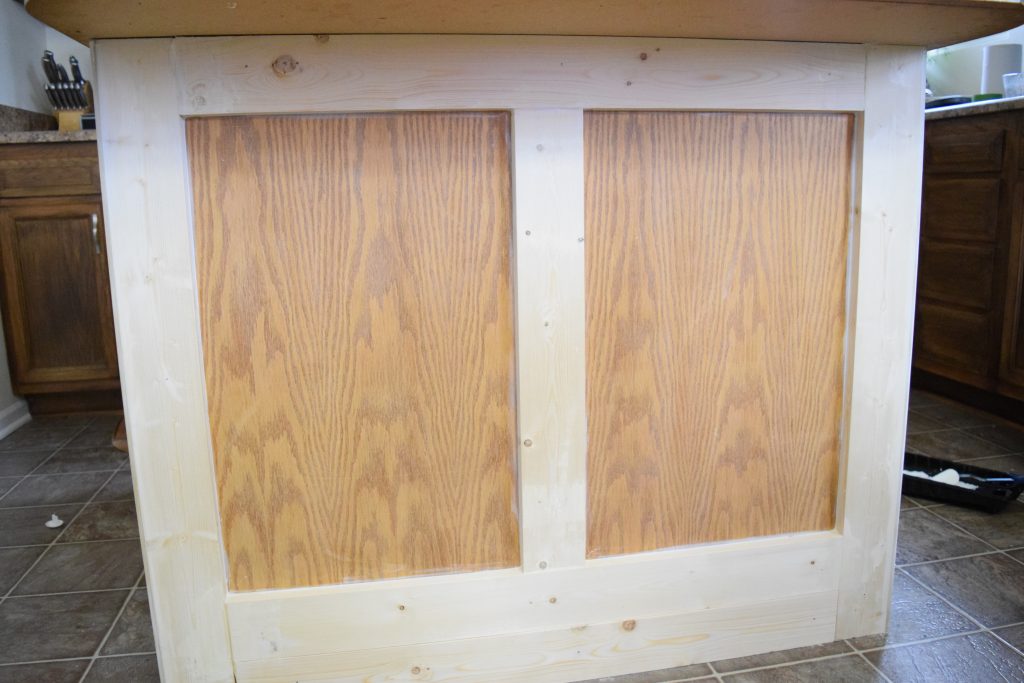
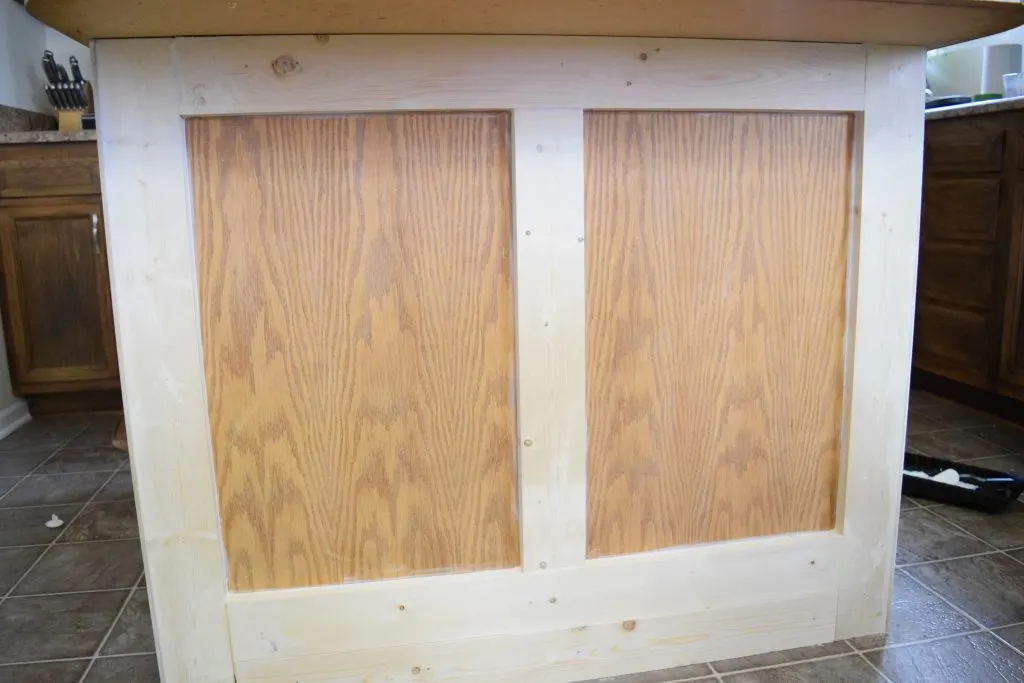
See how the bottom of the island has two boards instead of one? This is so that the baseboard trim piece at the bottom has something to nail into, and is built out to look more elegant.
The Baseboard Trim on the Bottom of the Kitchen Island
When that was finished, I cut the baseboard trim piece for the bottom of the kitchen island.
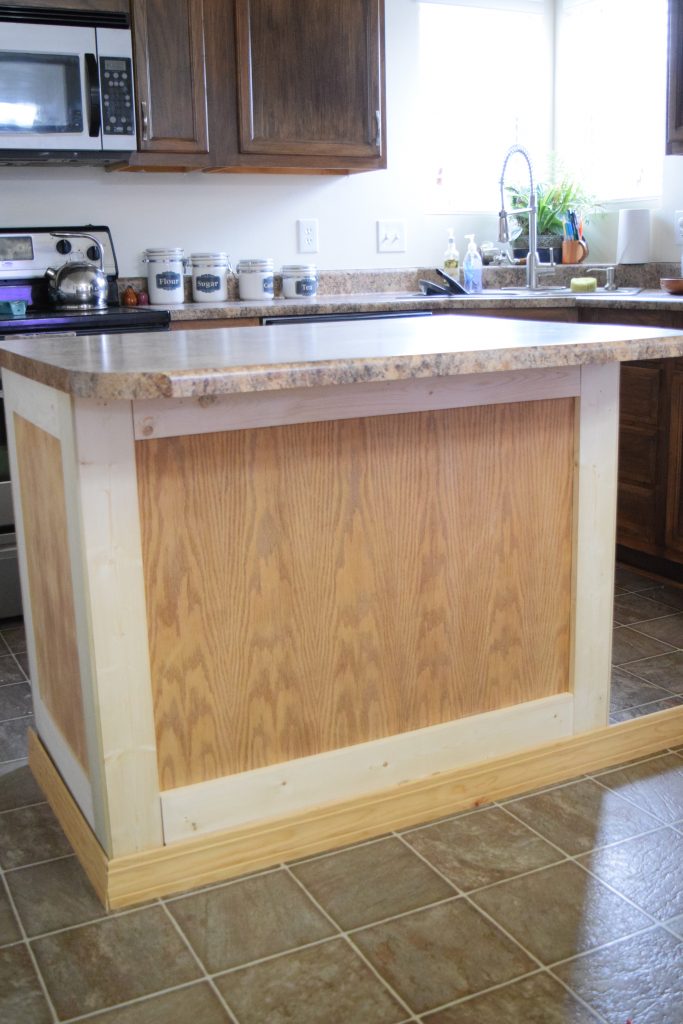

Cutting the mitered sides was actually super hard with my DeWalt miter saw (which doesn’t make sense to me, because that is actually what it is meant to do). Even though I watched several videos and think of myself as a fairly smart person, I just couldn’t figure it out. So, I pulled out my handy Stanley miter box, that comes with a hand saw, and used the preset guides to cut a perfect mitered edge.
When the edges were cut, I nailed the moulding on the bottom with my finishing nails.
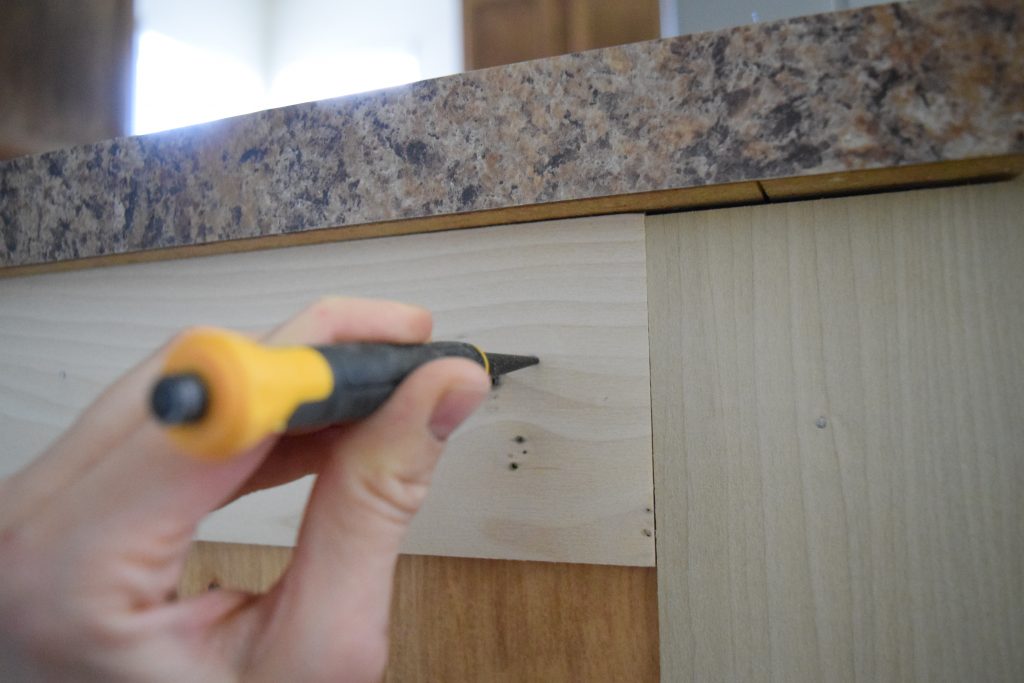
4. Set the Nail Heads
After I had all my nails in place, I went back through all of them and pushed them a little further in with my Stanley nail setter. This is a great tool to have if you don’t have a Brad Nailer. Since I don’t, the nail setter allows me to push the head of the nail below the surface of the wood, so it doesn’t stick up making a bump in my nice finish after the wood is painted. To use it, you just stick the tip of the tool on the nail head and hit the other end with your hammer.

5. Fill the Seams.
I filled all of the seams between the boards that I added with Durham’s Water Putty. This stuff is just the best for this type of thing. It is similar to wood putty, but SO much easier to work with. It doesn’t get gritty like wood putty does, and makes a much smoother seam. One note about it though. It dries HARD, so scrape off as much excess as you can so you aren’t sanding it forever.
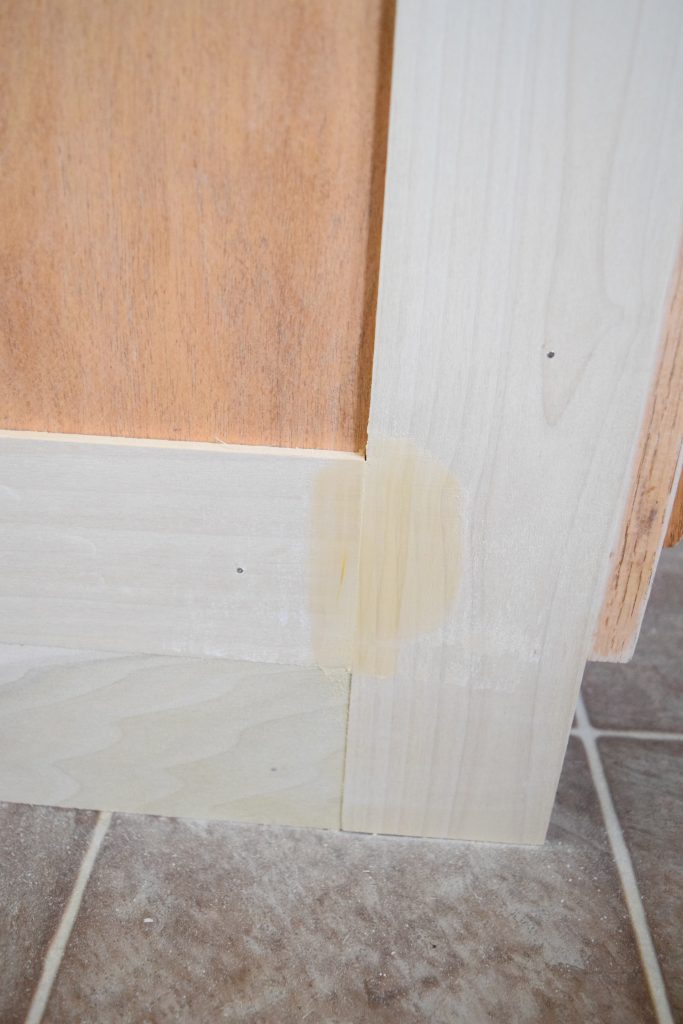
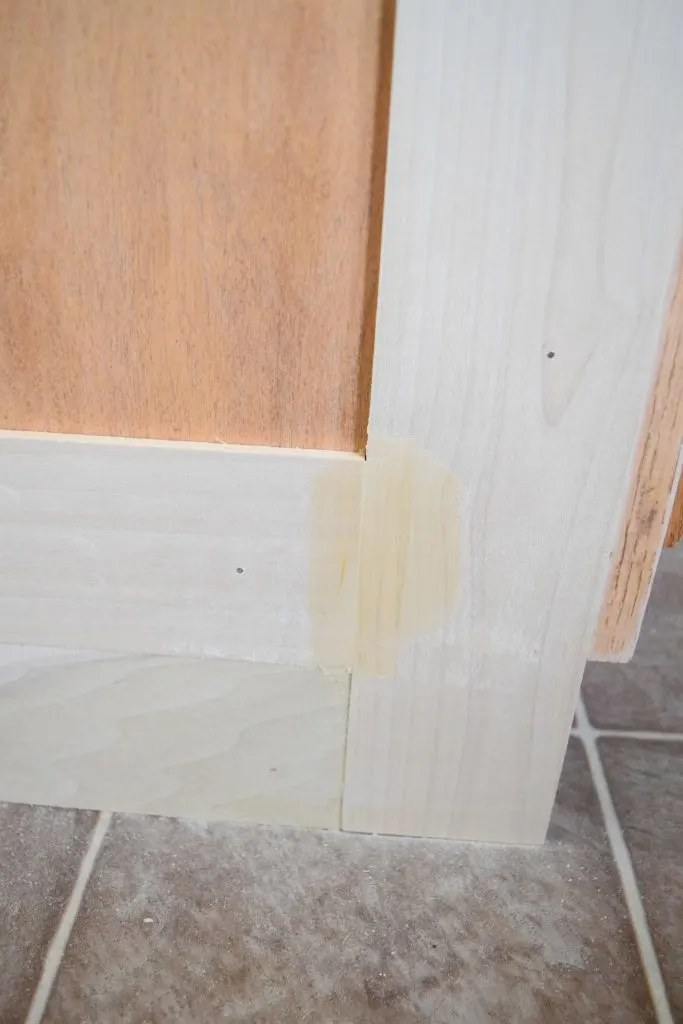
I didn’t bother to do the bottom seam, because I knew that it would be covered by the moulding.
6. Caulk the Ledges.
After all the seams were filled, I took some white paintable caulk and ran a bead along all the insides of the boxes (where they met the original island base). This makes the unit look like one piece instead of just boards stuck on an island. I also caulked along the top of the baseboard trim where it met the board behind it. Last, I put a little bit of caulk in all of the nail holes.
7. More Sanding.
When ALL of that prep work was done, I gave the newly added wood a sand to make sure that there were no stray splinters sticking out and that the paint would adhere. I also sanded down any high spots from the water putty.
When all the sanding was complete, I vacuumed the whole area and used a tack cloth to remove any remaining sanding dust. I did not want anything to mess up my painted finish.
8. Paint.
Finally… time to paint! This is when things start to look really good!
To paint my kitchen island, I used Behr Marquee paint. The sales person assured me that this was top of the line stuff, that it wouldn’t need primer, and that it would likely only take one coat.
Four coats later…
In all honesty, I won’t use this product again. It dries super fast. Too fast, making the paint get muddy if you go back over a section. I didn’t like that. Also, it took many coats, and I probably should have used a primer to speed this process up.
But, it made a nice hard finish and looks like it adhered well. Next time though, I’ll use Sherwin Williams ProClassic. Its never failed me yet!
I applied the paint with combination of a foam roller, for the flat parts, and a brush, for detail parts. Between each coat, I gave it a light sand in case it raised the grain, or to rough it up in case it was too smooth.
The Grand Finale
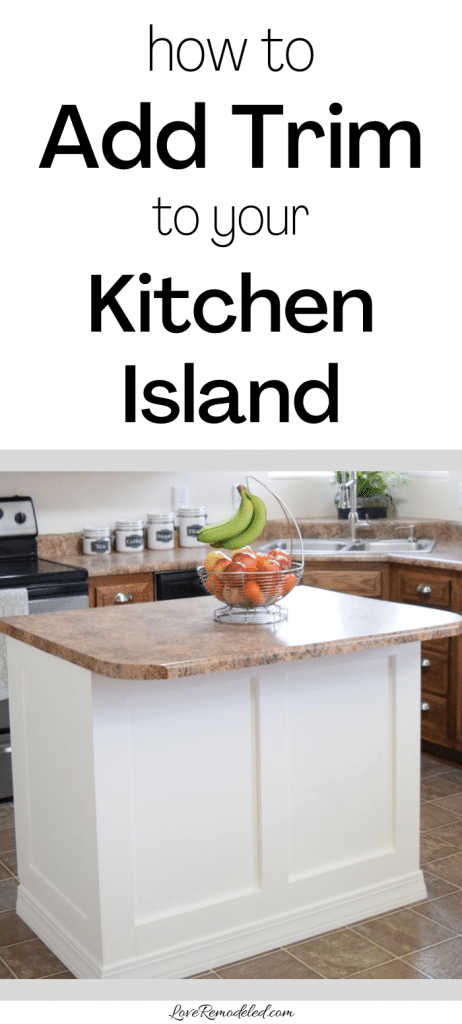
So after all that work, this is how my island turned out.

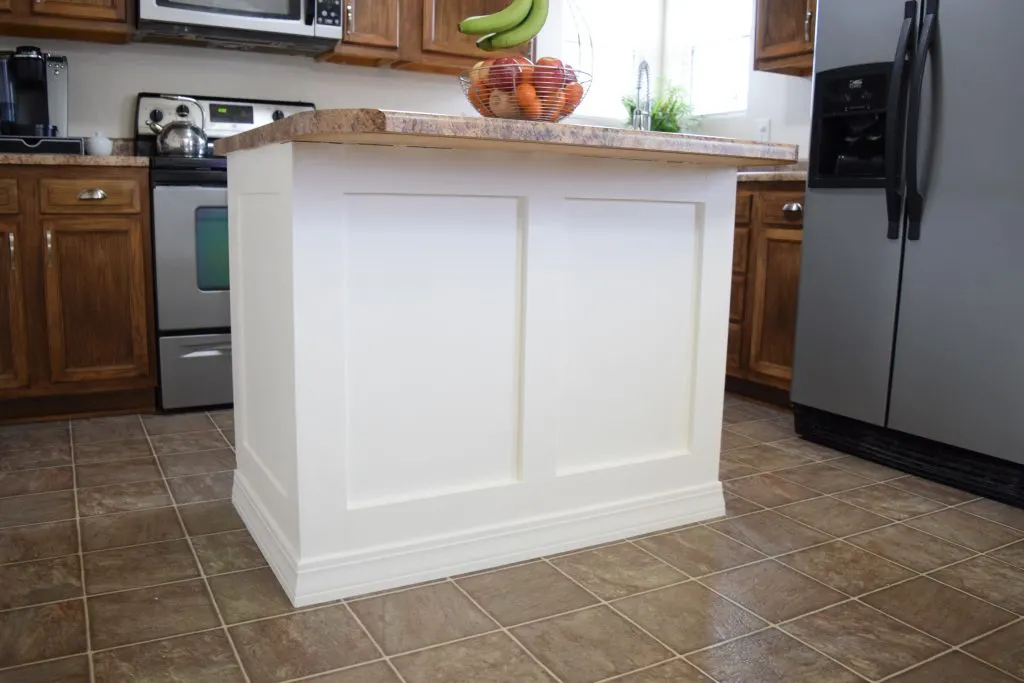
Gorgeous, isn’t it? When you add moulding to a kitchen island, it makes a huge impact!
And I say all that work, because after listing it all, it sounds like a lot. But actually, this only took me 2 days to finish. And that is two days that also included running errands, making meals, doing laundry, and general cleaning, with 3 kids under 5 at my side.
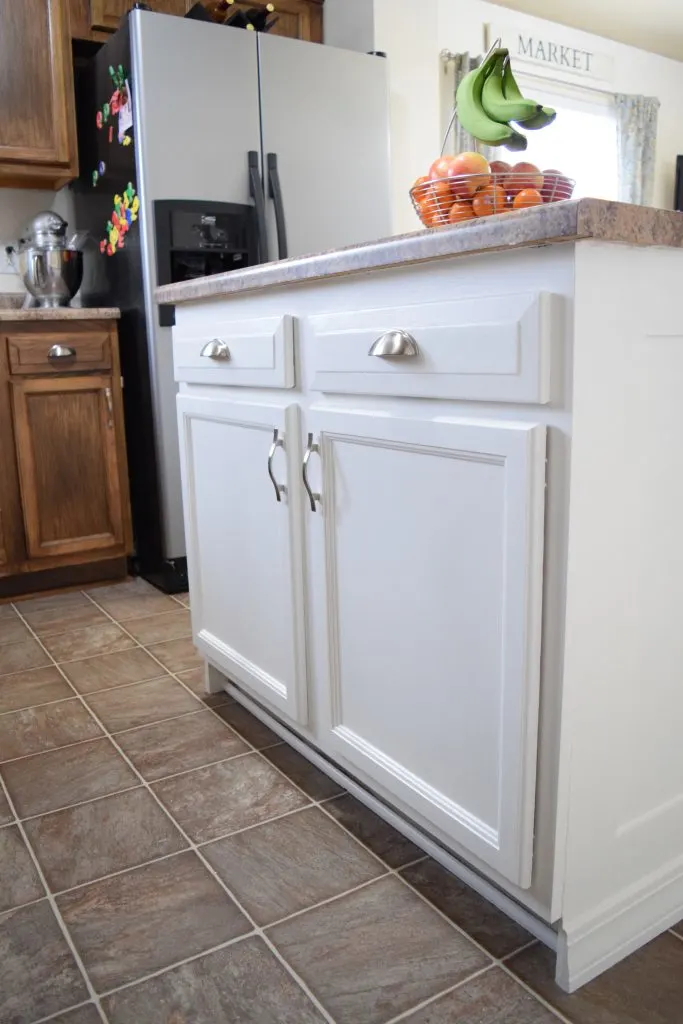
Here is how the door side turned out:

Total Cost?
So, my total cost for this project was as follows:
- wood – $35
- nails – $5
- paint – $20
So my total cost for materials was $60. Talk about a lot of bang for your buck!
I love seeing the huge difference that can be made in a kitchen when you add moulding to a kitchen island!
Interested in other ways you can upgrade your island?
Check out 10 ways to give your kitchen island a makeover!
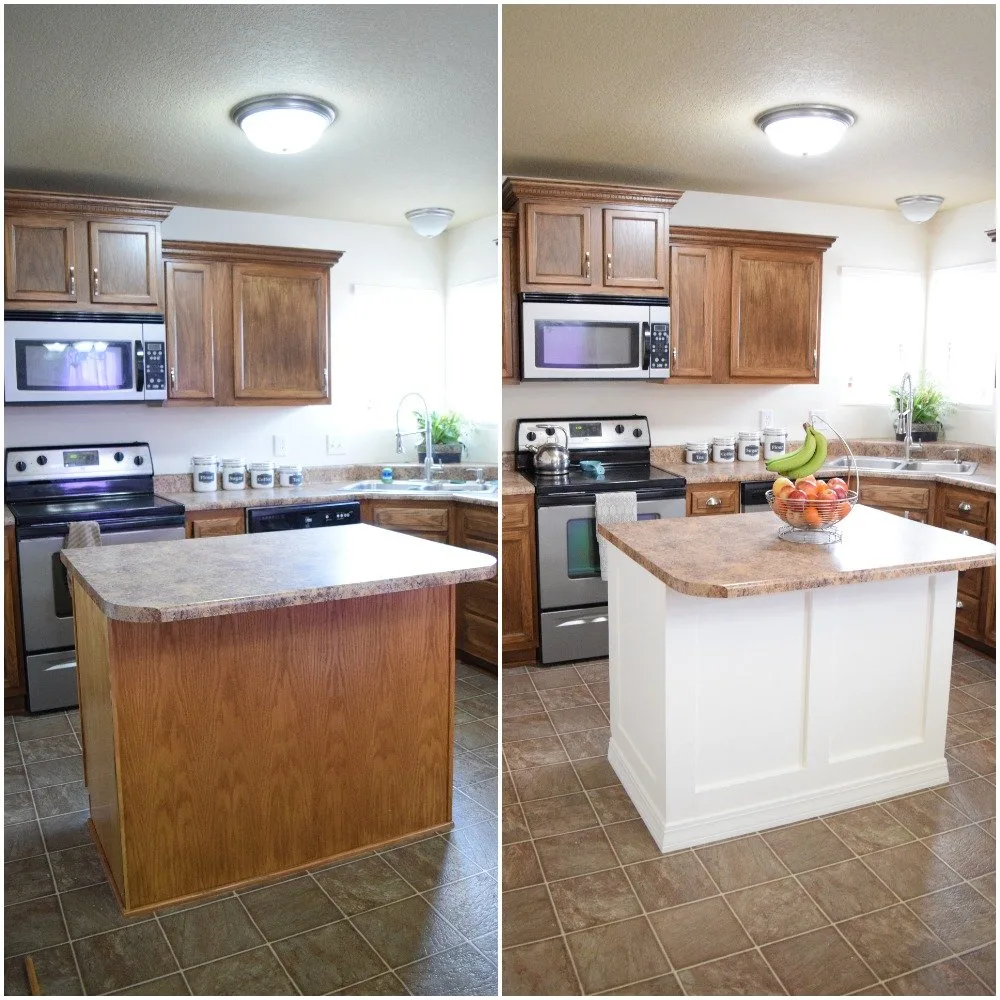
Here is my before and after shot, showcasing the island.

What do you think? Leave me a comment below! I’d love to hear your thoughts!
Easy to Use Tools for the Project:


Add Moulding to a Builder Grade Kitchen Island: An Easy How-To

Kelly Dee Ramos
Wednesday 4th of February 2026
It's gorgeous!! Love it.
Lauren
Monday 9th of February 2026
Thank you so much!!
Cindy
Monday 22nd of July 2024
Why did you use oak AND poplar? If you’re painting it shouldn’t matter versus staining.(I think) I want to do this but stain not paint. I ask because I know different wood stains differently. My island is oak.
Lauren
Monday 9th of September 2024
Hi Cindy! I used oak and poplar because thats what I could find in the sizes I needed. And you're right, since I was painting, it didn't matter that they were different types of wood. But if you're staining, you definitely need to get the same type of wood. And ideally, it'll be the same type of wood as the cabinet. Now, are you building the island yourself or starting from an unfinished island? If you're trying to match the stain of the island, its definitely possible, you'll just need to try some sample stains (and maybe mix or layer them) on the backside of your trim pieces. Good luck!
Michelle H.
Thursday 24th of February 2022
Awesome! And very thorough ( step by step) instructions, tools required, paint recommendations, pictures, and more!!!
Lauren
Monday 7th of March 2022
Thank you Michelle!
Sabrina
Tuesday 8th of February 2022
Beautiful! Clear instructions too. Just what I need. Never done this, but now inspired to give it a go!
Lauren
Tuesday 8th of February 2022
Thanks Sabrina! You can do it!
Stephanie
Friday 24th of September 2021
Did you have any issues with your 1/4” panels warping once painted?
Lauren
Saturday 25th of September 2021
Hi Stephanie! I haven't had any issues with this. Are you seeing this? Or just concerned that it could happen?