
Painting tile floors is an inexpensive and relatively easy way to update the look of your existing floors.
It only takes a few hours at most to complete the project, plus time for the paint and sealer to dry.
There are a lot of questions that need to be answered before you decide whether this is a good option for your tile floor. I’ll discuss the answers those questions here, and then show you how I painted my tile floor using Rustoleum Home Floor Coating.
Can You Paint a Tile Floor?
Yes – you can! Painting a tile floor is actually pretty easy if you have the right product and materials.
If your tile is outdated, you hate the color, or you want to change the look of the room, you can paint your tiles to completely makeover your space. But, the tiles need to be in good shape, with the tiles and the grout intact, to do this.
If your tiles are chipped or your grout is crumbly, you should not try to paint them. You will first need to repair or replace any chipped and cracked tiles, and re-grout any crumbling grout lines.
But just because you can, I think the next question to be answered is whether you should paint your tile floor.
Before you paint your tile, you need to consider whether you can stay off the area for at least 30 hours. For example, if you only have one bathroom in the home, it may be hard to paint your bathroom floor unless you do it prior to going out of town. If you can’t, you probably shouldn’t paint your tile.
So to summarize, painting your tile floors is a really good idea if your floors are in good shape and you want to update the look of your room without spending a lot of money!
Do Painted Tile Floors Last?
If you paint your tile floors, you can expect that this might not be a extremely long term solution. Painted tile floors can last for a couple of years, but like all painted surfaces, eventually they will need redone or replaced.
This is especially true if you are painting a floor, because floors are constantly scruffed, scraped and walked on.
All that abrasion on the floor can cause the paint to chip and scratch.
Additionally, you may find that painted tile floors can peel if they are in a damp environment, such as a bathroom.
But, painting your tile floors is an awesome shorter term solution. Additionally, because it is so inexpensive, it is a great option to try out while you’re saving for a new floor.
Using the right product is critical in ensuring that your painted tile floors last as long as possible.
Do You Have To Sand Tile Before You Paint It?
You might! Some products, and some tiles, requires that you sand the glossy sheen off prior to painting.
The product I used had you do a test to determine whether you need to sand first. You painted a small, inconspicuous spot, let it dry, and then scratched an X in it. Then, it instructed you to take a piece of duct tape and stick it on. After pulling it off, if 10% or more of the paint was removed, the product guide recommended that you sand your floor first.
Do You Need To Prime Tile Before Painting It?
It depends. If you used a regular paint product, you are definitely going to have to prime first. You want to make sure that the paint really adheres to the floor tile, and proper preparation is key.
But, if you use the product I did, it does not require priming. Just clean the floor really well and you’re ready to paint!
What Tools and Materials Do You Need to Paint Tile?
Here are the things you’ll need if you want to paint your tile:
You can use only a brush to paint your tiles, but I find that using a roller gives a much smoother finish and eliminates the chance of having brush lines in the paint.
In fact, I only used a foam roller to paint my tiles.
Do You Need Special Paint to Paint Your Tile Floors?
I have seen people paint their tile floors with everything on the market. People claim success with chalk paint, wall paint, and even craft paint.
While I think that you can find some initial success with these different products, the best way to ensure your painted tile lasts as long as possible is to paint it with a product that is specially designed for painting tile.
Recently, I tried out Rustoleum Floor Coating. I wanted a product that was made for painting floors, because I really wanted to use the best tile paint for my project.
I didn’t want to have to replace my floors any time soon, or to have to repaint them. I figure that a product made for floors and by a company as well-regarded as Rustoleum, was a good place to start.
Rustoleum Home Floor Coating
Rustoleum floor tile paint, or Rustoleum Home Floor Coating, is a newer product that promises to transform interior tile, vinyl, wood, and more.
It is a floor coating that can go over top of a number of existing finishes to make them look new again.
This two product system consists of a paint product (step 1) and a sealant (step 2). You can buy them separately, or just pick up a kit that has both products in it.
Since I had a tile bathroom that hadn’t had new flooring since the 70’s, and I’m always game to try a new DIY, I decided to give it a try.
How I Painted My Ceramic Tile Floor
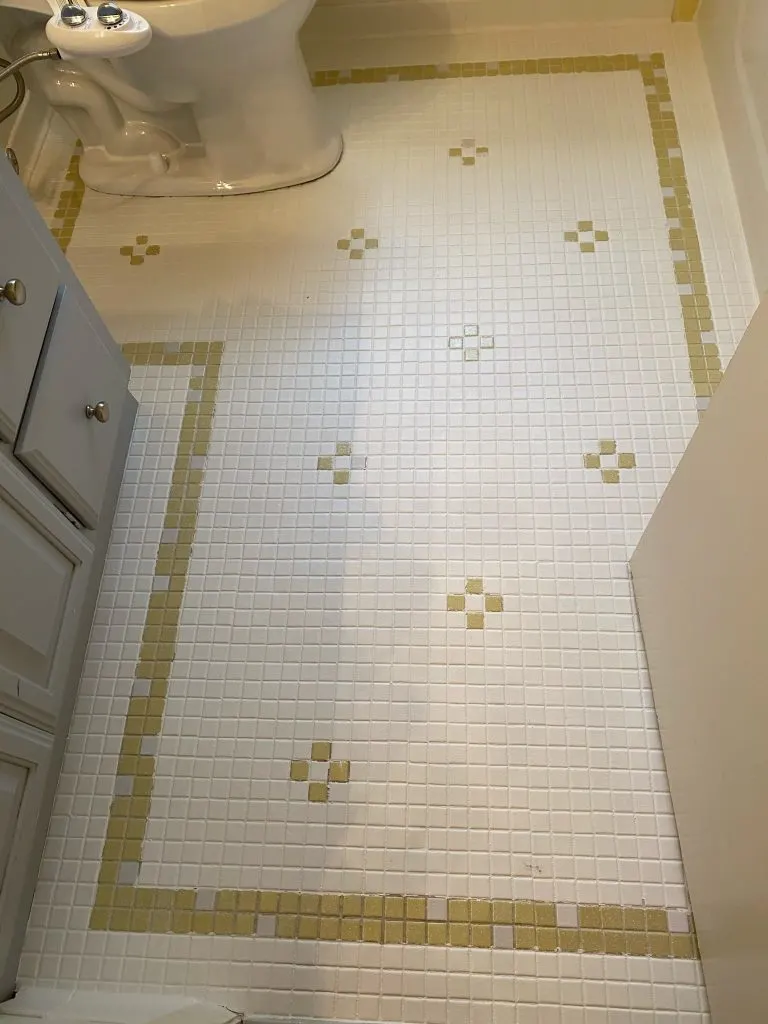
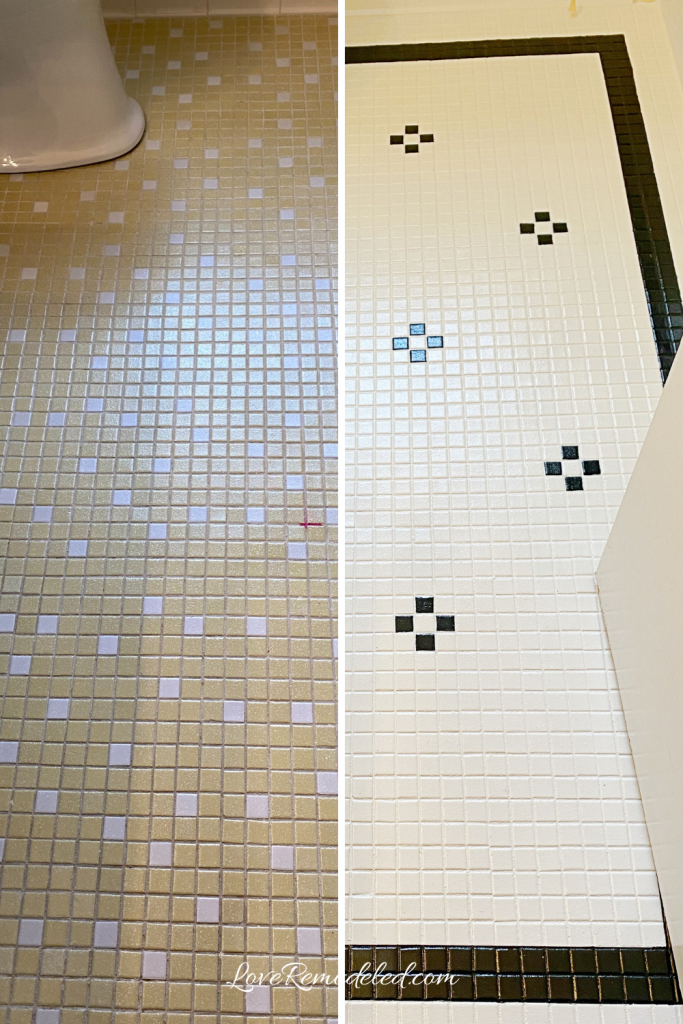
In my home, I had a bathroom tile floor that was in great condition, but dated. The tiles looked perfect, but were a dingy yellow color that I didn’t love.
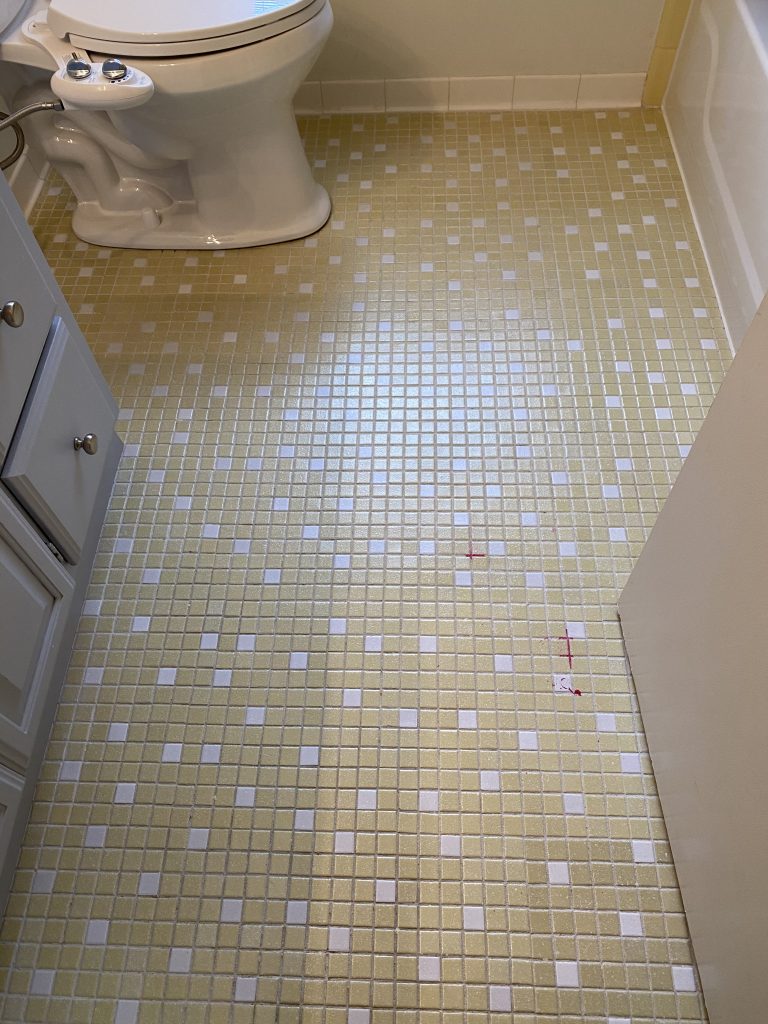
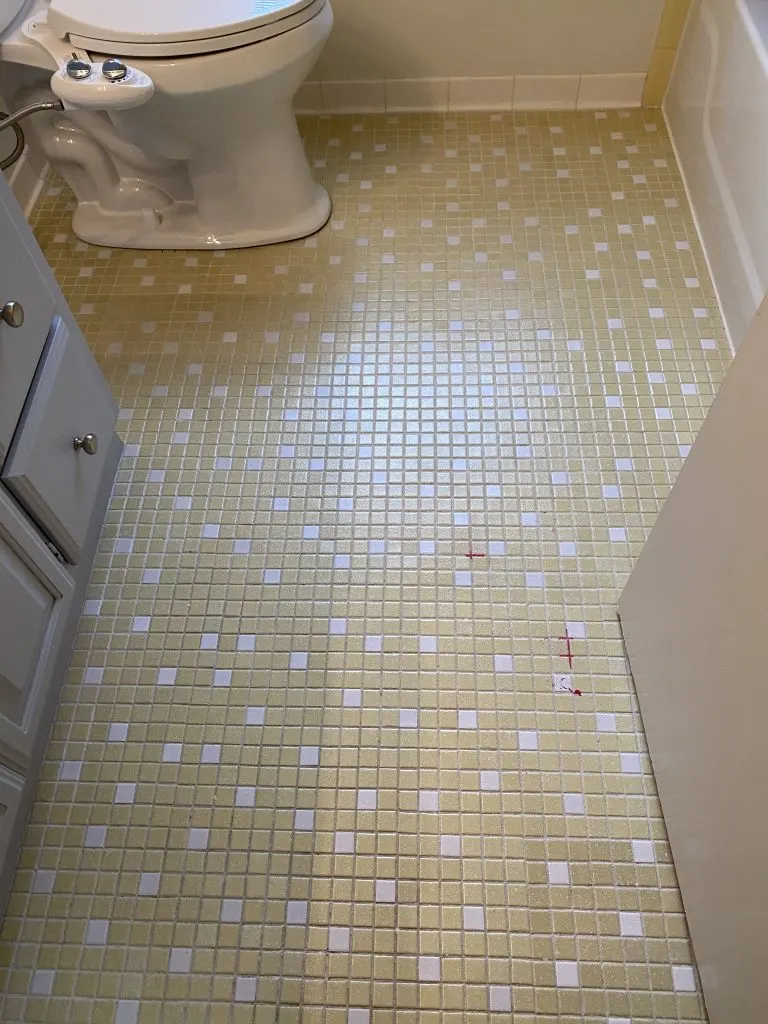
Oh, and my three year old had painted her nails in there… and knocked over the bottle.
Additionally, I had painted the grout about a year and a half ago, but it needed touched up again.
A few months ago my husband had brought home Rustoleum’s tile painting kit, and it had been sitting there waiting for me to begin. With most of the kids gone for the afternoon, it seemed like a good time to try it out.
STEP 1: Preparing the Tile for Paint
I started by vacuuming the floor to get any debris up. Then, I cleaned the entire floor with Soft Scrub cleaner, because it has a degreasing element to it. After, I rinsed it several times with water to make sure not residue remained. Finally, I vacuumed the floor again just in case there was any debris left.
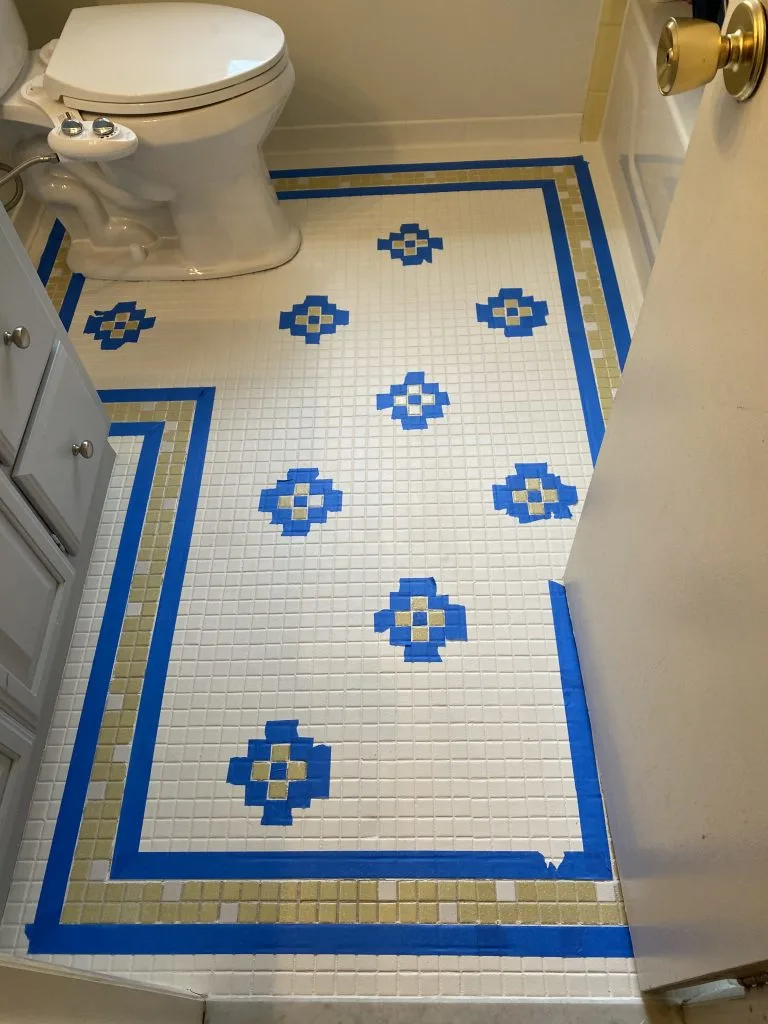
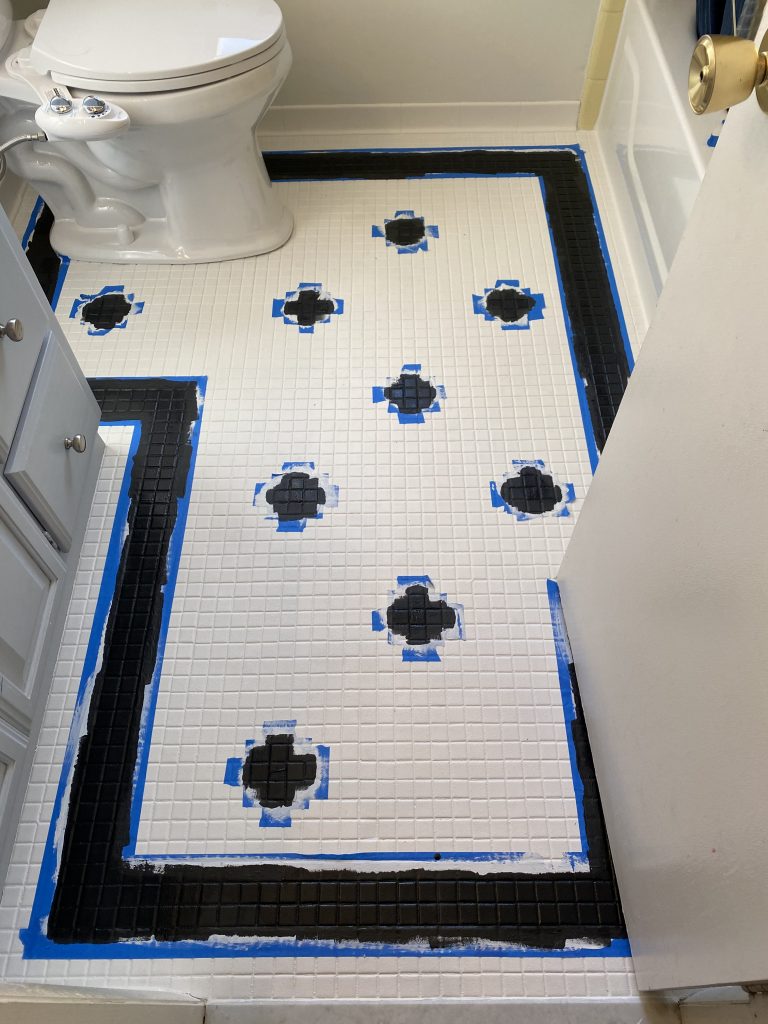
Once I was sure that the floor was clean, I taped off the tiles to make the pattern I wanted. If you are not planning on doing a pattern, you do not have to do this step.

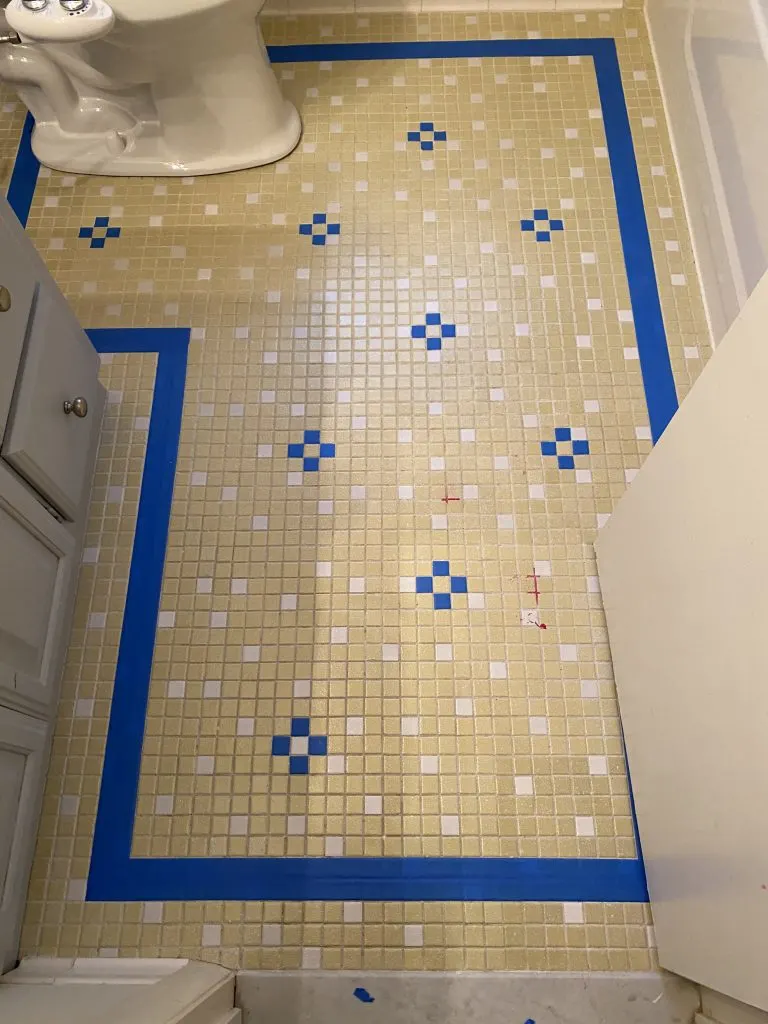
You will want to use blue painters tape to tape around any cabinets, showers and toilets. Even if you’re a really good painter, it just makes it easier, and then you can use a roller for everything instead of switching between a roller and a paint brush.
A Note About Making A Pattern with Floor Paint
Making a pattern on my flooring made this task MUCH harder and MUCH more time consuming than if would have been if I were just painting it all one color. If you want to make a pattern on your floor, make sure that you apply the tape on the top of the tiles as much as possible, and not on the grout unless you’re covering multiple tiles. Also, really take your time taping to get it perfect. The time you spend on the taping step will pay dividends later when you don’t have to do as much touch up.
STEP 2: Painting the Ceramic Tile
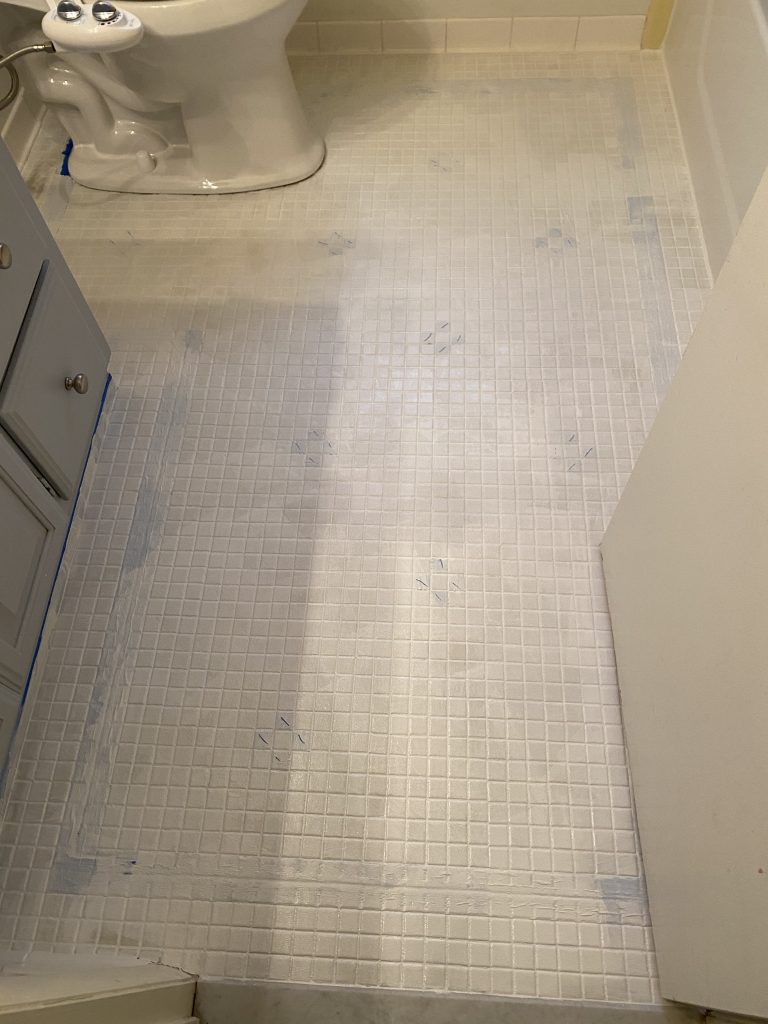
Once the floor was dry, I used a 4 inch foam roller to apply the paint to the tiles. I went in small sections, like the directions suggested, and covered the tile with a thin but adequate coating.
I was impressed by how pigmented this paint is! It really covered a lot with one coat. Rustoleum recommends two coats for the white paint though, and it did need that second coat.
This is how it looked after the first coat of paint on the tile:

I let it dry for 6 hours, like the can recommends, and then painted a second coat.
If you are not painting a pattern on your tile, you can skip to Step 4.
STEP 3: Painting the Pattern
Because the second coat completely covered all the paint, I made sure to make a little mark in the wet paint on the tape lines so I knew where to peel off.
After this second coat of tile paint dried, I peeled off the blue painters paint. This is always scary – you don’t know if it will peel all the paint off with it, or whether you’ll have tons of paint under the tape.
Here is how it looked:

Not too bad!
The tile paint stuck right to my glazed ceramic tiles without sanding or priming first! And, it didn’t peel up on the side where I took the tape off! I was definitely impressed now.
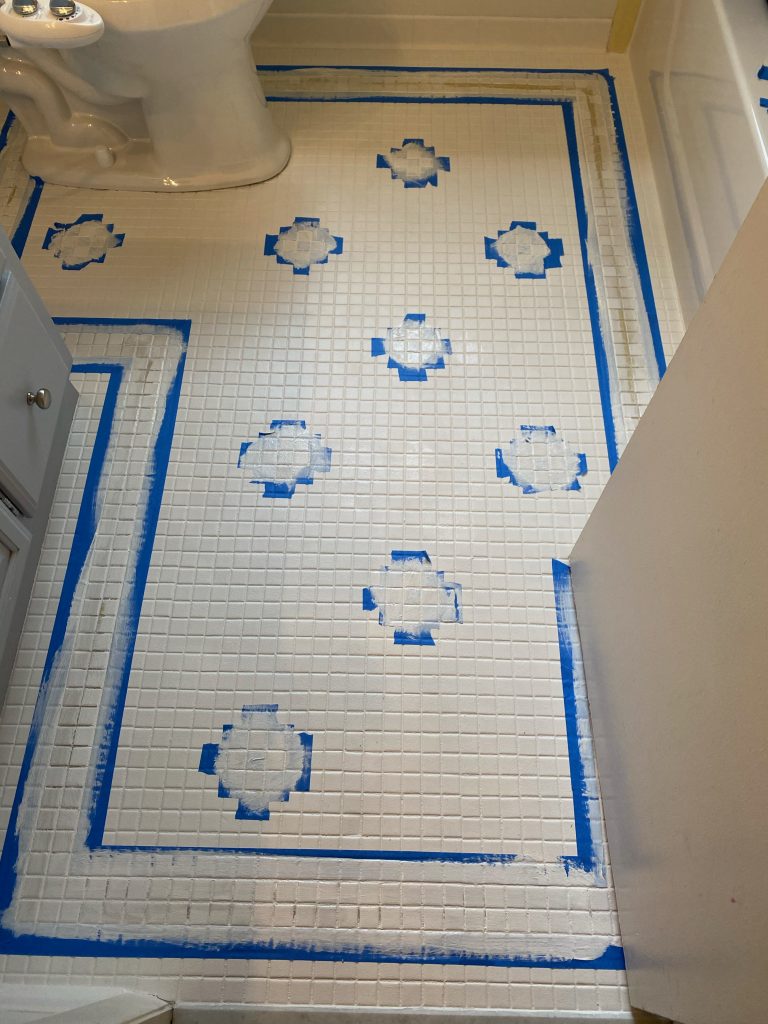
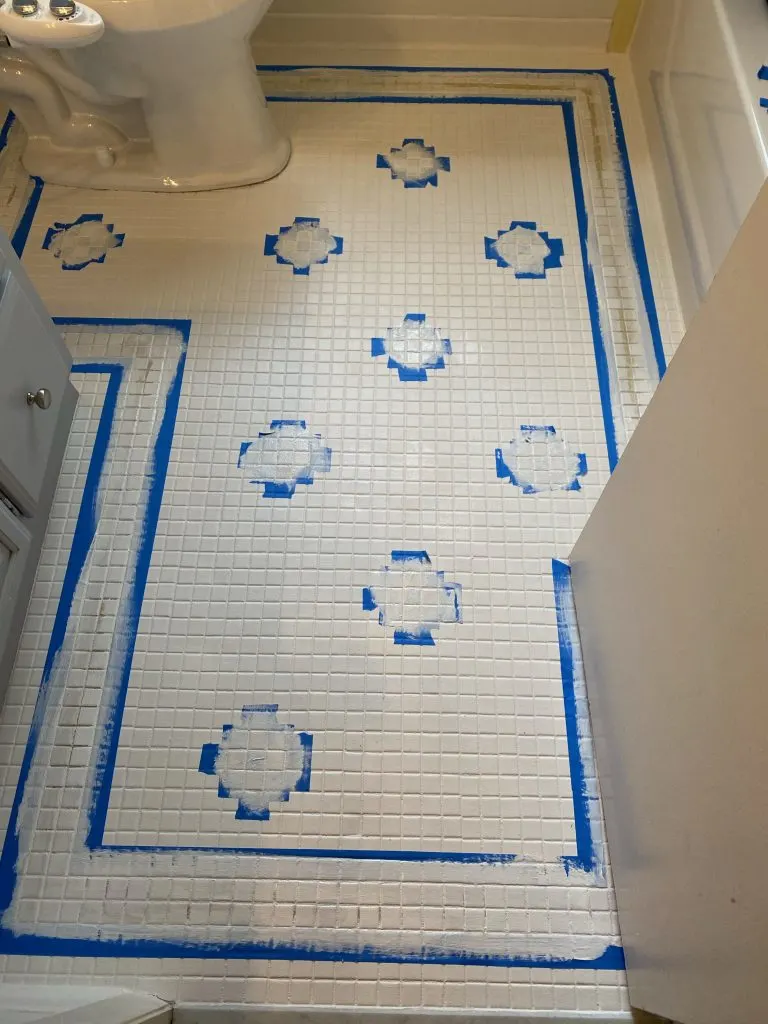
So I began to retape the lines on the other sides. This would ensure that the black paint I applied went on the unpainted tiles.

But before I was ready for black paint, I had to seal the tape. This is a little painter’s trick to help make sure you get crisp lines when painting two colors right next to each other.
To seal the tape, I painted a coat of the white paint everywhere where the blue tape met the unpainted tile.
Then, I finally painted with the black paint.
Again, this stuff was super pigmented and only required one coat to get a really dark finished look.

I waited the 6 hours for this coat to dry, and then pulled the tape off.
And found a DIYer’s catastrophe:

Thankfully (unfortunately?), this is about my millionth DIYer’s catastrophe, so I got right to work fixing it and completely skipped over the despairing step.
To fix it, I found a tiny craft paint brush and painted over all the stray marks.
And then had to do it a second time.
And then a third time.
And then I had to paint black over the places where I got white paint on the black paint.
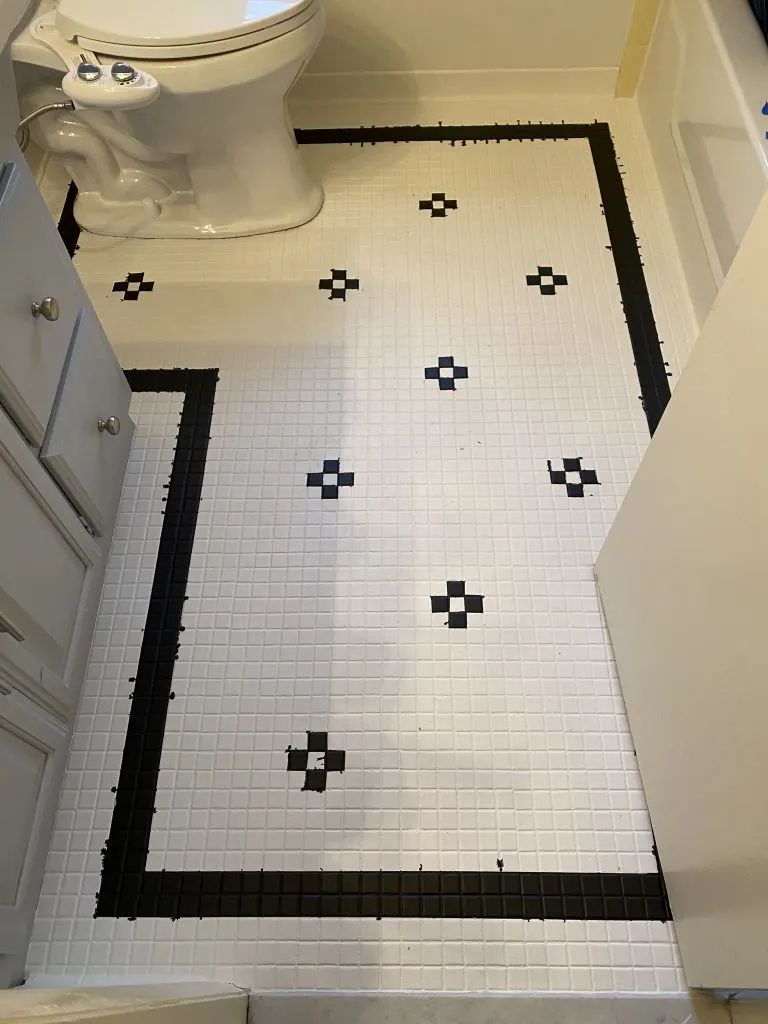
And then I asked my husband how it looked. He said that I needed to paint the grout lines around the designs in the middle. And he was right.
If you’re painting all of the tile the same color, you can paint the grout lines as well and it’ll look nice. But, if you’re painting a pattern just a few tiles, you really need to make sure the tape is only exposing the top of the tile and not the grout.
When I taped them, I had put the tape in straight lines around the tiles, but they were covering the grout. So the squares didn’t look like crisp, clean squares, and definitely looked like they were painted.
And so I went ahead and just did the whole despairing step after all, because after all that work it still wasn’t perfect (or even good).
After that, I got back to work, and painted the grout lines in the designs. It was fairly hard and super tedious, and took three coats to cover the black lines.
But finally, it look pretty good.
If you are painting a pattern on larger tiles, like 12×12 sized ones, you can use stencils to get the pattern just perfect, and I don’t think it would be nearly as difficult. The main challenge came because the tiles were so tiny, and there was just so many grout lines that were hard to seal off.
STEP 4: Sealing the Painted Tile
I vacuumed the floor really well again, and even wiped it with a damp rag. If you don’t spend hours on the floor painting a pattern on it, you won’t need to do this.
I applied the sealer using a clean foam roller. I rolled a thin layer one, working my way out of the room, and made sure to use my finger to get any debris out of the finish before I moved on from each section.
As the product guide directed, I let it dry for 24 hours before walking on it, though it seemed dry way before this.
To be fully cured, the product takes 7 days, so only light use is recommended for a full week.
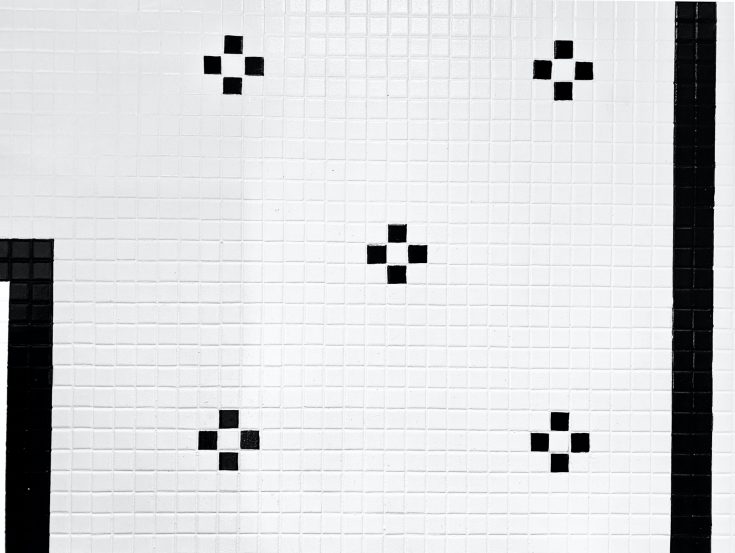
Here is how the painted floor tiles turned out:
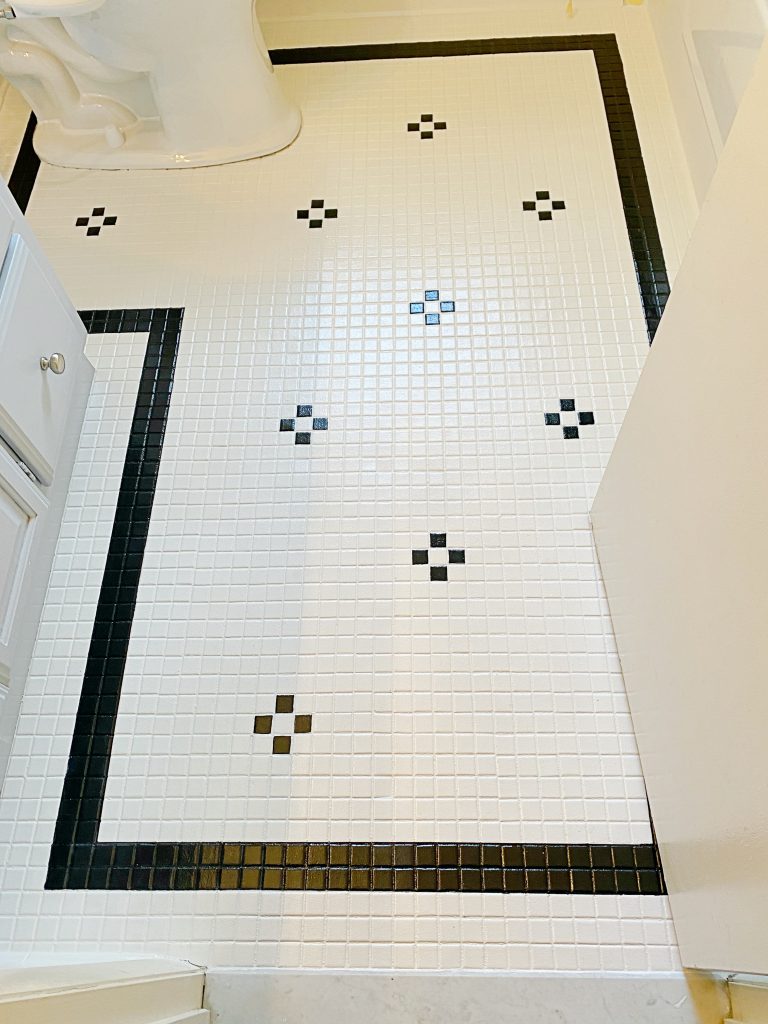
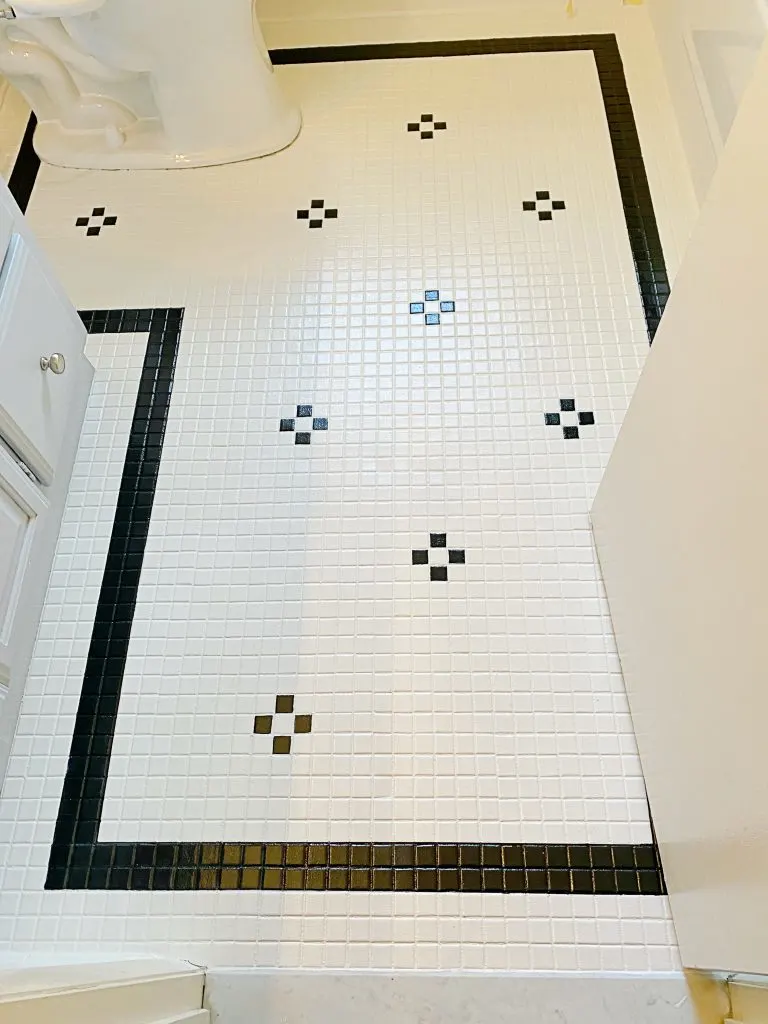
See that nice shine that the top coat provides?
Rustoleum makes two finishes for the top coat: matte and semi-gloss. I went with the semi-gloss to help hide any painting imperfections in my pattern.

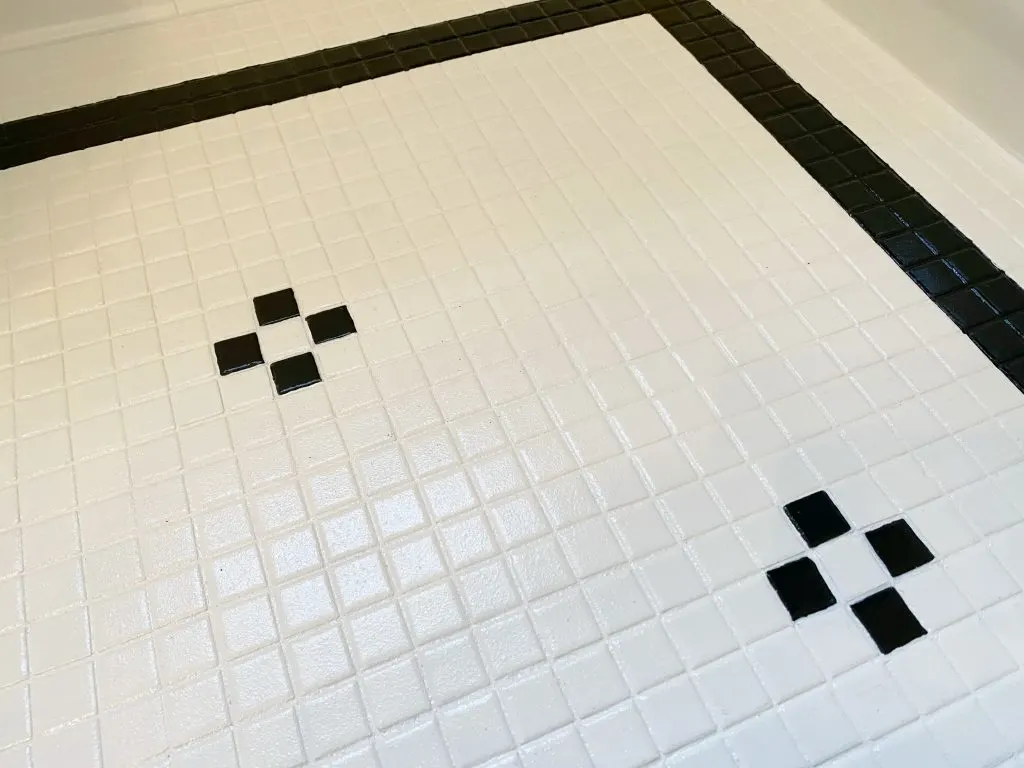
I really love how it looks! The finish is hard and strong. I can’t scratch it even when I try.
It really transformed the look of the bathroom (though I’ll do a full reveal of the bathroom after a few more DIYs).

Final Thoughts on Painting Tile
Painting tile is a cheap way to update a stained or outdated ceramic tile floor. It is easy to do (especially if you’re only painting one color. Plus, it only takes a few hours of actual working time.
Based on my experience painting tile, I would definitely recommend Rustoleum Tile Paint for your project. The coverage was amazing and the sealer dries to a hard, glassy finish.
If you’re looking for other inexpensive ways to update your floor tile, check out this post on painting grout. Instead of painting the whole tile, you can paint just the grout lines to give the floor a refreshed look.
If your floor just needs a complete overhaul, check out this post on peel and stick floor tiles. They are SUPER easy to put down, and make it look like a brand new floor (because it is!).

Painting Tile Floors - A How-To for Using Rustoleum Home Floor Coating
How to paint your ceramic tile using Rustoleum Home Floor Coating.
Instructions
- Thoroughly vacuum the floor.
- Clean the floor with a degreasing cleanser.
- Tape off any areas you don't want to get paint.
- Using your foam roller. paint a thin layer of paint on the floor, working in small sections. Be sure to start at the innermost area and paint you way out of the room. Allow it to dry for 6 hours.
- If needed, paint a second coat. Note that a second coat is required for Rustoleum's white floor paint, but is not recommended for their dark colors.
- After the paint has dried for 6 hours, use a foam roller to apply the sealer. Work in small sections, starting with the innermost corner of the room.
- Allow the sealer to dry for 24 hours before you walk on it. Product takes 7 days to fully cure.

Amy
Friday 13th of May 2022
I have been looking and looking for a tutorial on these tiny tile floors! I didn't want an all over stencil because the bathroom adjoins our kitchen which has a busy linoleum tile!! I'm hoping to tackle this soon.
Lauren
Friday 13th of May 2022
Good luck Amy!!
Mike Weyer
Wednesday 30th of March 2022
?can asphalt tile floors in a commercial building be painted and or be recommended to do to hold up on wear & tear ?
Lauren
Thursday 7th of April 2022
Hi Mike! I'm fairly sure this product would not hold up to commercial use. Sorry!
Alison
Sunday 23rd of January 2022
Hi! How is the white holding up? Did you use one layer of top coat? I used this in white on my bathroom floor too with one top coat. The white seems to get "worn" and looks dirty. I can't clean the smudges. Any advice on this would be great. Thank you!
Lauren
Wednesday 26th of January 2022
Hi Alison! The white on my floors did get dirty easily. I could scrub it to look better, but eventually, some of the paint started to come off in places. Some places could be scrubbed forever and no damage was done, but in other places, it peeled off a bit. I think probably the prep wasn't as good on some spots perhaps, and that caused the adherence issue? It didn't peel off in big spots, just a little chip here or there. I did just one layer of top coat, if I remember correctly. If I didn't mention doing more in the post, then I definitely only did one.
Tirzah L Hailey
Friday 10th of December 2021
Thank you for that step by step. I was looking to paint my wooden floors in my son's room after mo ing out. They are a wreck. But ne er thgt I could do the same with the bathroom & dining room linoleum. Cant wait to start with the help of this article.
Lauren
Wednesday 15th of December 2021
Hi Tirzah! I hope it works for you! You may want to check a hidden place on the linoleum to see if it sticks before doing the whole floor. Good luck!!