
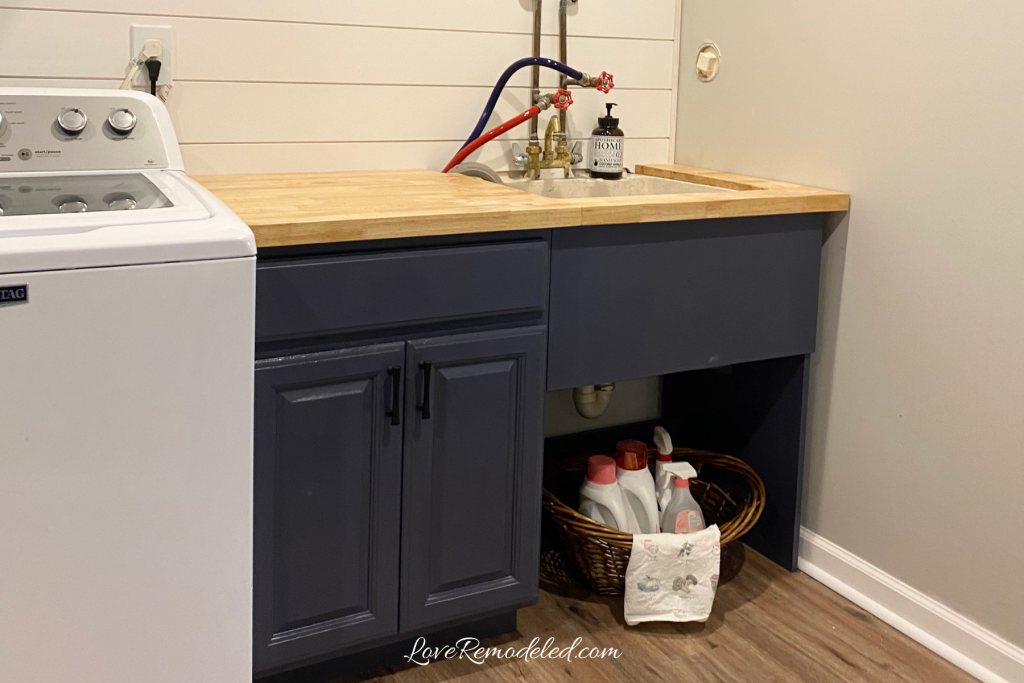
Creating a cabinet base to go around your utility sink is a great way to add some style to room, while hiding any unsightly pipes or the sink itself.
This tutorial will teach you how to create a faux utility sink cabinet using a few pieces of wood. It is a fast and easy DIY job that just about anyone can do.


This post may contain affiliate links. If you have any questions, please see my disclaimer page.
My Utility Sink – Before the Cabinet
Recently, I completed a laundry room makeover. As part of this makeover, I added cabinets to the space and wanted a cabinet to wrap around my utility sink to hide it.
The utility sink is an old one – circa 1975. It is an off-white plastic tub with flecks of pink and blue in the finish. While it is perfectly functional, it is not exactly beautiful.

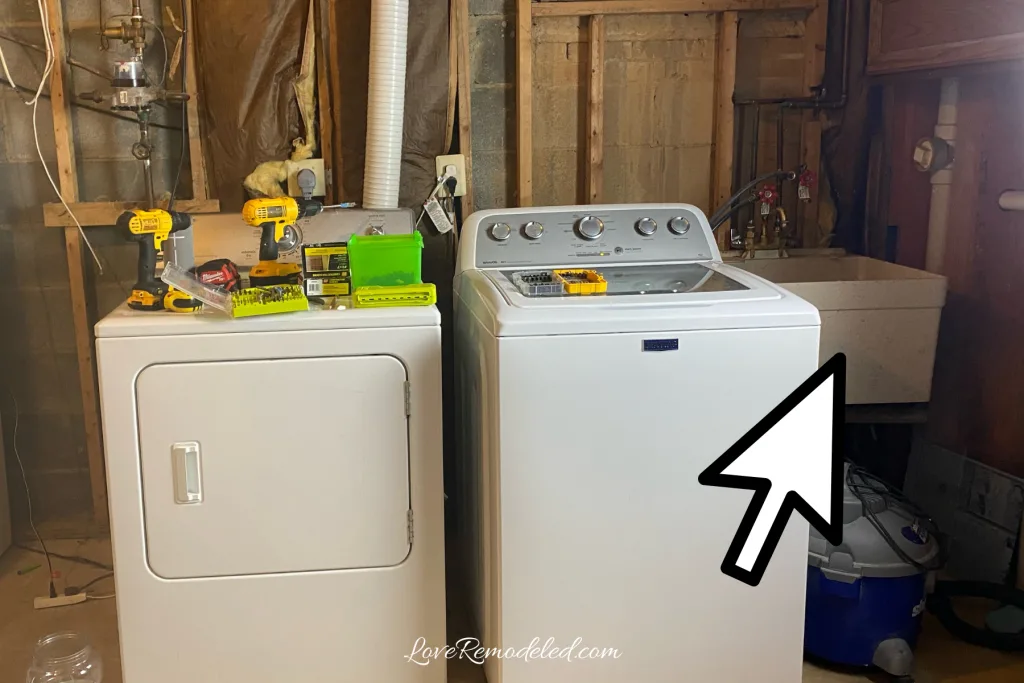
Since I like to use what I have when it still works, I decided that the best way to make this sink work in my space was to create a wood cabinet that would fit around it.
This would hide the sink, provide a base for a countertop to wrap around the sink, and would make a seamless look along that wall.
The cabinet that I created is just a basic frame, so it can fit around any type of sink. So without further discussion, here are the steps to making a utility sink cabinet.
How to Make a Cabinet to Hide Your Utility Sink
The idea behind this type of sink base is to make a frame that can slide into place around your utility sink.
Because of this, I assembled the whole sink cabinet separately, slid it into place around the utility sink, and then attached it to the cabinets beside it.
Here is how I assembled the utility sink base.
Make a Utility Sink Cabinet Step 1 – Making Legs
Begin by measuring how high your sink cabinet needs to be. If you’re attaching to other cabinets, like I did, you can make the legs of your sink cabinet the same height as the cabinet.
If you are not tying it into existing cabinets, you can just measure how high the sink is and then decide whether you want the countertop you put on top of the frame to be higher, lower, or the same height as the top of the sink.
To make my utility sink cabinet legs, I used a piece of sanded plywood for the one side. The other side was already there from the existing cabinet. If you don’t have an existing cabinet, you would make two cabinet legs with sanded plywood.

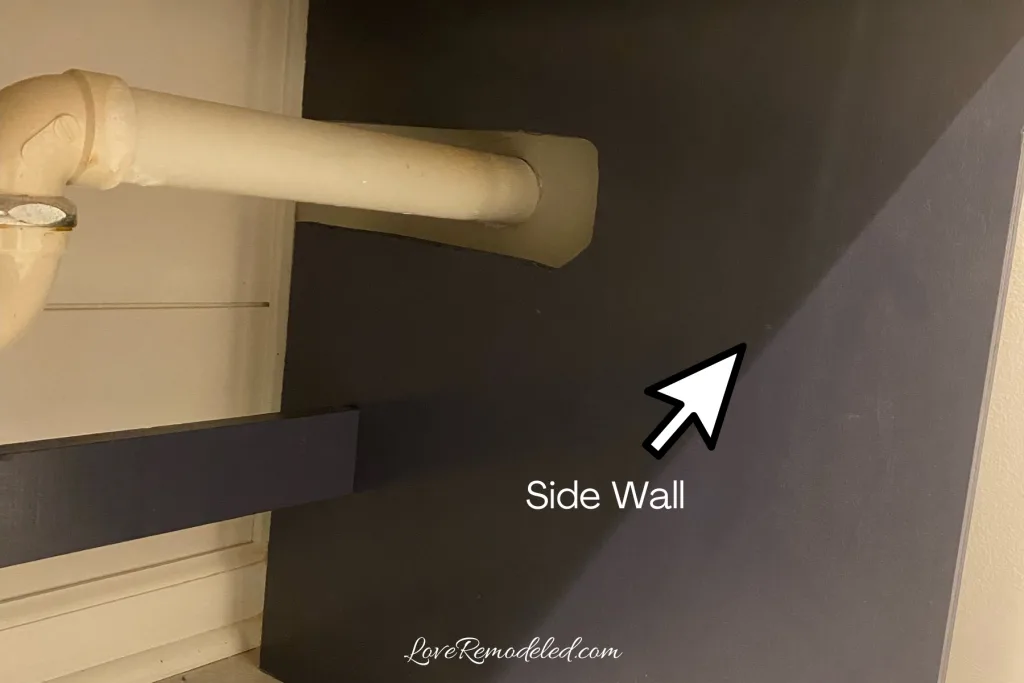
On that one leg, I need to make a cut out for a drain pipe, so I did that using my jigsaw.
Make a Utility Sink Cabinet Step 2 – Support Pieces
The next step of making the utility sink cabinet was to create horizontal support pieces to attach the two sides of the cabinet together.
These support pieces are crucial to make sure that the frame is strong.
I put a piece across the back (cut to a width wider than the sink cabinet) and screwed it into one side of the sink cabinet, making sure that it was low enough to clear the pipe coming out of the bottom of the sink.
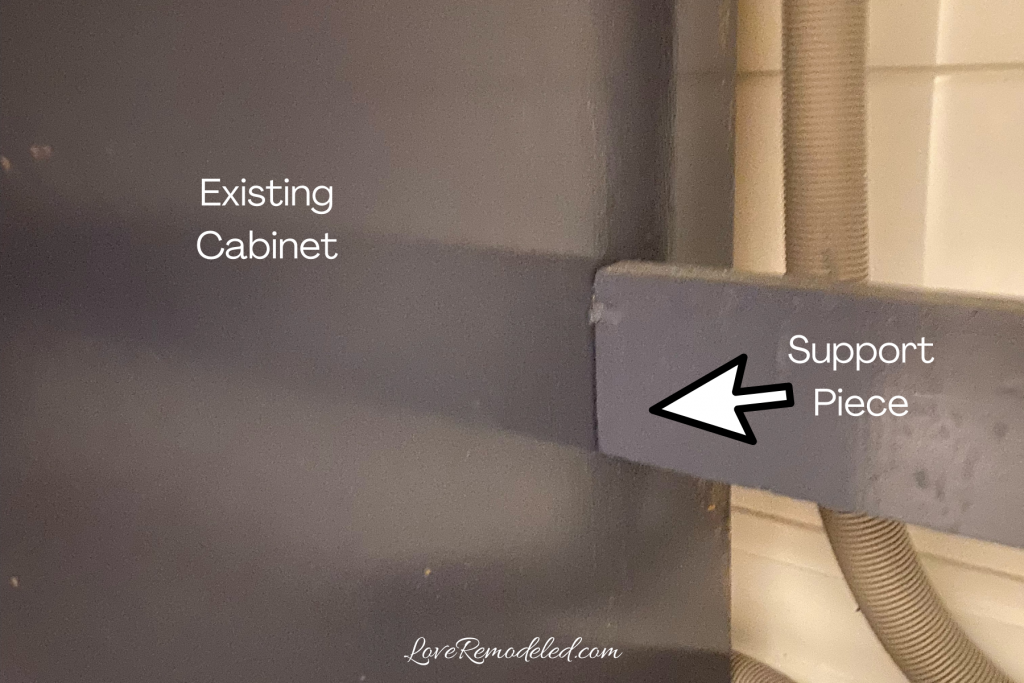

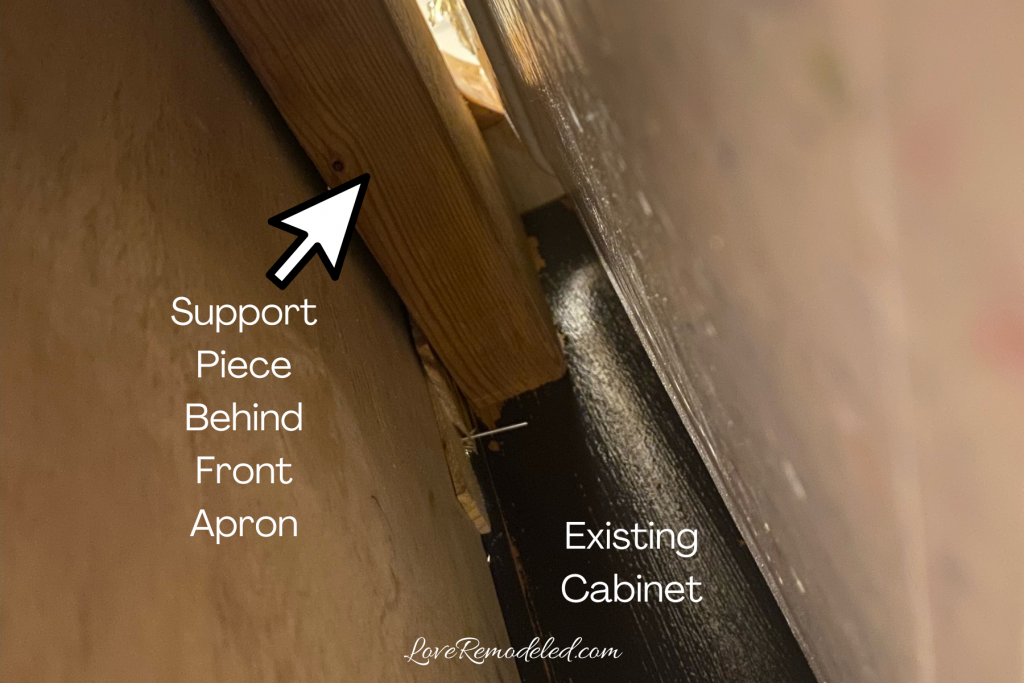
Using the same measurement, I cut another support piece to go along the front of the sink cabinet. This piece is used to create a place where you can nail the front apron piece to. So, it is set back 3/4 of an inch to make sure the front of the sink base is flush with the cabinets beside it. I screwed this into the same side as the other piece.
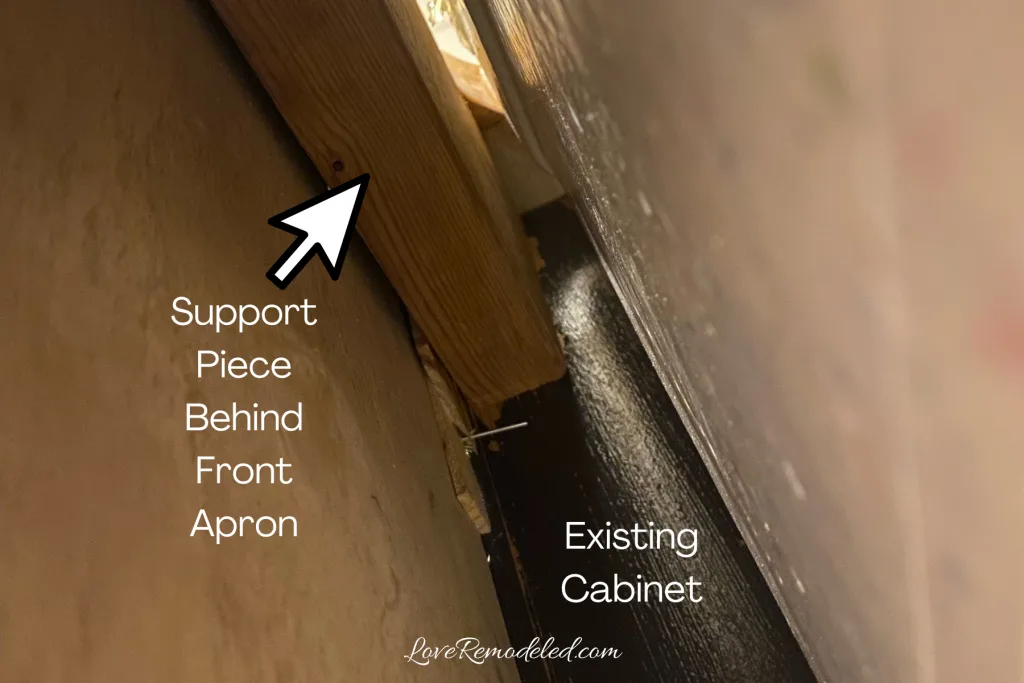
Now that the two support pieces were done, I slid the side wall into place and attached the two support pieces to the existing cabinet using screws.
If you’re not tying your sink base into a cabinet, you can just attach it to the other wood side you made. Then slide it into place.
Make a Utility Sink Cabinet Step 3 – Front Apron
To create a front apron, I again used a piece of sanded plywood.

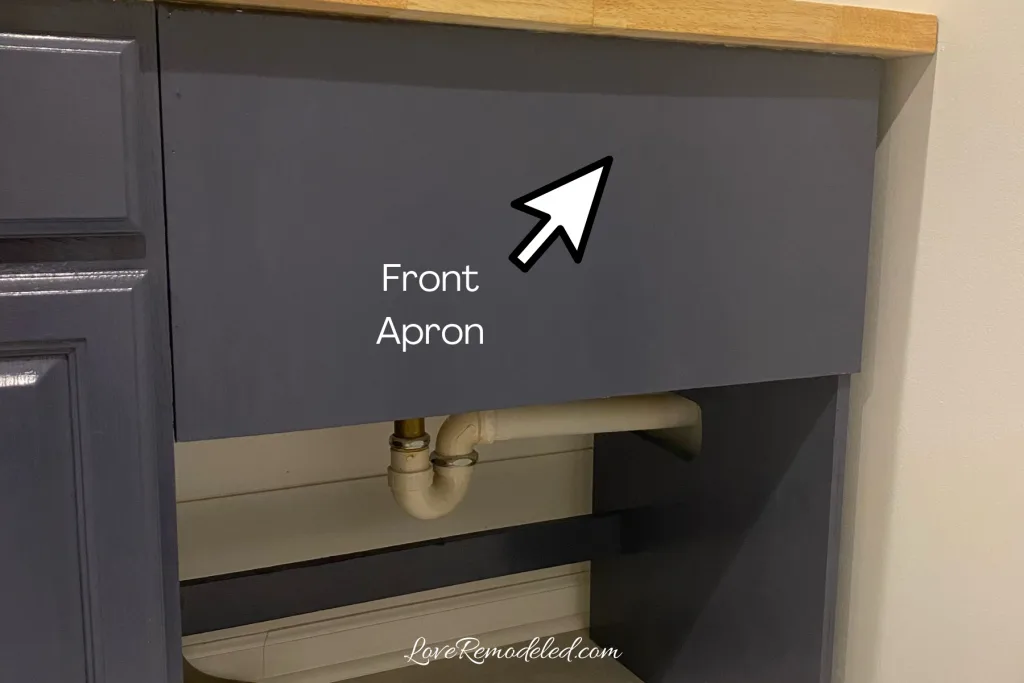
I cut it to the measurement of the back support pieces PLUS the width of the side wall, and nailed it into place using my finish nailer.
(I LOVE my finish nailer, but if you don’t have one and don’t want to invest in one, you can either screw it in from the back using a shorter screw, or use finish nails and a nail set to give it a professional look).
Make a Utility Sink Cabinet Step 4 – Finishing
The next step to making a utility sink base is to finish the wood. Whether you choose to stain or paint your utility sink base, you’ll need to give it a sanding first.
For my cabinet, I painted it Hale Navy to match my cabinets.


Make a Utility Sink Cabinet Step 5 – Countertop
For a countertop, you have a few options. You can use butcher block like I did, purchase a laminate countertop, or use a piece of sanded plywood.
No matter want you use for the countertop, you’ll need to cut out a U-shaped hole for the sink (or a whole in the shape of your sink). If you can, lay it on top of your sink and stencil around the sink top from underneath with a pencil to get the exact cutout dimensions.
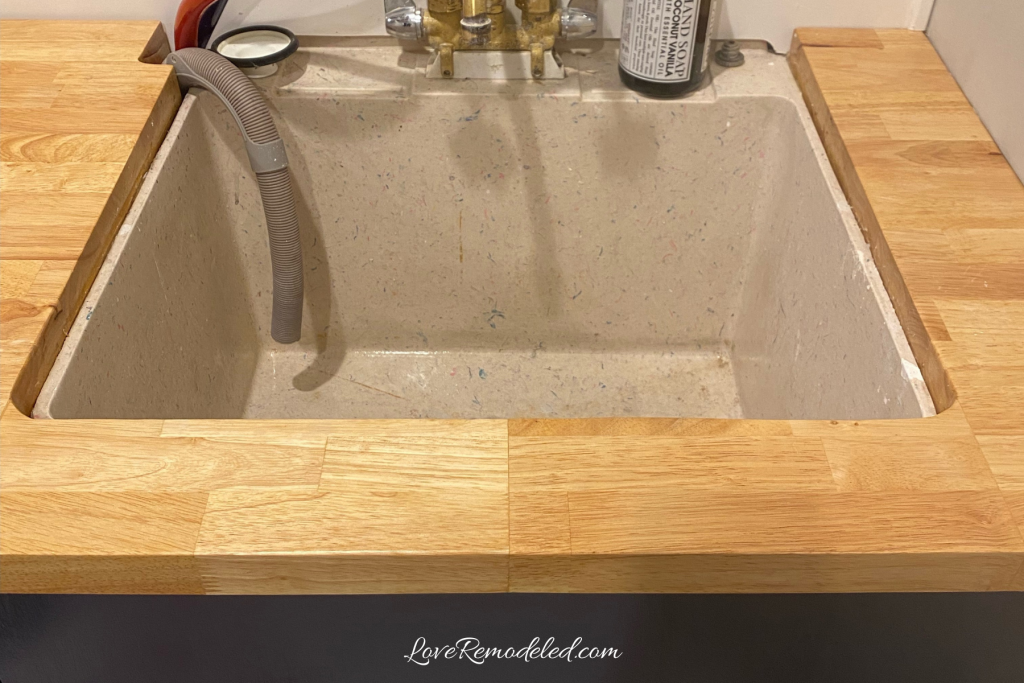
Otherwise, you can just measure your sink top and cut accordingly.
Probably the easiest way to cut the top is to use a jigsaw.
I sealed my butcher block with a poly, but you can also use paint or stain (and a sealer) on your sanded plywood.
Before you attach the countertop to the faux cabinet, set it on top and use a level to make sure it is level. Put the level front to back and side to side. If you find that the cabinet is not level, you can use shims between the cabinet and countertop bottom to raise certain areas.
Next you will attach the countertop to the faux cabinet that you made by applying a bead of caulk to the top of the cabinet and pressing the countertop down onto it. If the countertop is not level, this is the time to put the shims in. You cannot do this after the caulk dries.
Final Thoughts on Hiding a Utility Sink

Creating a faux cabinet to go around your utility sink completely changes the look and feel of your laundry room (or wherever your utility sink is).
It makes the space look intentional and lends a bit of style, instead of it just being a utilitarian place. This simple DIY requires a few pieces of wood and a couple of screws.
If you’re looking to elevate the look of your utility sink, making a sink cabinet is a great way to do it!
Want to see the rest of the laundry room remodel? Check it out!

