
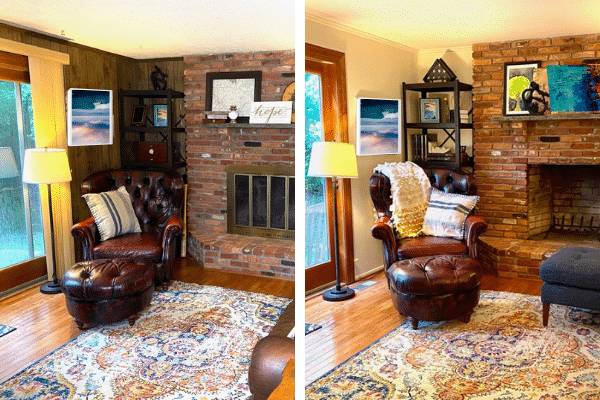
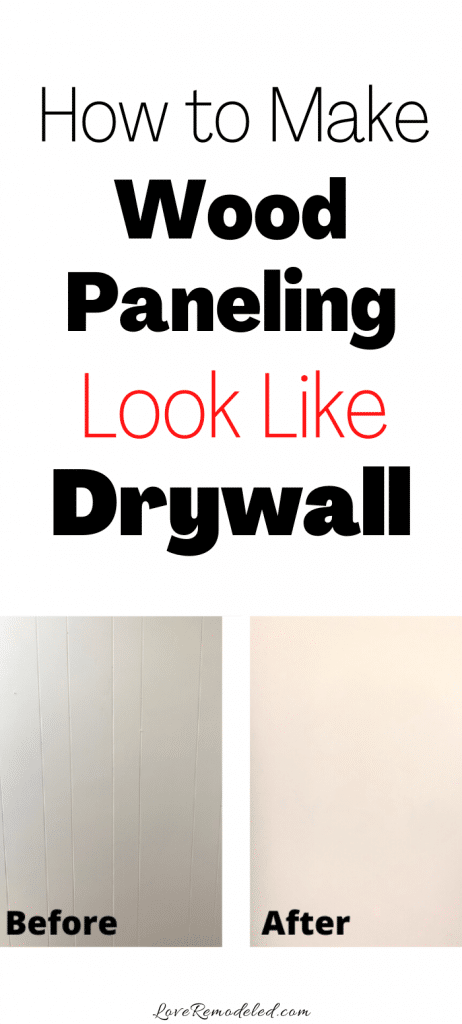
Making wood paneling look like drywall is an easy project that almost anyone can do. Turning your paneled walls into a smooth wall gives the room a much more modern, updated look.
This post may contain affiliate links. If you have any questions, please see my disclaimer page.
How To Make Wood Paneled Walls Look Like Drywall
To make your paneling look a smooth wall, you need to fill in the seams. If you have a large area that has wood paneling, this will take a bit of time, but the results are amazing.
Here is my wall before and after I filled in the seams:
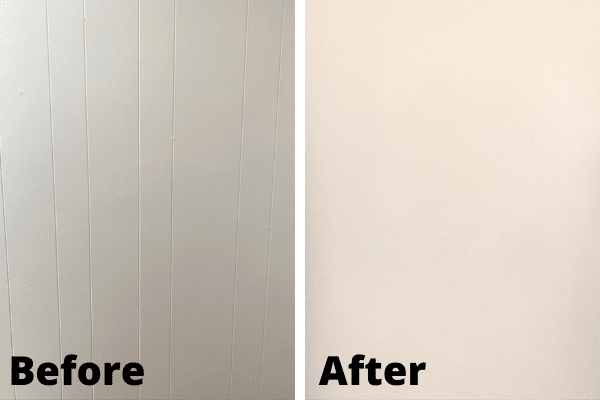

You would never know that this wall was actually wood paneling.
Here are the steps to making your wood paneled walls look like a smooth wall.
Step 1: Prime the paneling.
To start, I primed the area using a high quality primer. I like to use PrepRite ProBlock from Sherwin Williams because it is designed for smooth surfaces.
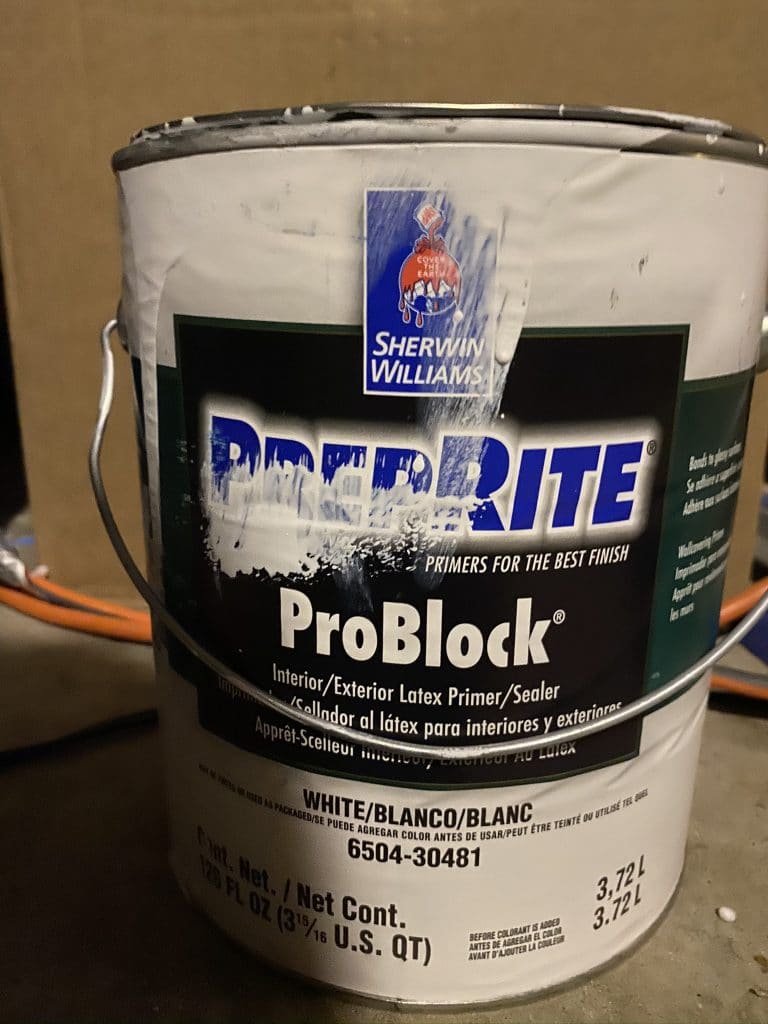

Paint the whole area with the primer before you do anything else. This will give the joint compound and paint a good surface to stick to.
One coat of primer on the paneling is enough to create a workable surface for the next step.
Step 2: Apply joint compound to the grooves in the wood paneling.
After the primer has dried, get a spackle brush and your joint compound.
Using your spackle brush, fill in the grooves of the paneling. Apply joint compound over the whole groove from top to bottom (or bottom to top if you prefer). Using a firm hand, scrape off as much of the joint compound as possible in long strokes. This will allow the joint compound to remain only in the groove.
You want to scrape off basically all of the joint compound, except what is in the groove. Be careful not to catch the edge of your spackle brush on the wall, as it will likely pull the primer off.
Wait until your joint compound dried. This may take a full 24 hours, depending on the product you use.
It is likely that your joint compound shrank down some and there is still a slight groove in your paneled wall. If so, apply a second coat of joint compound using the same technique.
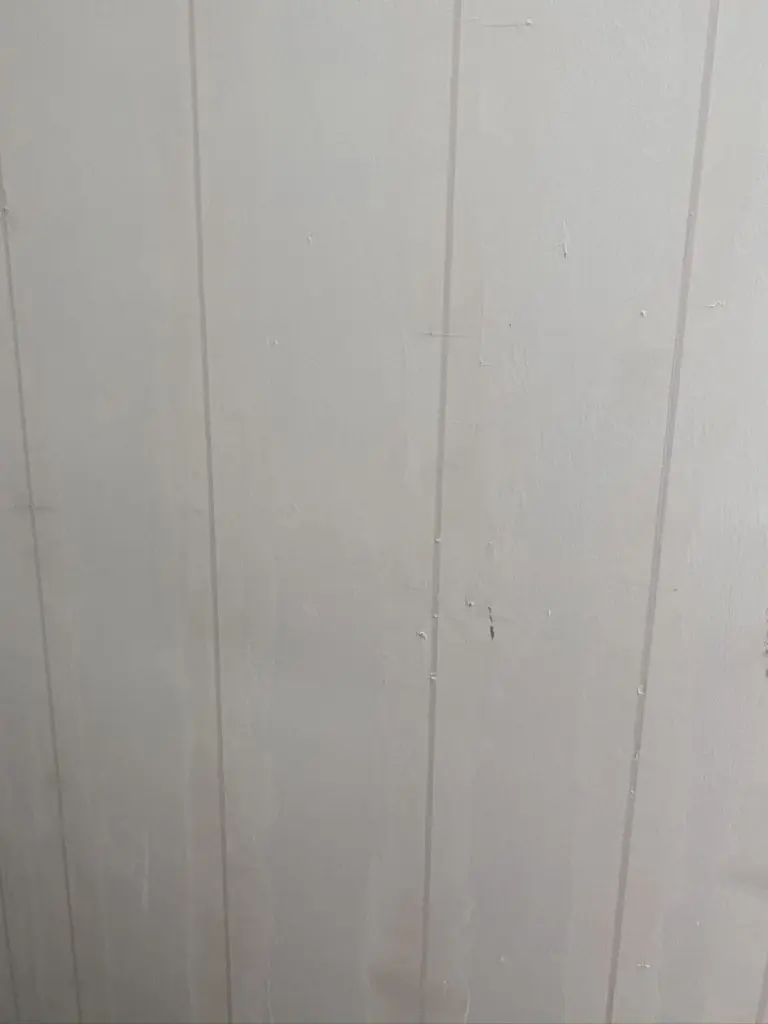
This is how my wall looked after two coats of joint compound.

Again, wait until the joint compound is fully dry. Apply a third coat of joint compound if the previous coat sank into the grooves.
To test if your joint compound sank into the lines of the paneling, close your eyes and run your fingertips across the groove. If you feel nothing, you’re done. If you still feel a small groove, apply another coat of joint compound.
When I filled my wood paneling grooves with joint compound, it took three coats to fill the lines to be completely smooth.
What to use to fill in paneling grooves?
This product, made by USG, is a great choice for filling in paneling grooves. It is really easy to work with because it comes pre-mixed. This means that there is no guess work involved in figuring out how much water to add to the joint compound, because everything is already in the bucket.
Plus, the dust control aspect of it means that it comes off in clumps when you sand it. Because of this, it is much more likely to fall to the ground instead of spreading throughout your whole house.
Now, you will still get dust all over if you sand any type of drywall compound, but not nearly as much if you use a dust control product.
If you really want to almost eliminate the dust in your home, pick up one of these drywall sanding attachments for your shop vac.
Because the sander is attached to the vacuum hose, it works really well for sucking up all the drywall dust produced by sanding.
Step 3: Sand the Joint Compound.
Once the joint compound is fully dry, lightly sand any high spots. Ideally, you won’t have too much compound on the flat sections of paneling, and you won’t need to do much sanding.

If you do need to sand, sand the edges of your joint compound in a light, circular motion.
Step 4: Prime The Paneled Walls. Again.
I know this seems redundant, but this is actually really important in making your wood paneling look like drywall.
Joint compound makes the sheen of paint appear different than in places that don’t have it. So, for this reason, you need to prime the whole wall again.
If you skipped this step, you paint would look striped. The paint that is on the joint compound where the grooves were would look like more of a matte finish and the paint in between the grooves would look shinier. So don’t skip this step.
Step 5: Paint the Walls.
Finish your walls with two coats of your favorite paint, just like you would if you were painting actual drywall.
Roll the walls with a 3/8 inch nap roller, and cut in the edges with a good quality, angled brush.
For a paint recommendation, I like Sherwin Williams Super Paint because it has really great coverage.
If you need some tips, check out this post on how to paint a room.
Final Thoughts on Making Wood Paneled Walls Look Like Drywall
Filling in the grooves of your wood paneled walls to make them look smooth is a great way to update your room. It gives the space a much more modern look. Plus, the room ends up looking bright and fresh from new paint as well.
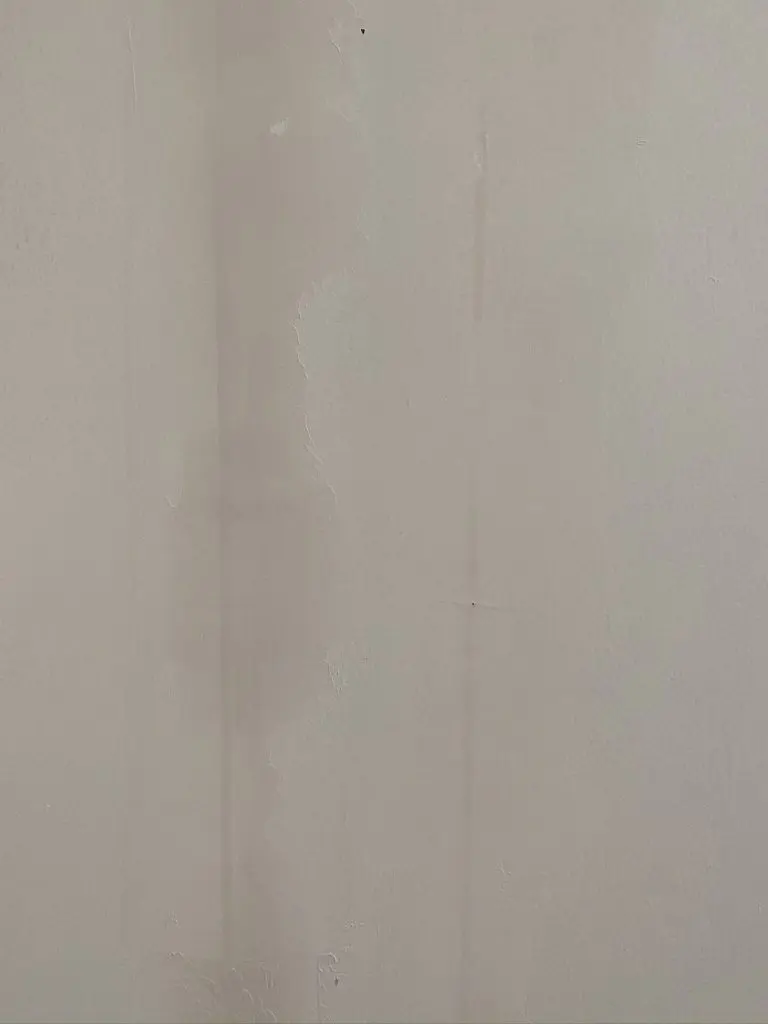
Here is how my wood paneled wall transformation turned out.
This DIY project took me about three days to complete, but only because the joint compound takes a long time to dry. The total active time for this project was maybe 4 hours.
If you want to completely update the look of your wood paneled room, filling in the grooves to make the walls look like drywall is a great way to do it!
Want to see all your paint options in one convenient place? Click here to get everything you need to start painting, including Sherwin Williams and Benjamin Moore paint color decks!


betty
Thursday 7th of November 2024
Hi Lauren, I am planning to wallpaper one panel wall with an old world nautical map wallpaper in a den.( other walls dark paneling). Do I need any extra steps to make the one wall smooth and ready for the wall paper?
Lauren
Friday 6th of December 2024
Hi Betty!! I would definitely fill in the lines prior to putting wallpaper so ensure you don't get hole or lines in your wallpaper, but I don't know that there is anything else that you need to do. I haven't used wallpaper on paneling, but I think it should work. You could consider scuffing the paneled walls if they are super shiny and smooth to promote better adhesion. Good luck!
Carmen
Saturday 29th of June 2024
Hi,
I am just wondering, is it necessary to prime before filling the groves? I know the mud wont stick to the flat paneling, but you don't want it to anyway... So could you just fill the groves, then prime, then paint?
Lauren
Wednesday 18th of September 2024
Hi Carmen! I don't think it is necessary to prime before filling in the joints. I think you could fill the grooves, then prime, then paint. Good luck!
Jenny
Thursday 16th of November 2023
Hello. I live in an older mobile/manufactured home. Did you remove the battens where the panels meet, and then use the joint compound there as well to fill in the gaps? If not, do you think it would work? Thank you!
Old school
Wednesday 19th of June 2024
@Jenny, I know this is a older post but something you could do after removing the piece that joins rhe panels together, is to use caulk to fill in the gap then use the joint compound over that. Just don't get a glossy caulk of the mudd won't stick. Also be sure to smooth flat while still wet or you're going to have a bump where the caulk is. Otherwise, like mentioned before that joint compound will just crumble, fall out, and be a mess.
Nikki
Wednesday 28th of February 2024
@Jenny, Did you ever try this and did the joint compound work in the spaces where the battens between the panels were removed? Thanks in advance for your response.
Lauren
Thursday 23rd of November 2023
Hi Jenny! I didn't have battens where my panels met. I think it would just depend on how you want it to look. If the gap is relatively small (like under a quarter inch) you can probably do that, but if its too wide the joint compound will crumble.
Mark
Friday 19th of May 2023
Hello. Thanks Do you think this would work with 1/8 inch thick plywood panels? Does the thickness of the paneling make a difference?
Thanks
Lauren
Sunday 21st of May 2023
Hi Mark! I can't say for sure, but I would think so. The paneling I used it on had less deep grooves than that. But, I've used drywall mud in grooves of drywall that were thicker than that and it held up well. Good luck!
Dave
Saturday 18th of March 2023
Hello, I have one outside wall with painted panelling that appears to be fake wood, fiberboard. Decades old. Part of the wall is the board only, no drywall underneath. The seams/joints have expanded from hot/cold air, pushing the nails out, breaking my caulking. Any suggestions on sealing those joints? And is it acceptable for a wall to be built this way?
Lauren
Sunday 19th of March 2023
Hi Dave! Sorry to hear that you're having this problem! As for whether the wall is built correctly, I would recommend talking to a contractor to determine whether insulation or some other material needs to be added to the wall. I have seen paneling attached directly to the studs without drywall being used first. I think this was an accepted practice back when home with this type of paneling were built, but not I'm sure if its acceptable by today's codes and standards. For sealing the joints, you may have an issue of the caulking being old and cracking. There are some caulks that have more flex than others. Dep Alex Stretch is one example. A product like that would be what I would try.