
Adding a shiplap closet door is a great way to transform an ugly closet door and bring a modern farmhouse or even a coastal vibe to a space.
Making a shiplap closet door is actually a really easy DIY. It requires a few simple tools and a thin sheet of sanded plywood. Altogether, this DIY can be completed in a day’s time.
This post may contain affiliate links. If you have any questions, please see my disclaimer page.
Where Can I Make a Shiplap Closet Door?
You can use this same method on both sliding closet doors and hinged closet doors.
Making a DIY shiplap closet door is a great way to hide a mirrored closet door. Mirrored closet doors were more common in the 70s, and have fallen out of fashion for most people.
Creating a shiplap closet door is also a great way to give some dimension to a flat panel door.
No matter what your reason for wanting to update your closet door, DIYing this upgrade is easy! Keep reading for all the details on how to make a shiplap closet door.
Shiplap Closet Door – Before
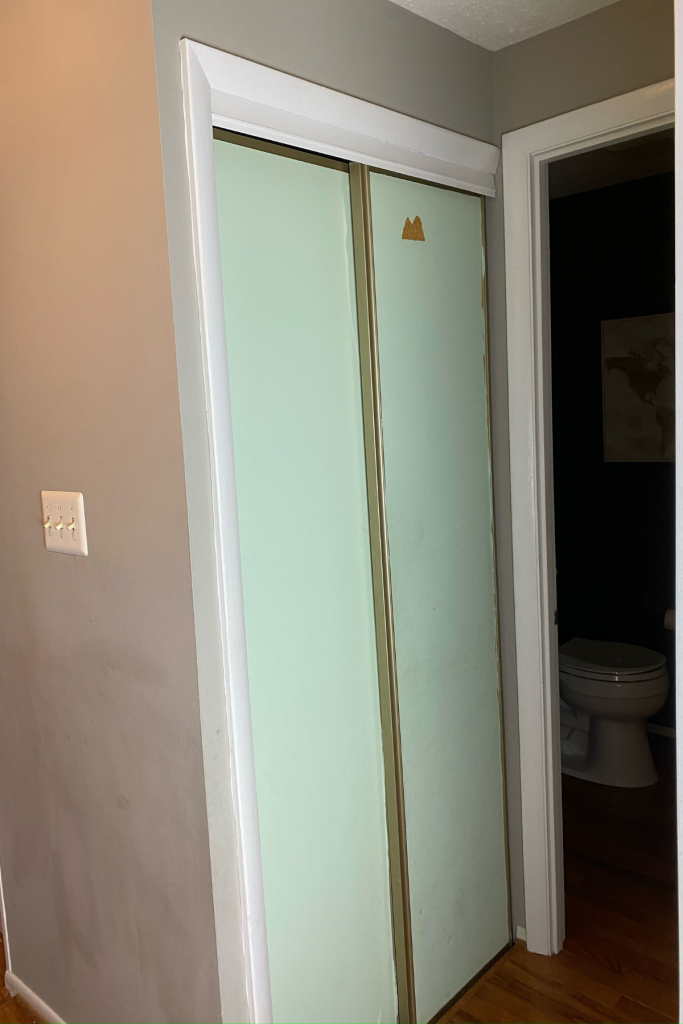

When I moved into my home, it had original closet doors from the 1970’s. I think that they may have had a mirror on them previously, but the mirror had been removed, leaving a particle board sort of surface which had been painted green.
The frame was a gold color, and altogether, it wasn’t the look that I was going for.
The doors functioned well though, so after some thought, I decided to put some fake shiplap on them to give them a little more of my own style.
Here is how I made a faux shiplap closet door.
DIY Shiplap Closet Doors Tutorial
To make a shiplap closet door, you only need a few materials.
DIY Shiplap Closet Doors Materials
- thin sanded plywood (also called luan)
- black spray paint
- white paint
- handle
- Liquid Nails (paneling)
DIY Shiplap Closet Doors Tools
- Kreg-Jig circular saw attachment
- circular saw
- miter saw or hand saw
- clamps
Steps to Adding Faux Shiplap to Closet Doors
To start, remove the closet door from the track. This will make it easier to paint the frame and adhere the faux shiplap panels to the door.
Next, measure the length of your closet door. You will use this measurement to decide how wide you want your shiplap strips to be, based on how tall the closet door is.
For example, if your closet door is 80 inches, you could make 8 shiplap strips of 9 and 7/8 inches to allow for a shiplap gap. A typical shiplap gap is about the width of a nickel, which is about 2 mm.
Using the rip saw attachment, cut your plywood to the width of the door. Alternatively, as your local home improvement store to cut it to that width. Typically stores like Home Depot and Lowes are willing to do this.
Next, you should measure the width of the closet door. Using a hand saw or miter saw, cut each shiplap plank to the width of the closet door. Again, you can ask your home improvement store to do this, but oftentimes they have rules about how many inches a piece has to be for them to cut it at the store (due to safety reasons).
Once your shiplap planks are cut, paint the faux shiplap planks white or whatever color you like. Some of my favorite shiplap colors are Sherwin Williams Pure White, Sherwin Williams Iron Ore, or Benjamin Moore Chantilly Lace.


If the frame of your door needs painted, spray paint it the color you want. I chose a rich black spray paint for mine.
To adhere the faux shiplap planks to the closet door, I used Liquid Nails (paneling) and clamps. If you only have two clamps, this will take some time to complete. Leave each shiplap plank clamped for at least 30 minutes (or however long your Liquid Nails advises) before removing the clamps and gluing the next plank. Be sure to place a nickel or another object between each plank to create the shiplap gap look.
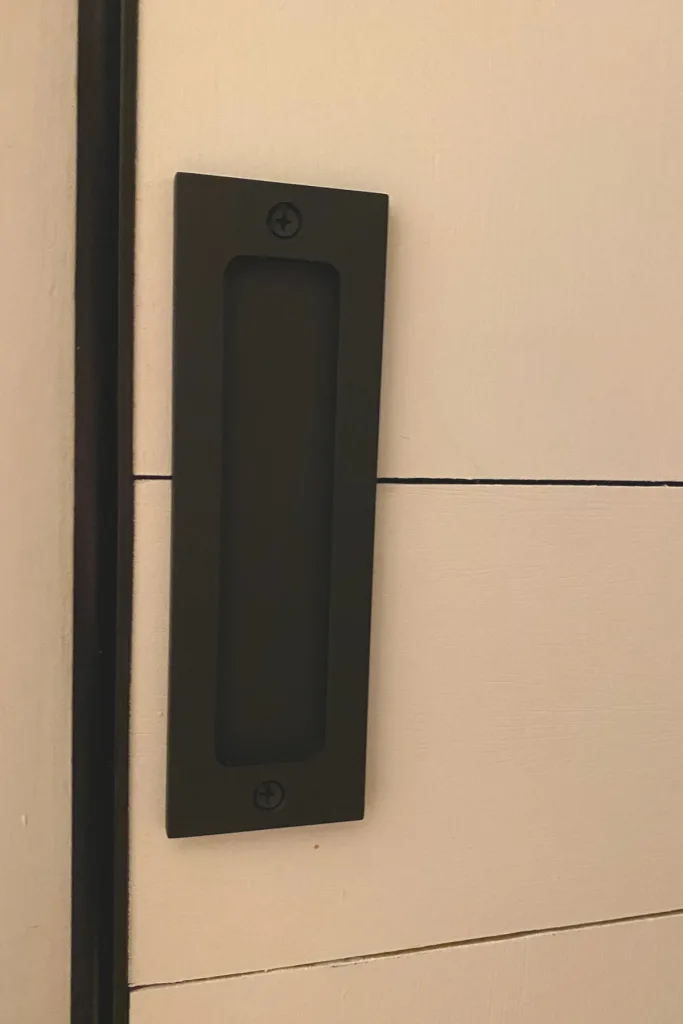
If you want, you can add a handle to the door. I find that this gives a little more of a decorative look to them, and also makes them easier to use.

After all your shiplap planks are adhered, re-hang the closet doors.
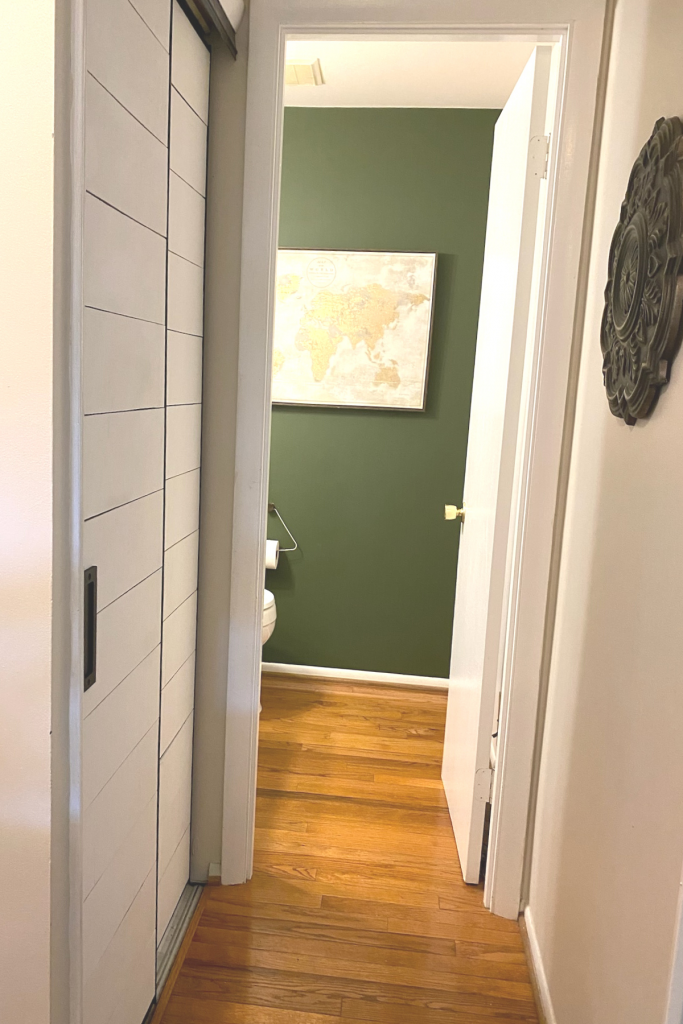
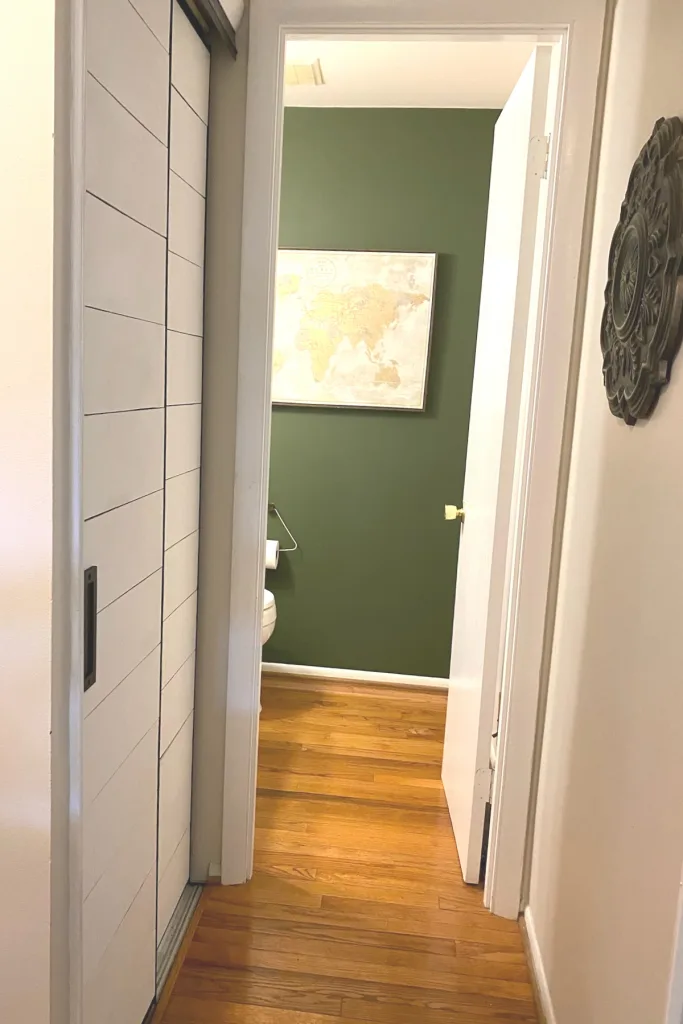
DIY Shiplap Closet Doors After
This is how my shiplap closet doors turned out:


As you can see, they look WAY better than the green particle board doors looks. The whole process was able to be completed in a day, with time in between the steps for the glue and the paint to dry.
Final Thoughts on DIY Shiplap Closet Doors
If you’re looking to update your home, but you don’t want to spend a lot of money, adding shiplap closet doors is a quick and inexpensive DIY to try. It really doesn’t take much work, and if you’re lucky, you may be able to get the people at your home improvement store to do most of the cuts for you. And if not, the Kreg-Jig attachment is easy to use.
If you’re still loving the clean, updated look of shiplap, this DIY is for you!


DIY Shiplap Closet Doors
Learn how to take a flat panel or mirrored closet door and make it look like a shiplap closet door.
Materials
- thin sanded plywood (luan)
- white paint
- black spray paint
- door handle
- Liquid Nails (paneling)
Tools
- circular saw
- Kreg-Jig rip saw attachment
- clamps (or something heavy)
Instructions
1. Begin by removing the closet door from the track.
2. Measure the length of your closet door. Decide how wide you want your shiplap strips to be, based on how tall the closet door is. For example, if your closet door is 80 inches, you could make 8 shiplap strips of 9 and 7/8 inches to allow for a shiplap gap.
3. Using the rip saw attachment, cut your plywood to the width of the door. (Alternatively, as your local home improvement store to cut it to that width)
4. Measure the width of the closet door.
5. Using a hand saw or miter saw, cut each shiplap plank to the width of the closet door.
6. Paint the faux shiplap planks white or whatever color you like.
7. Using your spray paint, spray the frame of the door.
8. Adhere the faux shiplap planks to the closet door using Liquid Nails and clamps. If you only have two clamps, this will take some time to complete. Leave each shiplap plank clamped for at least 30 minutes (or however long your Liquid Nails advises) before removing the clamps and gluing the next plank. Be sure to place a nickel or another object between each plank to create the shiplap gap look.
10. After all your shiplap planks are adhered, re-hang the closet doors.
Notes
If your closet is mirrored, paint the mirrors prior to adhering the shiplap to the closet door. Otherwise, you will see the mirror through the gap.