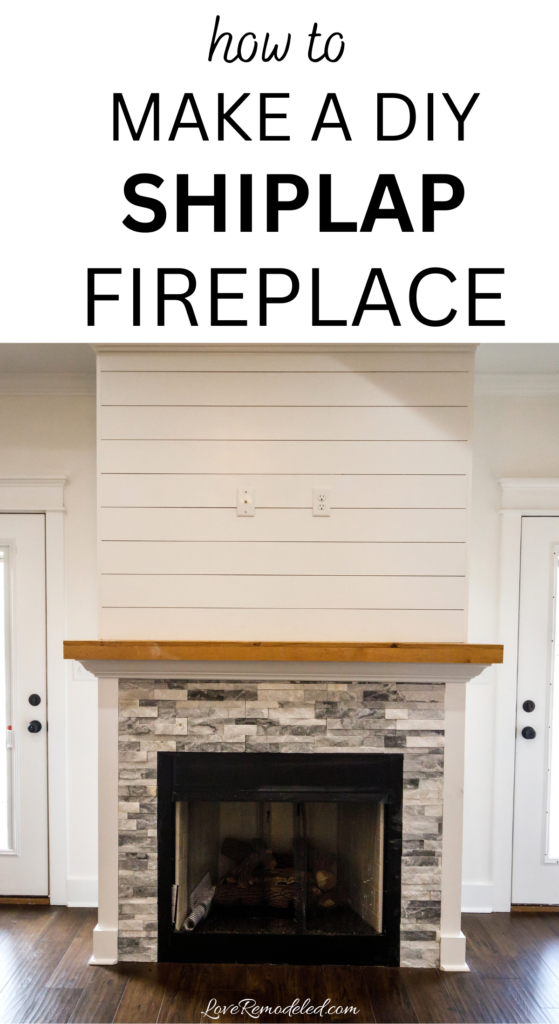
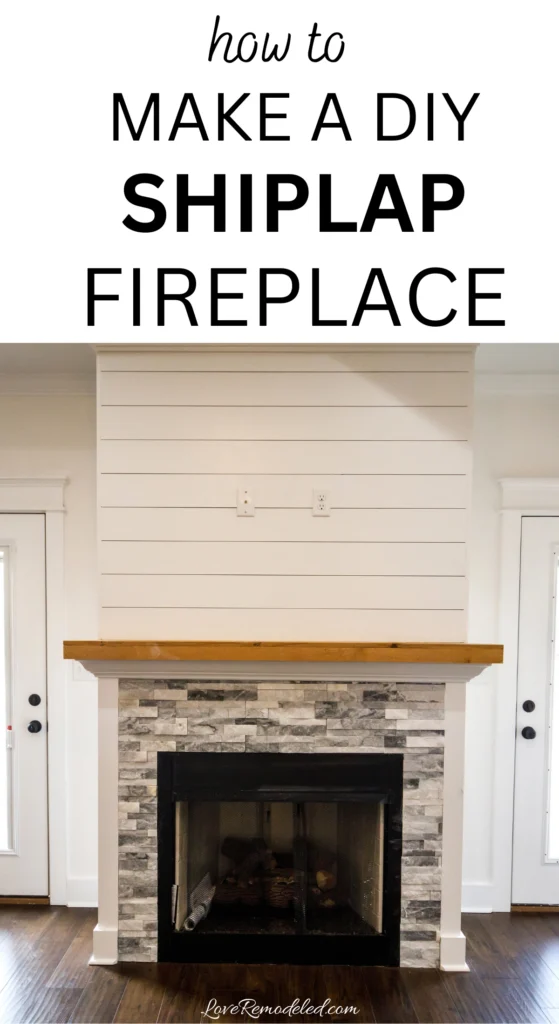
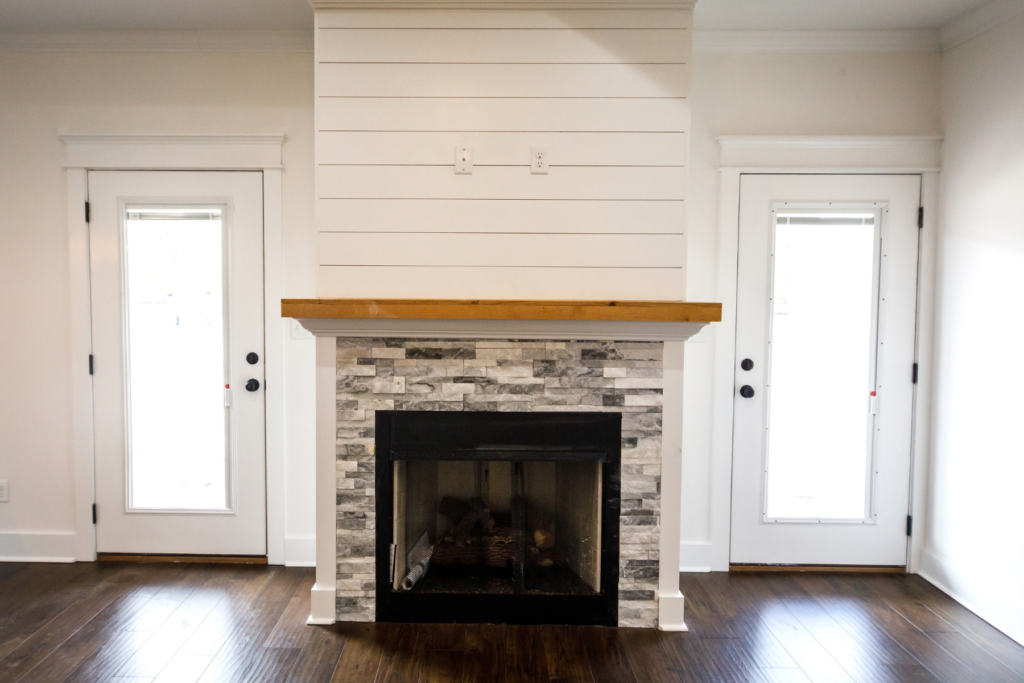
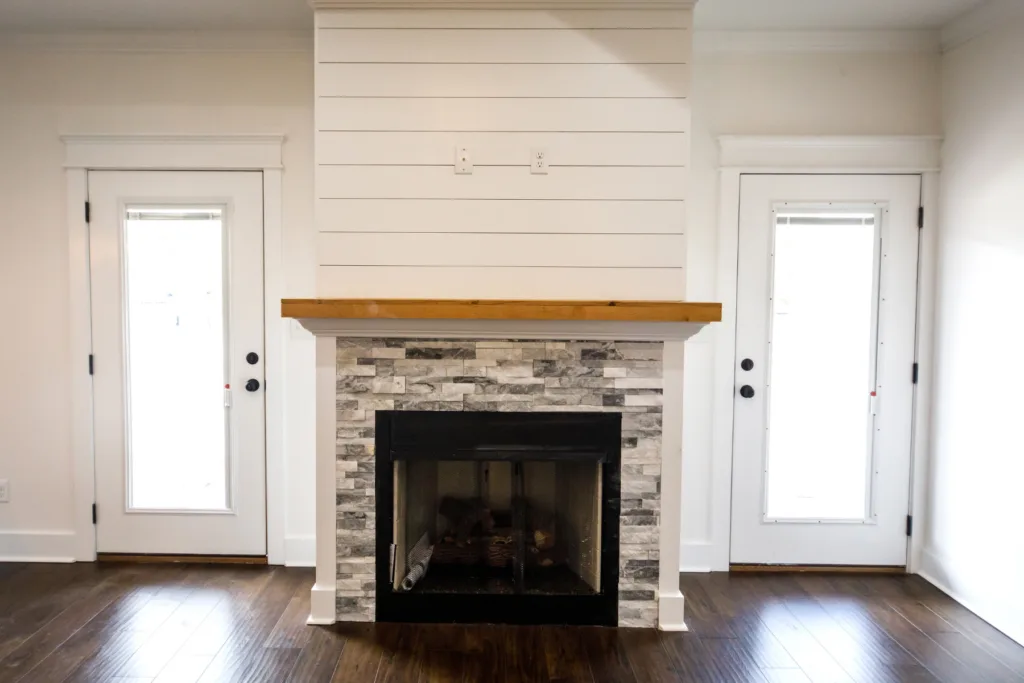
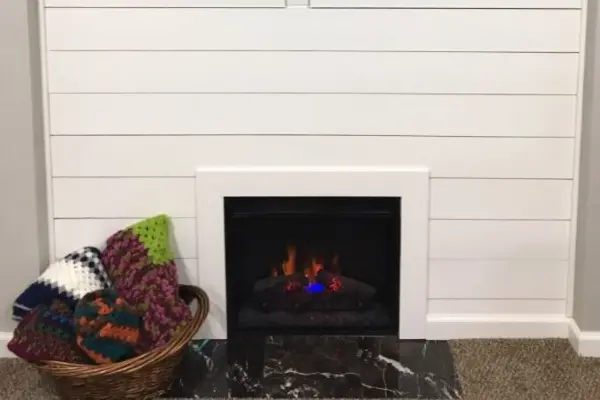
Making a shiplap fireplace is an easy way to upgrade the look of your electric, gas or wood burning fireplace.
Whether you are making a surround to go around a new electric fireplace, or you are wanting to change the look of your old fireplace surround, this easy DIY tutorial will help you turn your fireplace into a gorgeous shiplap look.
This post may contain affiliate links. If you have any questions, please see my disclaimer page.
Are Shiplap Fireplaces In Style?
Shiplap was hugely popular a few years ago, and many designers are saying that it is out. But, what designers say doesn’t always translate into what people like and want in their own homes.
Many homeowners are still loving shiplap and adding it to their homes.
So, just because you’ve seen some reels of designers saying shiplap is out, doesn’t mean that you should worry. If you like the look of shiplap, you should put it in your home!
DIY Shiplap Fireplace Makeover
In one home I lived in, I had a weird wall with an electric fireplace insert. The wall had cutouts on it for shelves, but the whole thing just looked a bit out of place.
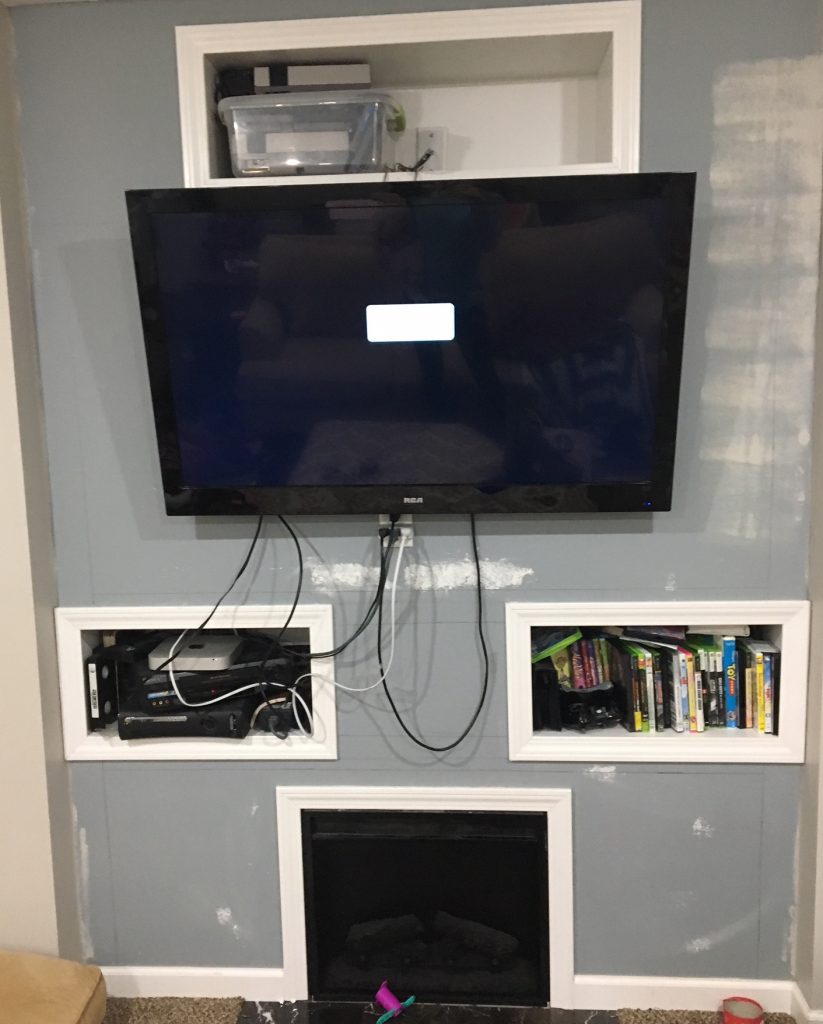

So, I decided to add shiplap to the wall to really make it my own fireplace instead of someone else’s vision.
I used faux shiplap instead of real shiplap to save a bit of money.
Faux shiplap can be made by using 1×6 boards instead of tongue and groove from Home Depot, Lowes or your local hardware store.
The gap is created by putting a space in between the boards, replicating the look of real shiplap.
They also sell real tongue and groove shiplap there (which I used for this project), or, you can order real shiplap here.
How to Make a Shiplap Fireplace Wall
Here is my entire process for making a DIY shiplap fireplace wall.
Step 1:
Begin by measuring the length of the bottom of your fireplace surround or wall. Using a circular saw or miter saw, cut the shiplap to the length of the bottom of your fireplace.
If your fireplace insert is positioned at the very bottom of the wall, you will need to cut two pieces.
Step 2:
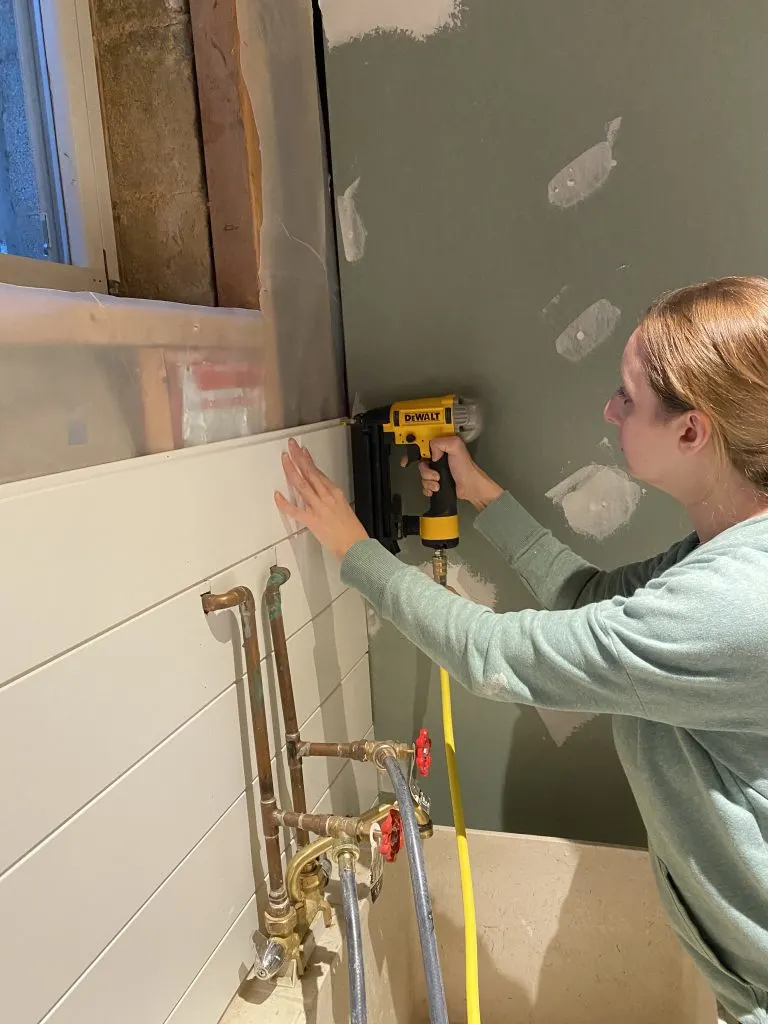
Using a long level or a laser level to ensure that the piece or pieces are level, nail your first board or piece of shiplap into the existing wall or frame. Use two finish nails on either side of the piece of wood.
If your first piece isn’t level, you have no hope of the rest of it being level, and your shiplap fireplace can end up looking pretty wonky. So take the extra step here to ensure levelness.
Using a finish nailer is my favorite way to attach trim or shiplap. A nail gun is easy to use and makes the tiniest hole – which makes filling in nail holes much easier later.

Step 3:
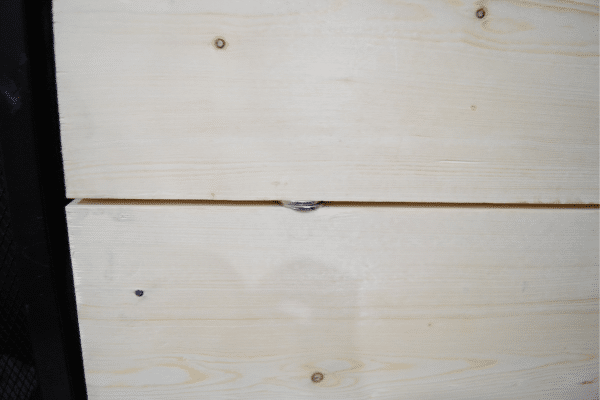
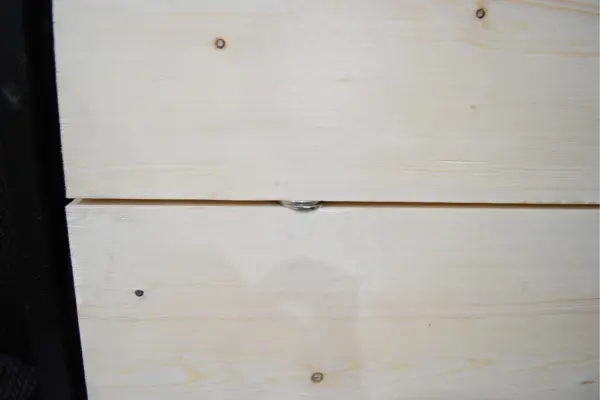
If you are using real shiplap, measure, cut and place the next board on your first. The shiplap groove should fit perfectly with the “tongue” of the last piece.
If you are using regular wood boards, find something of a consistent width to create a gap (such as a nickel), and place a few on the first board before putting the second board on and attaching it with nails.
Step 4:
Continue laying boards up the fireplace surround. If you are at the part of the fireplace where boards are going on either side of the fireplace insert, be sure to use a long level to keep your boards level.
Step 5:
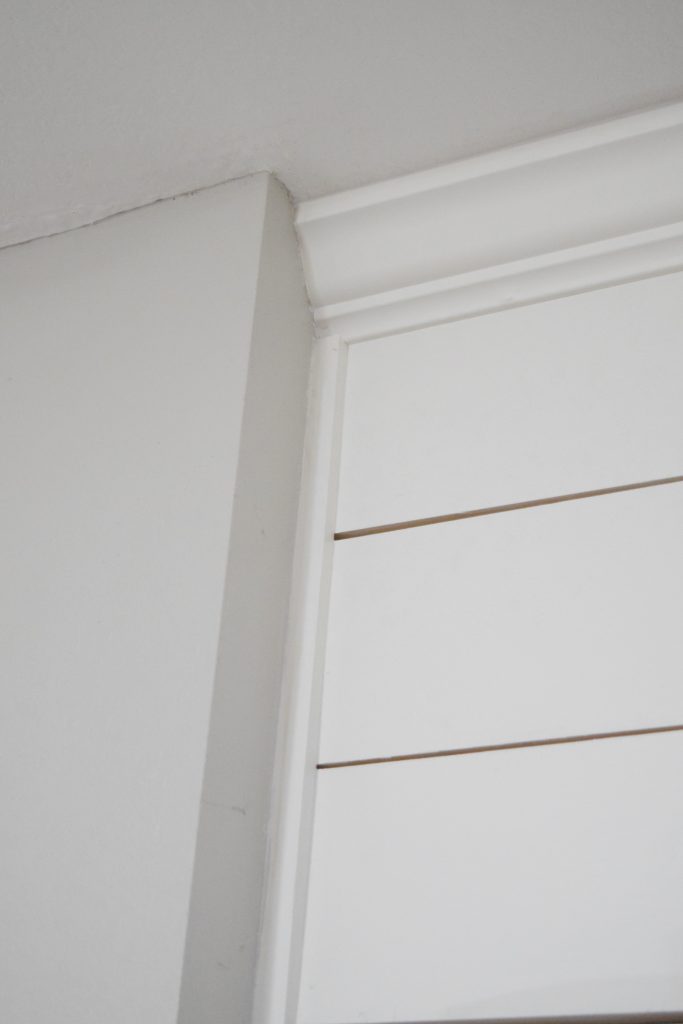
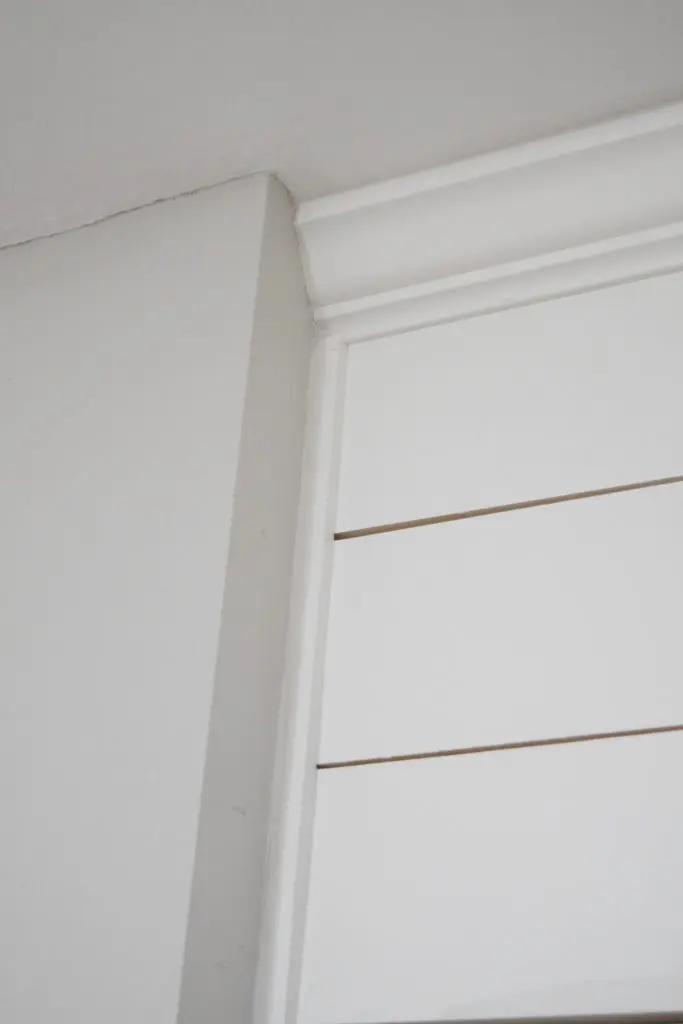
Once all your boards or pieces are shiplap are adhered to the wall, measure the sides and cut your trim boards to those dimensions. Adhere them to the shiplap with your nail gun or finish nails and nail setter.
Repeat with any other trim pieces you want. In my opinion, shiplap looks best when there is a trim board on the two sides, the bottom and a piece of crown moulding the top of the shiplap.
Step 6:
If your shiplap wall doesn’t fit behind your fireplace inset (this is likely if your fireplace was already existing and you built your shiplap fireplace around the fireplace opening, attach trim pieces around the opening to finish off the look.
At the point, your trim work should be done.
Step 7:
Fill your nail holes with wood filler, wood putty, or caulk. Caulk is probably the easiest option, because it is already white. Just be sure to get the paintable kind.
Also, use caulk to fill in any seams between your shiplap and trim boards, or where trim boards meet.
Step 8:
Paint your shiplap fireplace surround.
Pure White is a great color for white shiplap.


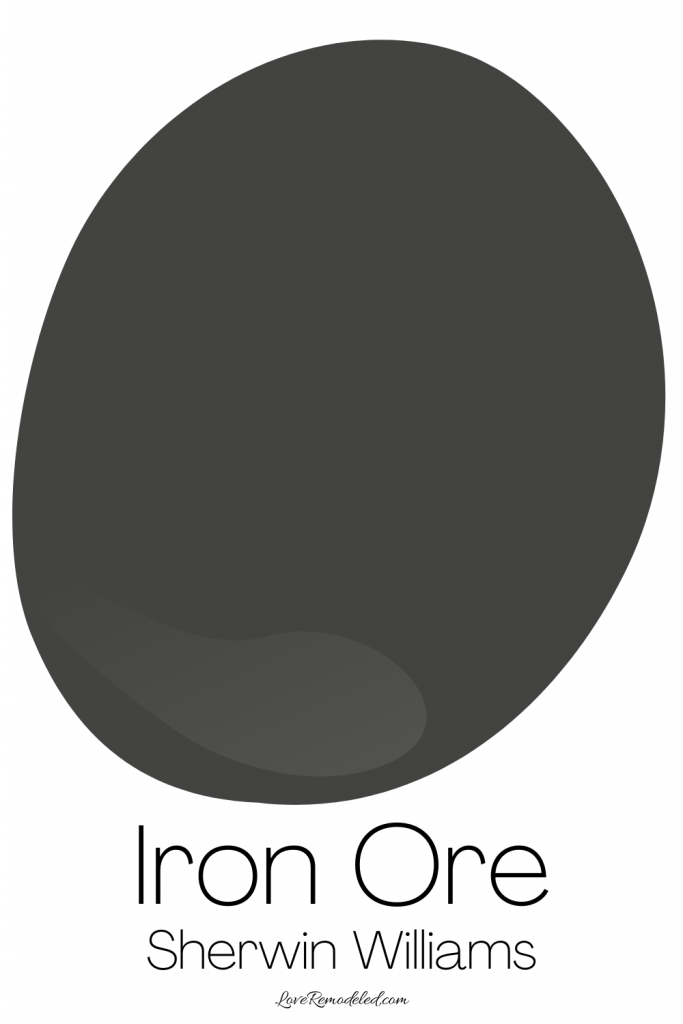
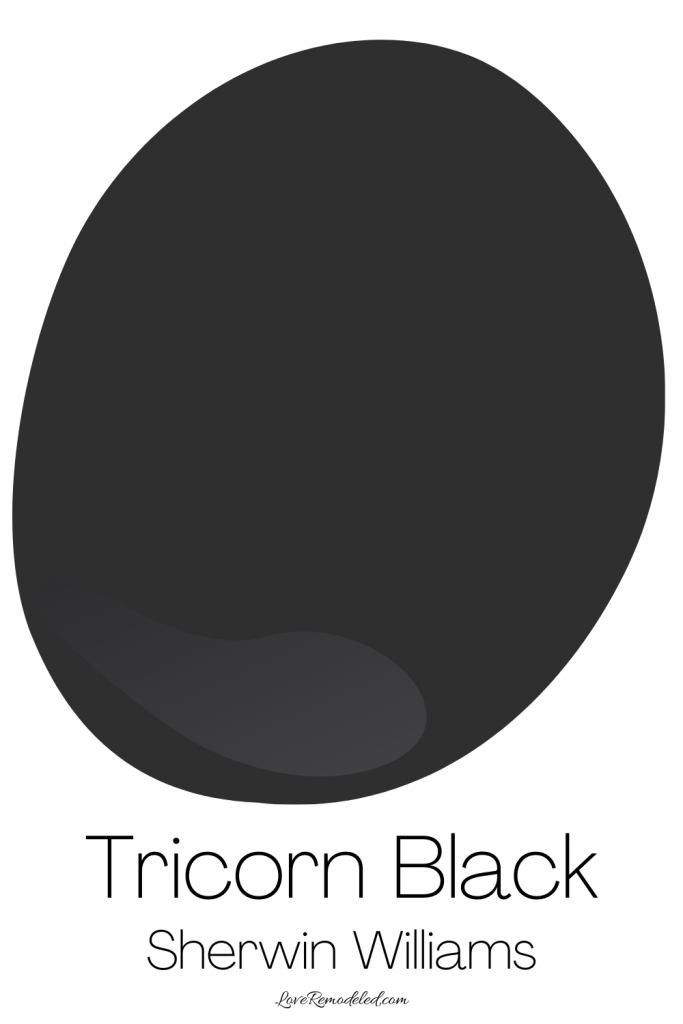
If you prefer a black fireplace, Ire Ore and Tricorn Black are good options.

Remember to use painter’s tape to ensure you don’t get any paint on the electric or gas fireplace insert.
Creating a Frame to Attach Shiplap To
This is the process I used to make a shiplap fireplace because I had a wall to support the shiplap boards, but if you have an existing surround or want to create a fireplace out of nothing, all you need to do is make a frame for the shiplap to nail into.
The frame can fit around your existing surround (if you have a brick or stone fireplace) or can sit on the floor with nothing behind it.
The frame should consist of a bottom piece forming three sides of a box, horizontal pieces at the edges of the fireplace, along the back wall, and on either side of the fireplace insert (to have a place to attach the shiplap to), and top pieces that mirror the bottom pieces.
When finished, the frame should look like three sides of a box and will allow you plenty of places to attach the shiplap to.
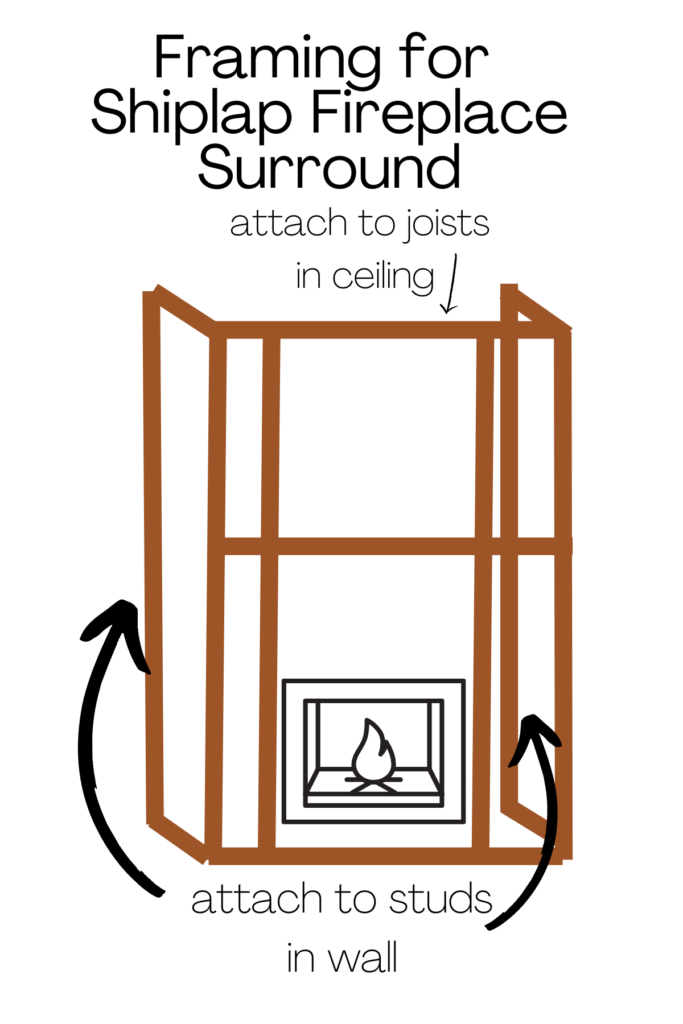
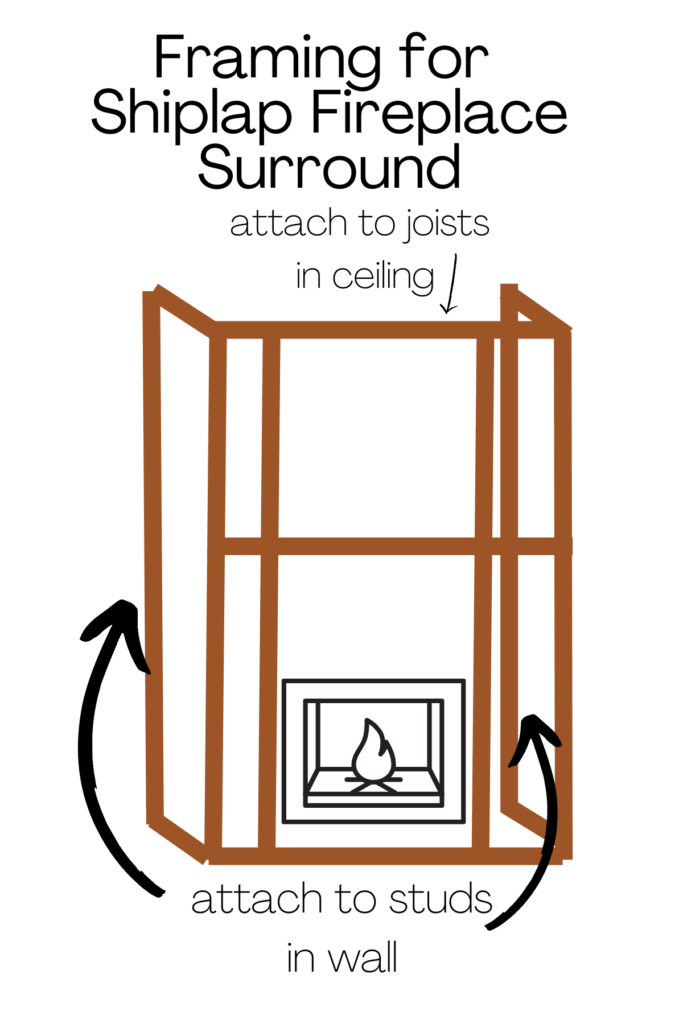
You even add an additional horizontal piece at the level where you want to hang a mantle to have something to attach your mantle onto.
Additional support pieces will have to be added if you want to attach a tv mount to your shiplap fireplace as well.
The back horizontal pieces should be attached to studs in the wall if possible, and the top pieces should be attached to joists in the ceiling if possible. You can find the studs and joists by using a stud finder.
This will anchor the frame into place if you don’t want to or can’t screw it into your existing fireplace surround. Wood screws or construction screws are a good choice for creating the frame.
A Few Notes about Making A Shiplap Fireplace Wall

There were a few important things that I learned along the way.
First, while you want your measurements to be good, you don’t need them to be absolutely perfect. Because you’re going to be putting trim pieces on the edge of the shiplap, there can be some minor variation in the lengths of your shiplap boards because the edges will be covered.
Second, real shiplap is easier to use. It is typically made of MDF, which means that it is lighter and easier to work with. Plus, real boards can bow, which makes them hard to work with, or completely unusable.
Final Thoughts on Making a DIY Shiplap Fireplace
Making a modern shiplap fireplace is an easy DIY project that you can complete in a weekend. It is a perfect addition to a master bedroom or living room, or can give a little kick to your new home.
If you’re interested in making a shiplap accent wall, check out this tutorial. And, if you are considering shiplap closet doors, I have a tutorial for that too.